Directions for threading, The tension – SINGER W12 User Manual
Page 6
Attention! The text in this document has been recognized automatically. To view the original document, you can use the "Original mode".
DIRECTIONS FOR THREADING
Place the spool on spool pin, take the thread in your left
hand holding it taut with the right during the whole threading
operation.
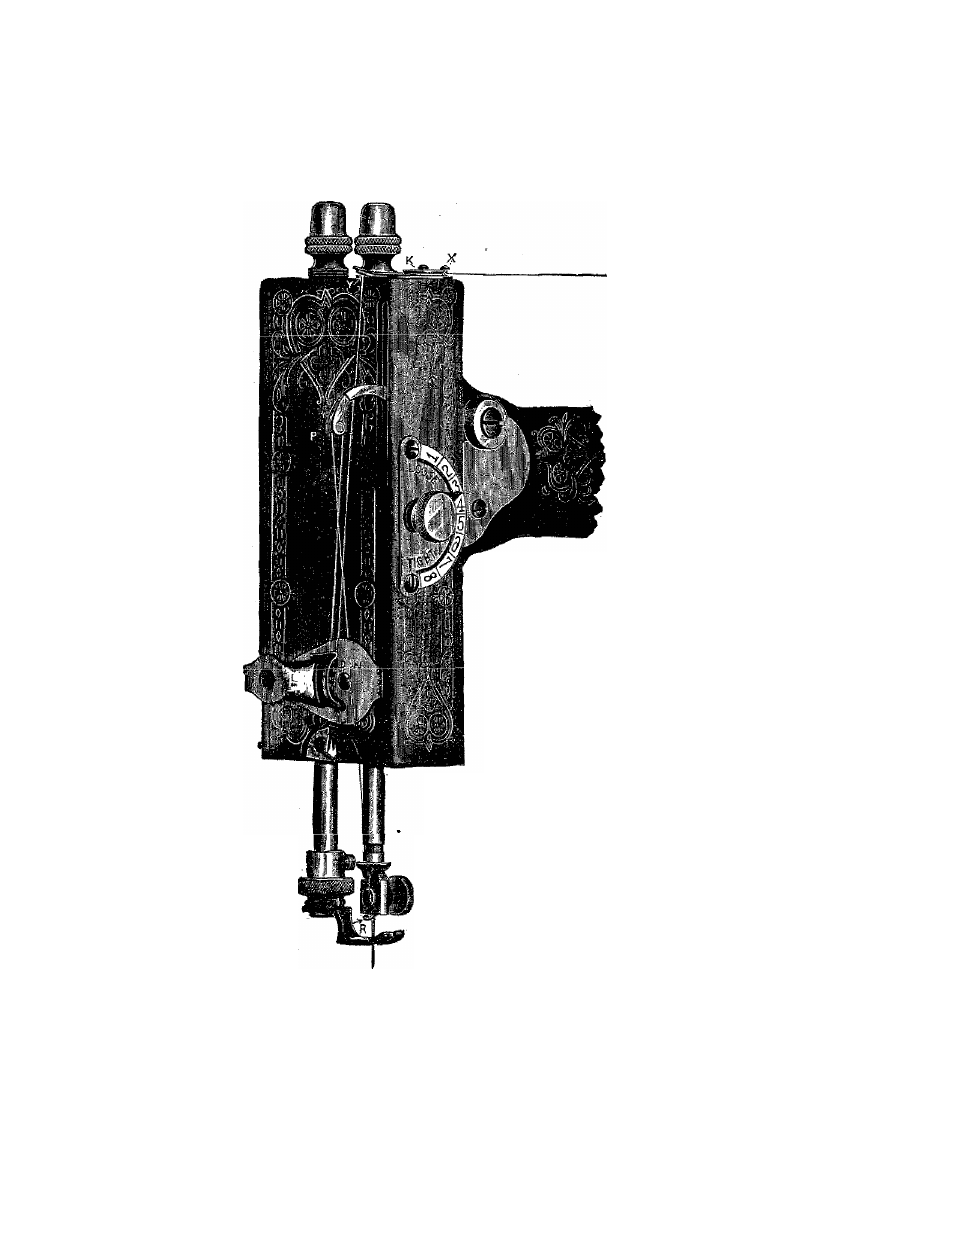
Pass
t h r e a d
from
spool over check
spring K at top
of face and down
under
point
L;
now pull thread
upward
until
it
passes
through
the eye of spring
N and into notch
O, then into end
of t a k e-u p
P,
t h e n
d o w n
through slot
R in
end of needle bar
and through eye
of
needle
from
left to right, al
lowing about 3"
of thread when
take-up is at its highest point.
To draw up the lower thread,
raise the presser-foot, take hold
of end of upper thread and turn
the
hand-wheel
once
around,
(moving upper side of wheel from
you) which will draw the lower
thread up through needle hole.
Pass the ends of both threads
under the presser-foot and you
will be ready to sew.
Note.—Do not run the machine with
the presser-foot down on the feed with-
oat cloth under it. Do not pull cloth to
or from you in such a manner as to bend
needle.
THE TENSION
The illustration above represents the
Tension Regulator and Indicator for the
upper thread, an entirely new and useful
device. The half circle is marked with a
scale running from 1 to 8, with the word
"loose” at fig. 1 and "tight” at 8,1 being
the slack and 8 the tightest tension.
6
Fig. IZ