SINGER 142W25 User Manual
Page 6
Attention! The text in this document has been recognized automatically. To view the original document, you can use the "Original mode".
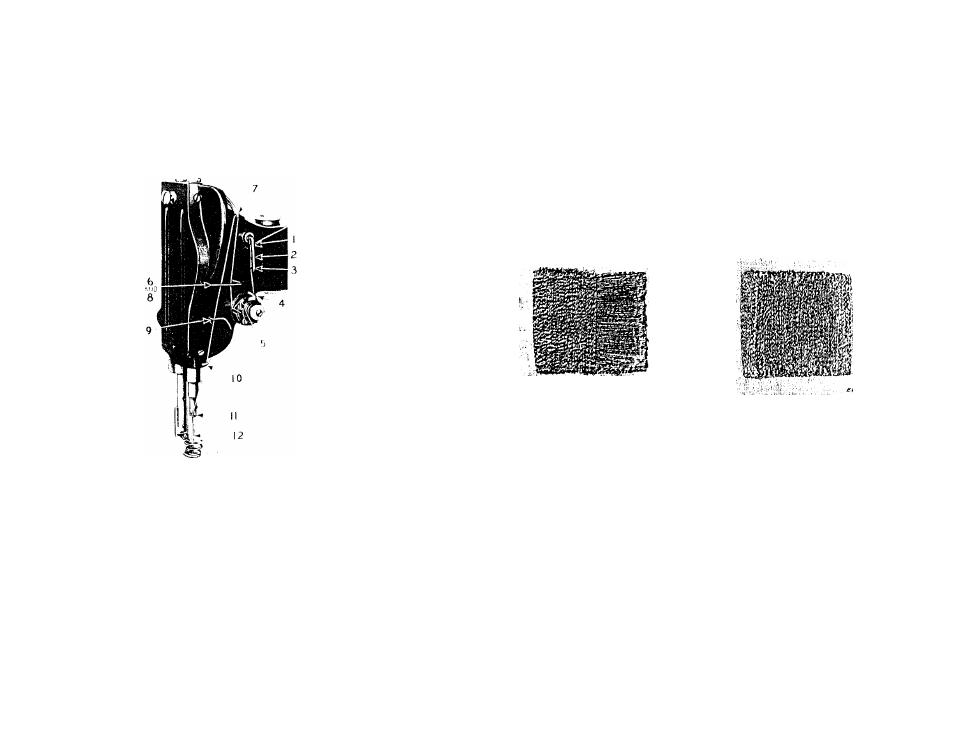
Upp
er Threading
Pass the thread from the spool or unwinder, from back to
front through the lower hole In the pin on top of the machine and
Fig. 7. Upper Threading
from right to left through upper hole in pin, from right to left
through the top hole (1), from left to right through the center
hole (2) and from right to left through the bottom hole (3) In
the thread guide at the front of the machine, down under from
right to left between the tension discs (4), up Into the fork
(5) of the thread controller against the pressure of the thread
controller spring, through the thread guide (6), from right to’
left through the take-up lever (7), down through the thread guide
(8), through the thread guides (9 and 10), through the hole (11)
In the lower end of the needle bar and from right to left through
the eye of the needle (12). Draw about three Inches of thread
through the eye of the needle with which to commence sewing.
To Prepare for Sewing
With the left hand hold the end of the needle thread,leaving
It slack from the hand to the needle. Turn the balance wheel
over toward you until the needle moves down and up again to Its
highest point, thus catching the bobbin thread; draw up the
needle thread and the bobbin thread will come up with It through
the needle hole. Lay the threads back under the presser foot.
To Commence Darning
Place the work under the presser foot. Having the unworn
part of the work near the hole under the needle, commence the
Fig. 8. Darning In Process
Fig. 9. Darning Finished
darning by making a line of stitches across the hole a little
longer than the width of the hole. Continue making parallel
lines of stitches across the hole, moving the work backward and
forward and at the same time gradually moving the work sidewise
until the hole Is covered with lines of stitches running across
the hole. Then commence as before and move the work lengthwise
of the hole until the stitches across the hole are completely
covered and the darn Is finished.
When darning flat work. It Is advisable to use embroidery
hoops to hold the work.
To Remove the Work
Stop the machine with the thread take-up lever (7,Fig.7) at
Its highest point, and press the tension release lever (A,Fig.2)
to the left to release the tension. Draw the work backward and
cut the threads close to the goods, leaving two or three Inches
of thread with which to commence sewing. The tension Is auto
matically reengaged.