Buttonholes – Sears KENMORE 385. 12708 User Manual
Page 35
Attention! The text in this document has been recognized automatically. To view the original document, you can use the "Original mode".
SECTION
3.
LEARN
THE
STITCHES
Buttonholes
S«t the Machine
Stitch
Q
Stitch selector
,_U
B
Top thread tension
control 1 to 5
Stitch length control
blue zone
SI
3
2
Sliding buttonhole foot
Adjusting
the
Stitch
Density
Depending
upon
your
fabric
or
your
own
preference
in
buttonholes,
you
may
alter
the
buttonhole
stitch
density
within
the
blue
buttonhole
range on the stitch length dial.
0 For more density, turn the dial
toward "0".
(?) For less density, turn the dial
toward "1".
NOTE:
Always
make
a
practice
but
tonhole on a scrap of fabric
you plan to use to find the
more suitable stitch length.
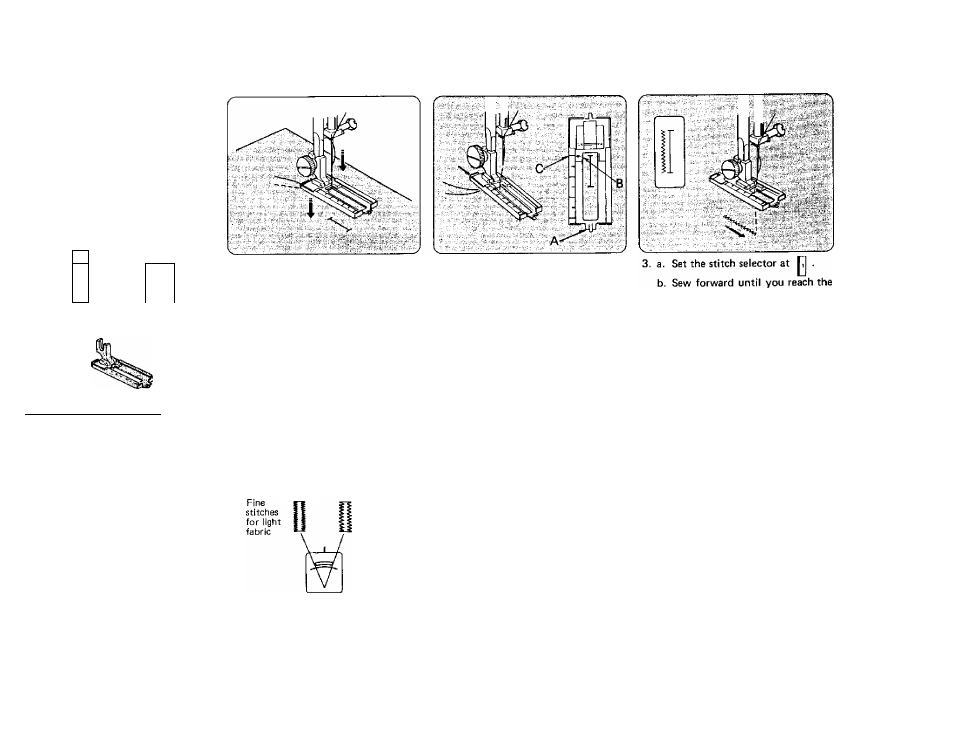
1. a. Carefully mark the buttonhole
length on your garment.
b.
Change to the sliding buttonhole
foot.
c.
Insert
the
garment
under
the
foot
with
the
buttonhole
mark
ing running toward you.
(D
Coarse
stitches
for heavy
fabrics
2. a. Move the slider (A) toward you
so that the top mark (C) on the
slider meets the start mark (B).
b.
Line
up
the
markings
on
the
foot with the top mark on your
garment.
c. Lower the presser foot.
NOTE: The markings on the slider
are engraved in centimeters.
front
marking
of
your
button
hole.
c. Stop sewing at the left stitch.
34