Straight stitches (continued) – Sears KENMORE 385. 12708 User Manual
Page 23
Attention! The text in this document has been recognized automatically. To view the original document, you can use the "Original mode".
SECTIONS. LEARN THE STITCHES
Straight Stitches (Continued)
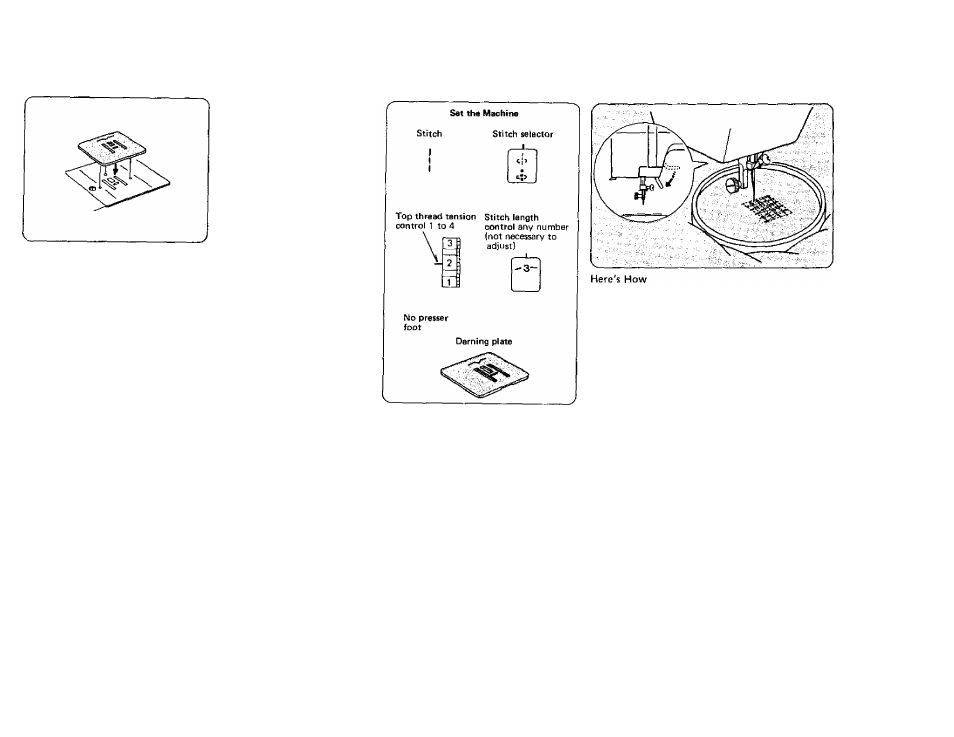
• Use the Darning Plate
Darning
Sometimes
when
you
sew,
you
want
to control the fabric youself.
The Darning Plate covers the feed dogs
so that they do not touch the fabric.
To Put on the Darning Plate:
NOTE:
The rectangular holes in the
Darning
Plate
match
the
holes in the needle plate. In
the
darning
plate,
these
holes are slightly to the left
of center.
1.
Position
the
darning
plate
with
the 3 pins on the bottom.
2.
Fit the darning plate pins into the
needle plate holes. The feed dogs
will
show
through
the
darning
plate holes.
Use the darning plate in the following
ways:
Darning (P.
Button Sewing (P. 26)
1
.
2.
3.
4.
5.
Put
the
darning
plate
on
the
needle
plate
(see p. 22).
Remove
presser
foot
and
stretch
fabric
between
embroidery
hoops
with
hole
centered.
Draw
the
bobbin
thread
up
through
the
fabric by holding the top thread and taking
one
stitch
at the spot where you wish to
start darning.
Lower the presser bar and sew at a slow
speed.
22
Move the fabric back and forth slowly until
you have covered the darning area.
6.
Turn the fabric a half turn and sew another
layer of stitching over the first layer.
NOTE:
If your fabric is thin or badly
damaged, use a separate piece of fabric
under the hole to reinforce it.
7.
When you finish darning, remove the darning
plate.