Section 3. learn the stitches, Sew in a zipper – Sears 385.1884180 User Manual
Page 54
Attention! The text in this document has been recognized automatically. To view the original document, you can use the "Original mode".
SECTION 3. LEARN THE STITCHES
Sew in a Zipper
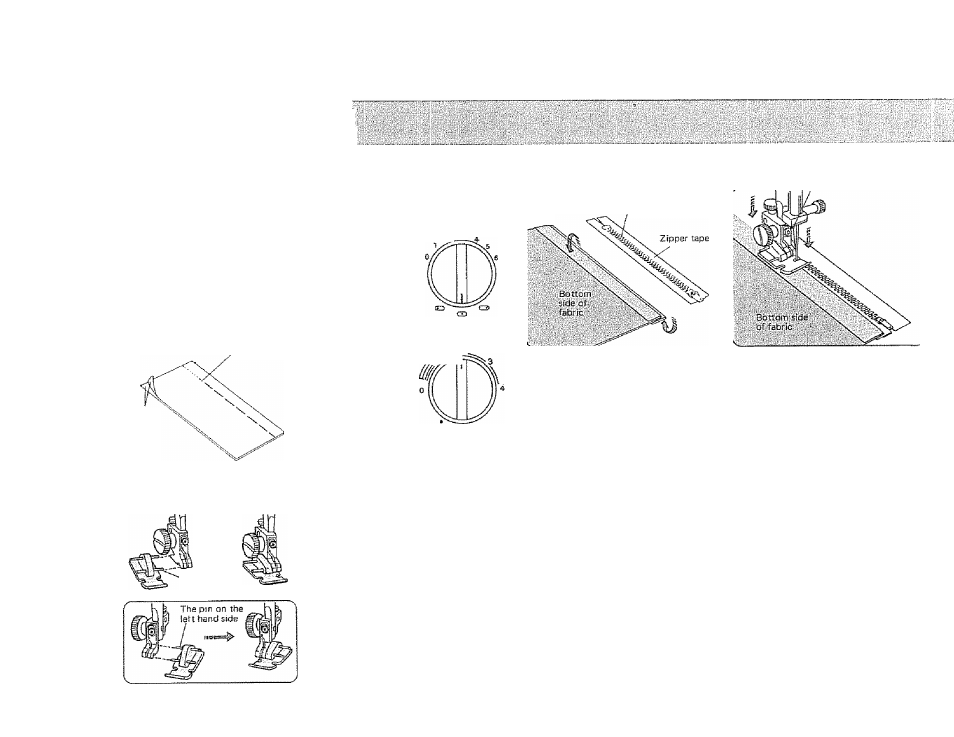
Fabric Preparation;
Put the top sides of the fabric together
and sew to the end of the zipper
opening. Use the reverse to lock the
stitches.
Sew the zipper opening with stitch
length at "4" and top thread tension
at “3".
End ot opening
Top side
of fabric
Top edge ot fabric
Set the №ehine
Stitch width
control 0 or CsD
2 A.
Top thread tension
contro! 2 to 6
HI
Stitch length
control 2
Stretch Stitch
E: Zipper
toot
The pin on the
right hand side
To attach the zipper foot:
® To sew on the left side of the zipper,
attach the presser bar to the right pins
on the Zipper foot
To sew on the right side of the zipper,
attach the presser bar to the left pins
on the zipper foot
Zipper lesih
To Sew;
1
2
.
3.
Reset stitch length at 2 and top
thread tension at 2 to 6,
Fold back the left seam allowance
as shown.
Turn under the right seam allow
ance to form a 1/8" fold.
Place the zipper teeth next to the
1/8" fold and pin in place.
4.
Attach the presser bar to the right
pins on the zipper foot.
5.
Lower the zipper foot on the top
side at the bottom of the zipper
so that the needle pierces the fold
and the zipper tape.
6.
Sew through the fold and the
zipper tape to the point where the
slider begins.
7.
Lower the needle to hold the
fabric and raise the presser foot.
52