Learn the stitcheis – Sears 385.1884180 User Manual
Page 36
Attention! The text in this document has been recognized automatically. To view the original document, you can use the "Original mode".
SECTION 3.
Darning
LEARN THE STITCHEiS
Straight Stretch
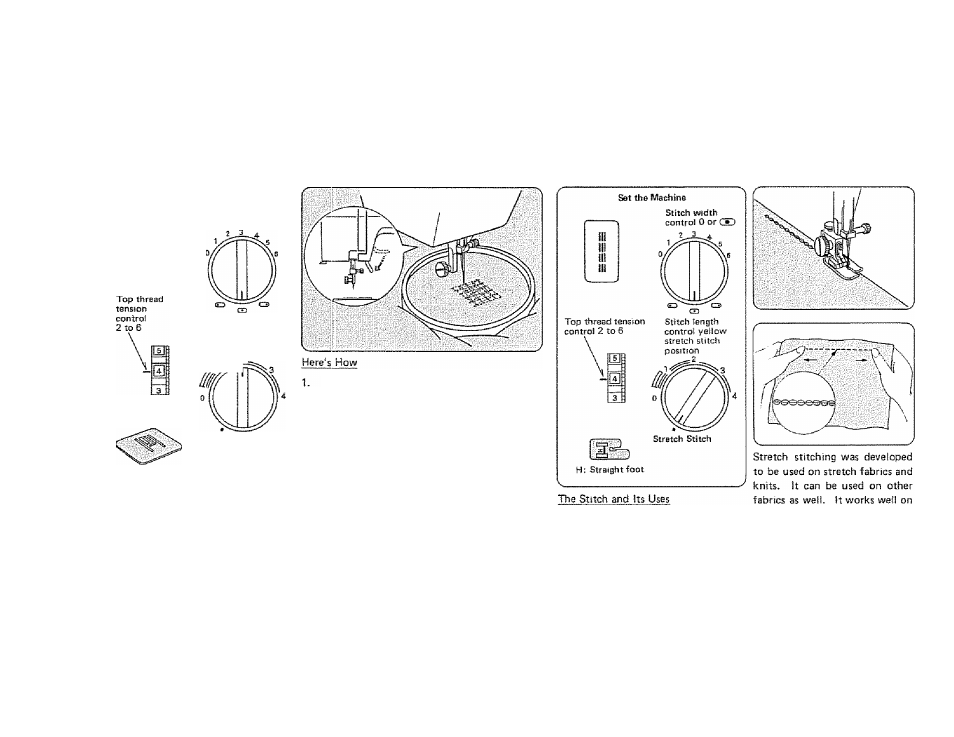
Set Ibe IMachiRB
Stitch uaidth
contro! 0 or СЮ
No pressar
foot
Darning piate
Stitch length
control any number
inot necessary to
adjust)
Stretch Stitch
34
Put the darning plate on the needie plate
(see page 32).
2.
Remove presser foot and foot holder
(see page 10), stretch fabric between
embroidery hoops with hole centered.
3.
Draw the bobbin thread up through the
fabric by holding the top thread and taking
one stitch at the spot where you wish to
start darning.
4.
Lower the presser bar and sew at a slow
speed.
5.
Move the fabric back and forth slowly until
you have covered the darning area.
6.
Turn the fabric half turn and sew antother
layer of stitching over the first layer.
NOTE: If your fabric is thin or badly damaged,
use a separate piece of fabric under the
hole to reinforce it.
7.
When you finish darning, remove the darning
plate and replace foot holder and foot.
This stitch is the stretch variation of
the straight stitch, especially develop
ed for knits and stretch fabrics.
This stitch can also be used for
topsfrtching on all fabrics.
curved
seams
and
on
any
garments that will receive a great
deal of strain (ie. children’s
clothes).
The
stretch
stitch
does
not
actually stretch as
it
is being
sewn, but is stitched m a
forward
and
back
motion
(sometimes called a "reverse
action" stitch), so that it will
give when the fabric stretches
instead of breaking.