Installing the depth stop, Raising the head, Assembly – Sears 113.21371 User Manual
Page 8
Attention! The text in this document has been recognized automatically. To view the original document, you can use the "Original mode".
assembly
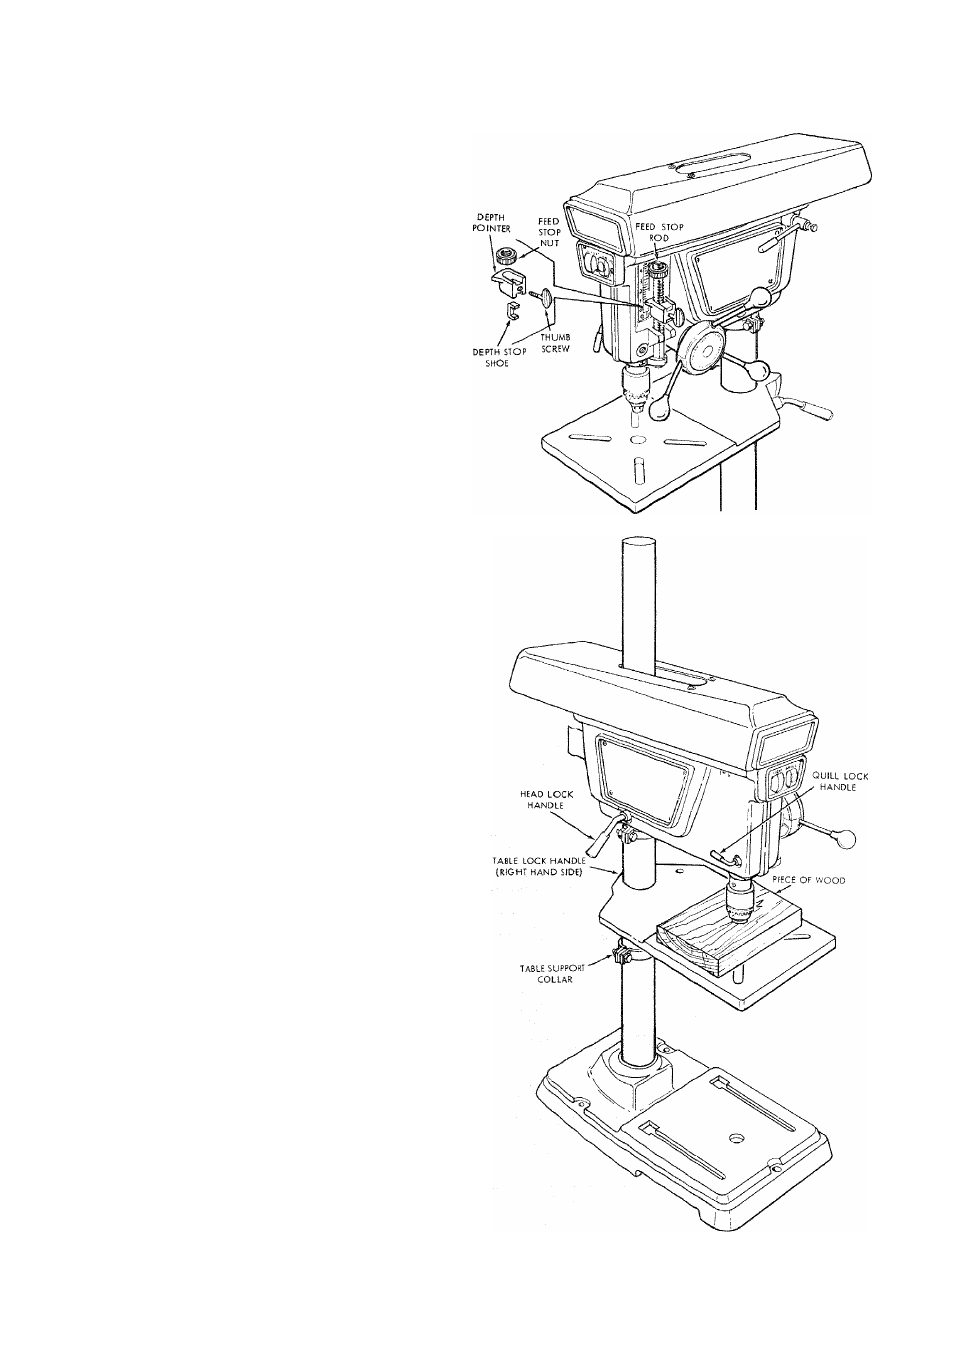
INSTALLING THE DEPTH STOP
1.
Screw
the
THUMB
SCREW
partways
into
the
DEPTH
POINTER.
2.
Place the DEPTH POINTER SHOE inside the pointer.
3.
Loosen
QUILL
LOCK
HANDLE
...
lower
the
quill
about two inches.
4.
Slide
the
pointer
and
shoe
onto
the
FEED
STOP
ROD
and
tighten
the
thumb
screw.
Make
sure
the
pointer
is
positioned as shown.
5.
Screw
the
FEED
STOP
NUT
onto
the
top
of
the
feed
stop rod.
6.
Move
the
pointer
upwards
against
the
nut
and
tighten
the thumb screw.
7.
Tighten QUILL LOCK HANDLE.
RAISING THE HEAD
1.
Loosen the TABLE LOCK HANDLE.
2.
Place
a
piece
of
WOOD
on
the
table.
USE
THE
packing
block.
3.
Turn
the
CHUCK
SLEEVE
until
the
jaws
are
all
the
way up inside the chuck. ,
4.
Raise
the
table
until
the
wood
block
touches
the
chuck
body.
5.
Tighten the Table Lock Handle.
6.
Locate
the
two
clamps
and
bolts
that
you
removed
from
the
paper
tube
when
you
first
started
unpacking
your drill press.
These
parts
make
up
the
TABLE
SUPPORT
COLLAR.
Position
the
TABLE
SUPPORT
COLLAR
underneath
the table and tighten the bolts.
7.
Loosen the HEAD LOCK HANDLE.
8.
Loosen the QUILL LOCK HANDLE.