Engini, To adjust throttle control cable (see fig. 31), To adjust carburetor (see fig. 32) – Sears 917.257552 User Manual
Page 23: Service and adjustments
Attention! The text in this document has been recognized automatically. To view the original document, you can use the "Original mode".
SERVICE AND ADJUSTMENTS
ENGINi
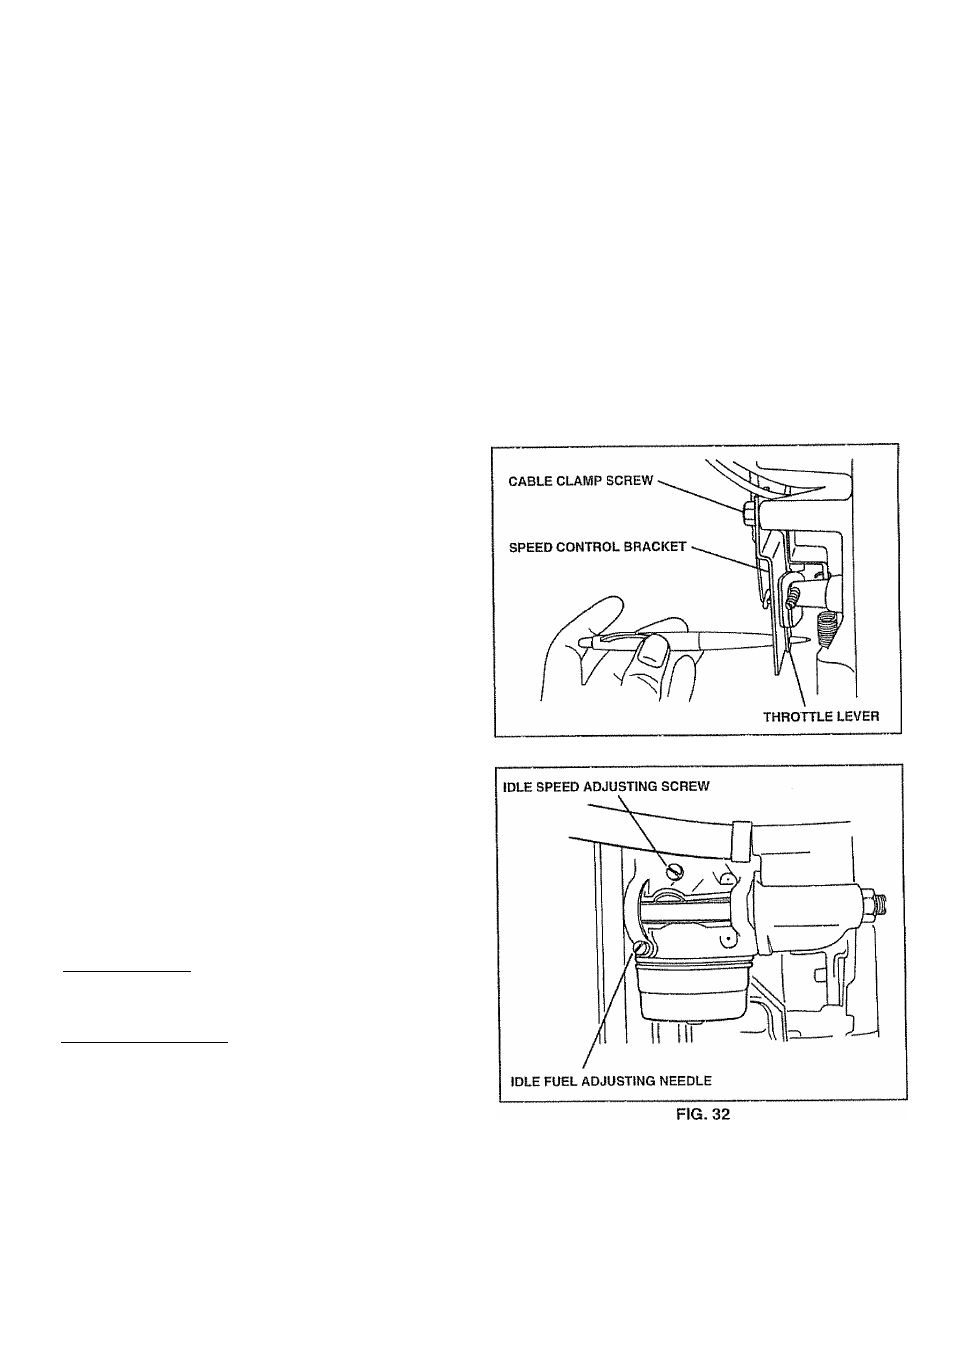
TO ADJUST THROTTLE CONTROL CABLE
(See Fig. 31)
The throttle control has been preset at the factory and
adjustment should not be necessary. Check adjustment as
described below before loosening cable. If adjustment is
necessary, proceed as follows:
» With engine not running, move throttle control lever
from slow (-^) to choke (1\D position. Slowly move
lever from choke (|\|) to fast {*%) position,
» Check to see if hole in throttle lever and hole in speed
control bracket are aligned,
0
If holes are not aligned, loosen cable clamp screw and
align the holes by inserting a pencil or a 1/4“ drill bit
through both holes.
• Pul! throttle cable up to remove slack and tighten cable
clamp screw. Remove alignment pencil or drill bit.
TO ADJUST CARBURETOR (See Fig. 32)
The carburetor has been preset at the factory and adjust
ment should not be necessary. However, minor adjust
ment may be required to compensate for differences in f uef,
temperature, altitude or load. If the carburetor does need
adjustment, proceed as follows:
In general, turning the adjusting needles
in
_(clockwise)
decreases the supply of fuel to the engine giving a leaner
f uel/air mixture. Turning the adjusting needles
out
(counter
clockwise) increases the supply of fuel to the engine giving
a richer fuel/alr mixture.
IMPORTANT:
DAMAGE TO THE NEEDLES AND THE
SEATS IN CARBURETOR MAY RESULT IF NEEDLE IS
TURNED IN TOO TIGHT,
PRELIMINARY SETTING -
® Be sure you have a clean air filter and the throttle
control cable is adjusted properly (see above).
» With engine off turn idle fuel adjusting needle
in
(clock
wise) closing It finger tight and then turn
out
(counter
clockwise) 1 turn.
FINAL SETTING -
» Start engine and allow to warm for five minutes. Make
final adjustments with engine running and shift/motion
control lever in neutral (N) position,
» Idle speed setting - With throttle control lever in slow
\-m )
position, engine should idle at 1750 RPM. If
engine idles too slow or fast, turn idle speed adjusting
screw In or out until correct idle is attained.
* Idle fuel needle setting - With throttle control lever in
slow
(«»)
position, turn idle fuel adjusting needle
In
(clockwise) until engine begins to die and then turn
out
(counterclockwise) approximately 1/8 to 1/4 turn to
obtain best low speed performance..
» Recheck idle speed. Readjust if necessary.
ACCELERATION TEST -
<• Move'lhrottle control lever from slow (sa) to fast
{< % )
position, if engine hesitates or dies, turn idle fuel
adjusting needle
out
(counterclockwise) 1/8 turn. Re
peat test and continue to adjust, if necessary, until
engine accelerates smoothly.
High speed stop is factory adjusted. Do not adjust -
damage may result,
IMPORTANT:
NEVER, TAMPER WITH THE ENGINE
GOVERNOR, WHICH IS FACTORY SET FOR PROPER
ENGINE SPEED, OVERSPEEDING THE ENGINE ABOVE
THE FACTORY HIGH SPEED SETTING CAN BE
DANGEROUS,, IF YOU THINK THE ENGINE-GOVERNED
HIGH SPEED NEEDS ADJUSTING, CONTACT YOUR
NEAREST
AUTHORIZED
SERVICE
CENTER/
DEPARTMENT, WHICH HAS PROPER EQUIPMENT AND
EXPERIENCE
TO
MAKE
ANY
NECESSARY
ADJUSTMENTS.
FIG. 31
23