Attaching rotary momr – Homelite Rotary Mowers User Manual
Page 10
Attention! The text in this document has been recognized automatically. To view the original document, you can use the "Original mode".
Attaching Rotary Momr
Remove contents from carton. The height adjustment
control lever is taped to the adjusting rod. Remove the
lever and proceed as follows;
1. Apply a light coat of grease to the control lever.
2. Pass the lever down through the quadrant, behind the
spring, and secure to roller shaft with the two cotter pins
supplied (see photo).
3. Pull the drive belt toward the front of the mower
housing and keeping it tight, adjust the belt stops on the
mower deck to within 1/8 in. of the belt.
4. Park the unit on aflat level surface and slide the mower
under the unit from the right side.
5. Raise the front of the mower housing and support it
using a block of wood.
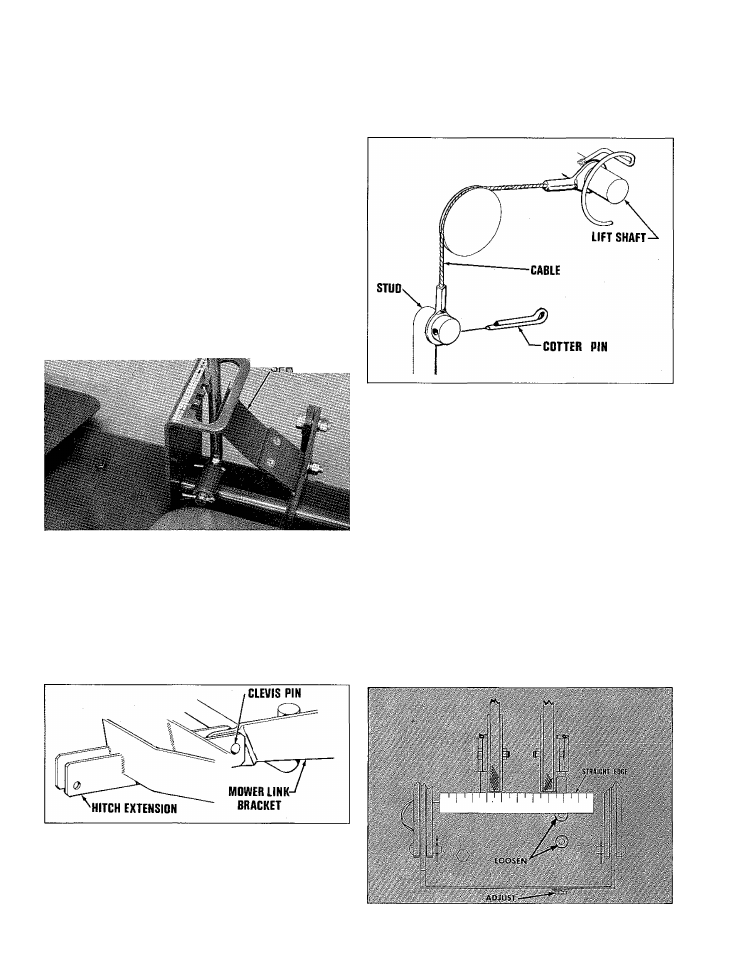
6. Secure mower link bracket to the rear holes in the
hitch extension (on the frame) with the clevis pin and
quick pin.
7 Attach one end of the lift cable to the lift shaft located on
the underside of the unit. Route the cable over and onto the
small idler pulley and secure the other end to the "L" shaped
stud on top of the mower deck using a cotter pin. NOTE: Be
sure lift is all the way in the down position.
NOTE: THE FOLLOWING STEPS ARE AS IF YOU ARE
FACING THE FRONT OF THE UNIT.
1. Pull the belt between the two idler pulleys.
2. Unlatch and raise the hood.
3. Loosen the two nuts securing the right idler pulley and back
off on the adjusting screw on front of the PTO bracket, releasing
the pulley.
4. Place the belt in the right pulley, the belt may have to be
twisted 90° clockwise.
5. Route the belt up through the frame, around the engine
pulley and back down to the left idler pulley.
6. Pull the black, tension release knob forward and secure the
drive belt around the pulley.
7. Looking straight down at the pulleys, turn the adjusting
screw clockwise, until both pulleys are lined up. (see
illustration).
/
10