Operating instructions (continued) – Emerson ITONE IP100C User Manual
Page 6
Attention! The text in this document has been recognized automatically. To view the original document, you can use the "Original mode".
OPERATING INSTRUCTIONS (CONTINUED)
LISTENING TO THE RADIO
NOTE: To prevent any interference between your iPod® and the radio in this unit,
your iPod® should be switched 'Off when listening to the radio.
Set the POWER button to the
'On'jt position, the display
lighting turns on.
Set the FUNCTION button to
the Radio position. The display
wilt change from time to radio
frequency. Set the SAND
selector to the desired band,
AM or FM Auto.
Rotate the TUNING control
until the display shows the
desired AM or FM station
frequency. Turn the TUNING
control clockwise to select
higher numbered frequencies
or counter-clockwise to select
lower numbered frequencies.
The FM STEREO indicator will
light when you tune to an FM
Stereo station.
Rotate the VOLUME control to
increase or decrease the
volume level. If you want to
increase the bass response
set the DBBS button to the
'On' -^positon.
Note; If you are listening to
music that contains heavy
bass at high volume levels the
sound may become distorted
if the DBBS switch is set to the
'On'j>- position. If this occurs
set the DBBS switch to the
‘Off position, or reduce
the volume level.
When you are finished listening
set the POWER button to the
'Оff’-M.position. The display
changes from radio frequency
to correct time and the display
lighting goes off.
OPERATING INSTRUCTIONS (CONTINUED)
Docking and Charging Your iPod®
This system is designed with the same 30-pin connector found in all iPocP’ docks.
By simply connecting your iPod® to the docking station on the front panel of this
system you can play your iPod® through the speakers of this system. And you
can also recharge the battery in your iPod®.
Note: Recharging is only possible when you are using the system with the included
AC adapter. Your iPod® battery will not be recharged when you are operating this
system on battery power.
To accommodate all models of dockable iPod® we have included four different
adapter/ inserts to ensure that your iPod® will fit properly in the docking
station.
Refer to the chart below to select the proper adapter / insert for your particular
model of dockable iPod®. Note: if you have a earlier non-dockable iPod® , or an
iPod® Shuffle, please refer to the next section to connect you device to the
Auxiliary Input jack.
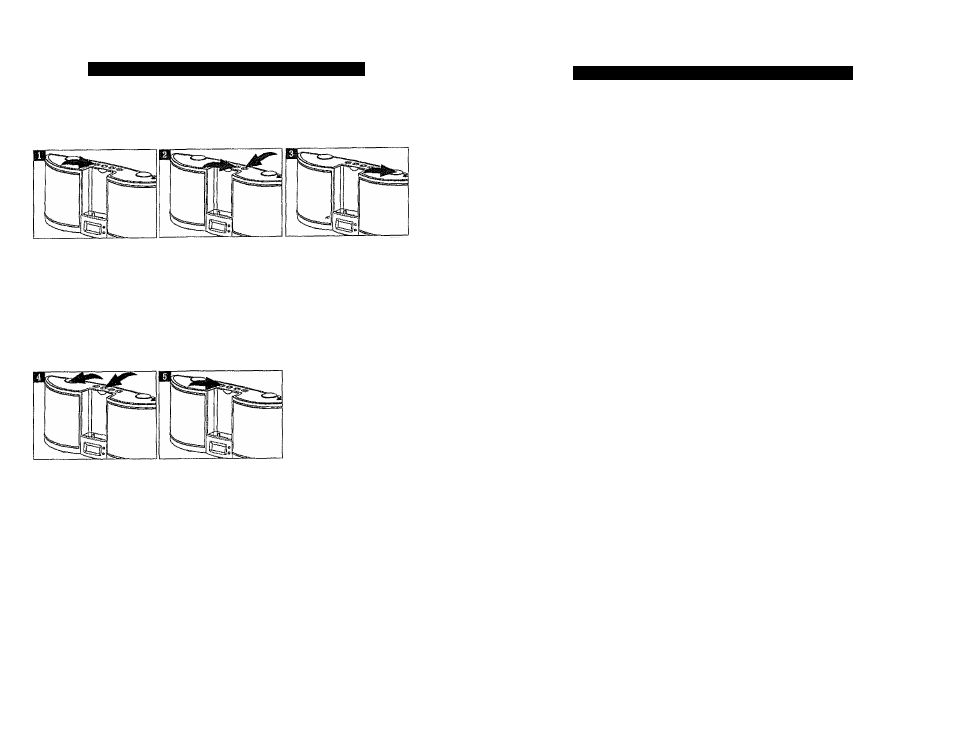
iPod® inserts
Your unit comes with 4 removable inserts to ensure your iPod® fits properly
in the dock on the front of the system.
iPad® version
T C .) -i :
t" ( )
ШЗ
iPod* size
GB
GS
^. Place the proper adapter / insert into the docking station. The iPod® 30-pin
connector should fit through the opening in the bottom of the insert.
2. Gently press the insert Into the dock until it is properly seated.
3. With your iPod® in the Power 'Off mode carefully place it into the insert.
Note: Remove any accessory case or "skin" from your iPod® before inserting
it in the dock.
4. To remove or replace an insert, first remove your iPod ® from the dock, then
grip the insert and gently lift it upward and out of the dock.
10