Using the site list with the marked file – YSI 610 User Manual
Page 3
3
USING THE SITE LIST WITH THE MARKED FILE
The Site List is accessed through the Setup 610 menu.
When using the Mark feature, there is only one filename,
“marked”. All readings that are stored using the “m”
prompt during Run mode are stored to filename
“marked”.
You can not type in the word “marked” to create this file.
You may rename “marked” file to a filename of your
choice using submenu FILES.
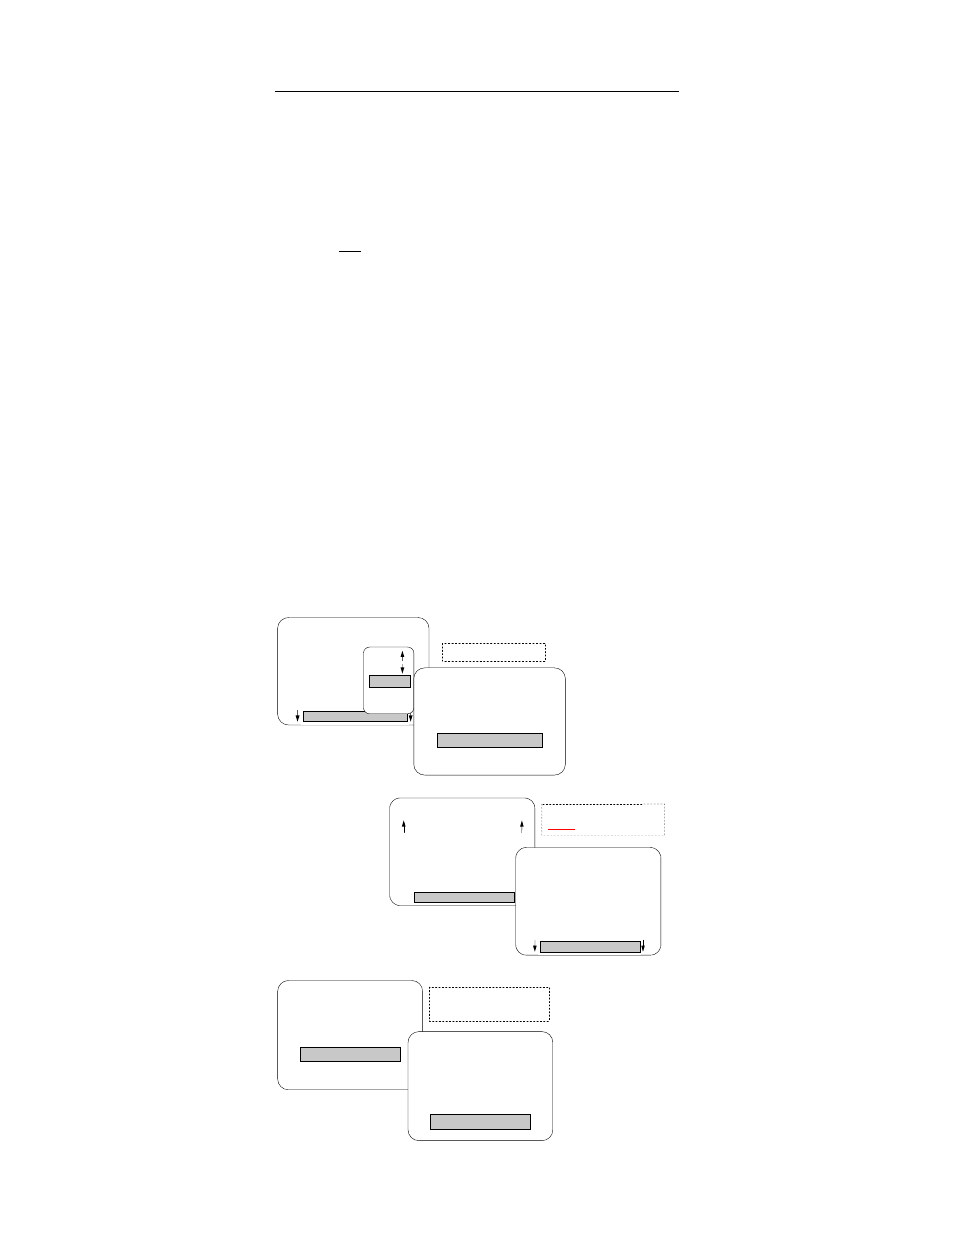
In the Site List use the File item to hold the Mark Name,
and the Site item to hold the Mark Number.
From Main menu choose Setup 610, then Setup Site List.
When in the field taking readings, from Run mode, you
would press the “m” key, and a list would appear.
Choose the site name to begin the process of collecting
the readings.
Remember that when you review data from the “marked”
file, lines of data from the site “spillway” will be labeled
as “sample 6”. Each of the sites will have corresponding
numbers. When you set up the sites, write down the
numbers for later reference.
Enter a mark name.
SITELIST
headwtrs
bridge1
bridge2
uplake
midlake
Insert
Move
Move
Insert
Revise
Delete
SITE
Make NEW Entry
Site:
File:spillway
SETUP
Date: 5/20/96
Time: 10:24:36
Dump 610 Setup
Delete All Files
Setup Site List
shft
SITELIST
headwtrs
bridge1
bridge2
uplake
midlake
spillway
Create a list of sites
before you go to the field.
SITE
Make NEW Entry
Site:
File:spillway
Enter a mark number that
corresponds to the name.
SITE
Make NEW Entry
File:spillway
Site:6