Installation guide, Step 14, Step 16 – Trending Accessibility Adjustable fusion shower pan recessed into concrete User Manual
Page 7: Step 15, Step 13
Installation Guide
www.trendingaccessibility.com
7
for adjustable fusion shower pan recessed into concrete
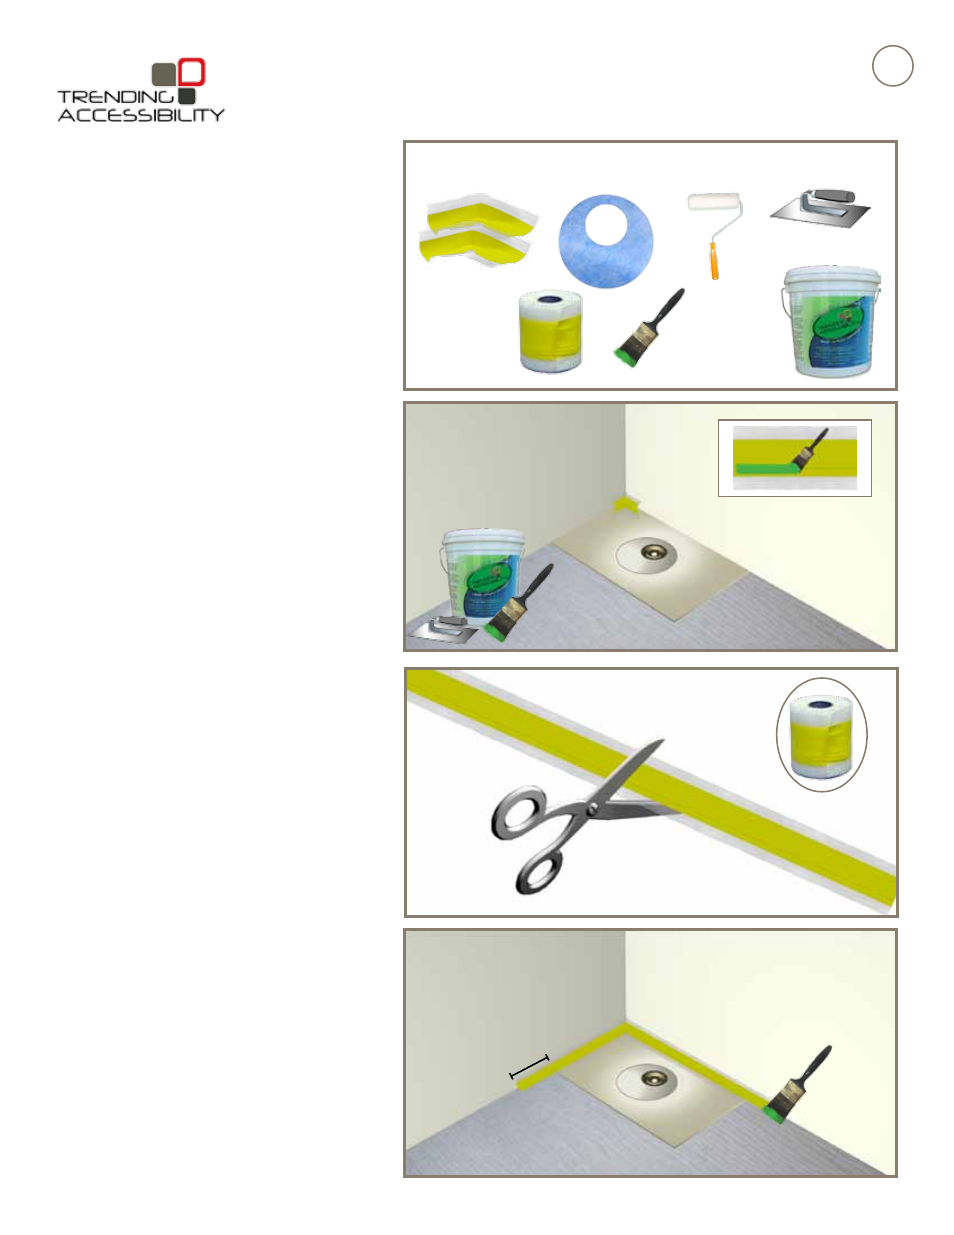
Step 16
Just like you applied the corner pieces, use your
cut strips of Crack Insulation Tape to cover all the
seams. Again, trowel or paint liquid waterproofing
onto seam, press tape into position and coat
the top to seal. Make sure to fully cover both
sides of the crack isolation tape with the liquid
waterproofing product. To make this process more
manageable, it is best to work in two foot sections.
Step 15
Using the 5” crack isolation tape provided, cut
strips of tape to length, to cover all seams (Corner
seams, wall/floor seams, pan/floor joint). Put
pieces aside.
If you are creating full wet room, you will need to tape
any seams throughout the entire room.
If you are only waterproofing the shower zone, you
will only need to tape the seams up to 2 feet outside
the shower area.
NOTE:
Illustration just shows tape use.
Please apply liquid waterproof-
ing to the wall and tape before
applying.
Extend the tape
2 feet past the
shower pan
2 feet
Step 14
Begin taping the wetroom floor at the interior corners
of the Fusion Pan using the corner pieces of the
crack isolation tape provided. Using a paint brush or
trowel, slather liquid waterproofing into corner, press
piece into place, then apply liquid waterproofing on
top. Make sure to smooth out any creases. Repeat for
additional corners.
Step 13
You will now begin waterproofing the wet room.
BEST PRACTICE: To achieve the best results, we
recommend waterproofing the whole room.
Minimum requirements, shown in these
instructions, show you that you only have to
waterproof the shower zone, which is 6 ½ feet high
and about 2 feet outside of the showering area.
Materials needed for wet room waterproofing.