Top Flite Elder 20 User Manual
Page 3
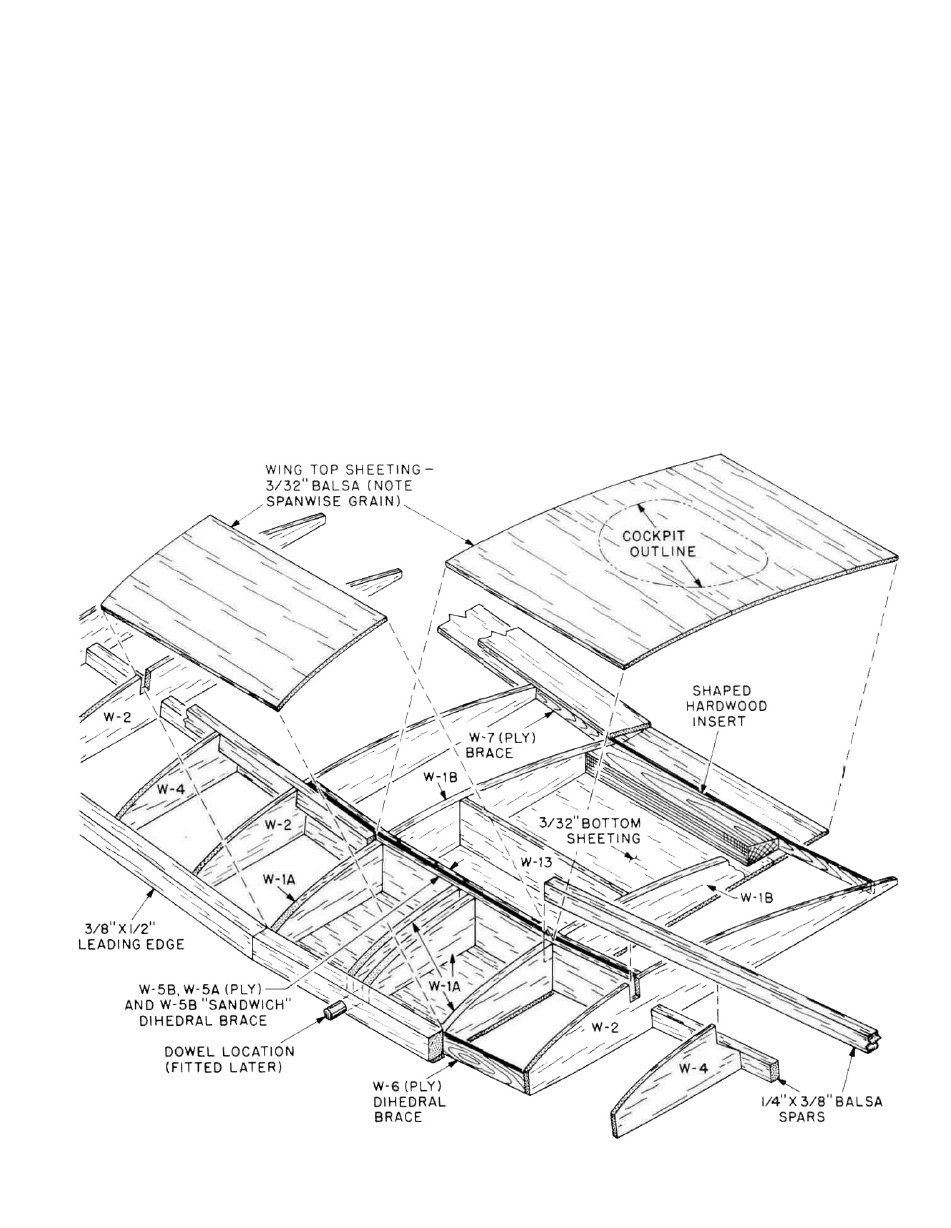
cut and glue in place the
3/8" x 1/2" leading edge. Glue
the forward ply dihedral brace, W-6, in place against
the inside surface of the leading edge piece—be
sure it's centered. Glue the two forward W-1A half
ribs in place against the rear face of the dihedral
brace, lined-up with the edges of the bottom
sheeting at right angles to your work surface.
3. As shown on the plans, the center dihedral brace is a
composite made by laminating the two W-5B's to
each side of the ply W-5A, resulting in a 1/4" thick
part—do this now. Glue the completed center
dihedral brace in place to the bottom sheeting and
the two rear edges of the W-1A half ribs—again, be
sure it's centered.
4. Now glue the two rear W-1 B ribs in place to the bot-
tom sheeting and rear face of the center dihedral
brace. As shown, these two half ribs also line-up
with the outside edges of the bottom sheeting, at
right angles to the work surface. Now glue the
shaped hardwood wing bolt insert in place between
the W-1B ribs, with its rear edge lined-up with the
rear edges of these ribs. Finally, glue remaining W-7
ply dihedral brace in place against the rear edge of
the shaped wing bolt insert and the two W-1B
ribs—be sure it too is centered. Locate and mark the
position of W-13 on the outside surfaces of the two
W-1B ribs, do this with light pencil marks (you will
need these marks for later locating and cutting-out
the cockpit opening). Glue W-13 in place.
NOTE: For the time-being, this completes the center
section construction. We will finish it after we have
used it in the construction of the fuselage. Set it
aside for now and build the two wing panels. The
wing panels are constructed directly over the plans
—build both at the same time.
3