Top Flite TOPQ7902 User Manual
Page 2
❑
14. Tape the Radial assembly inside the cowl. Make
final adjustments to the fit between the cutouts and the
engine. By working from the inside it’s possible to remove
material from the Radial without affecting the pushrod
tubes and ignition leads. Pay special attention to provide
unrestricted throttle and needle valve movement.
❑
15. When satisfied with the fit, smooth all rough
edges with fine sandpaper. Then paint the Radial (if not
already done).
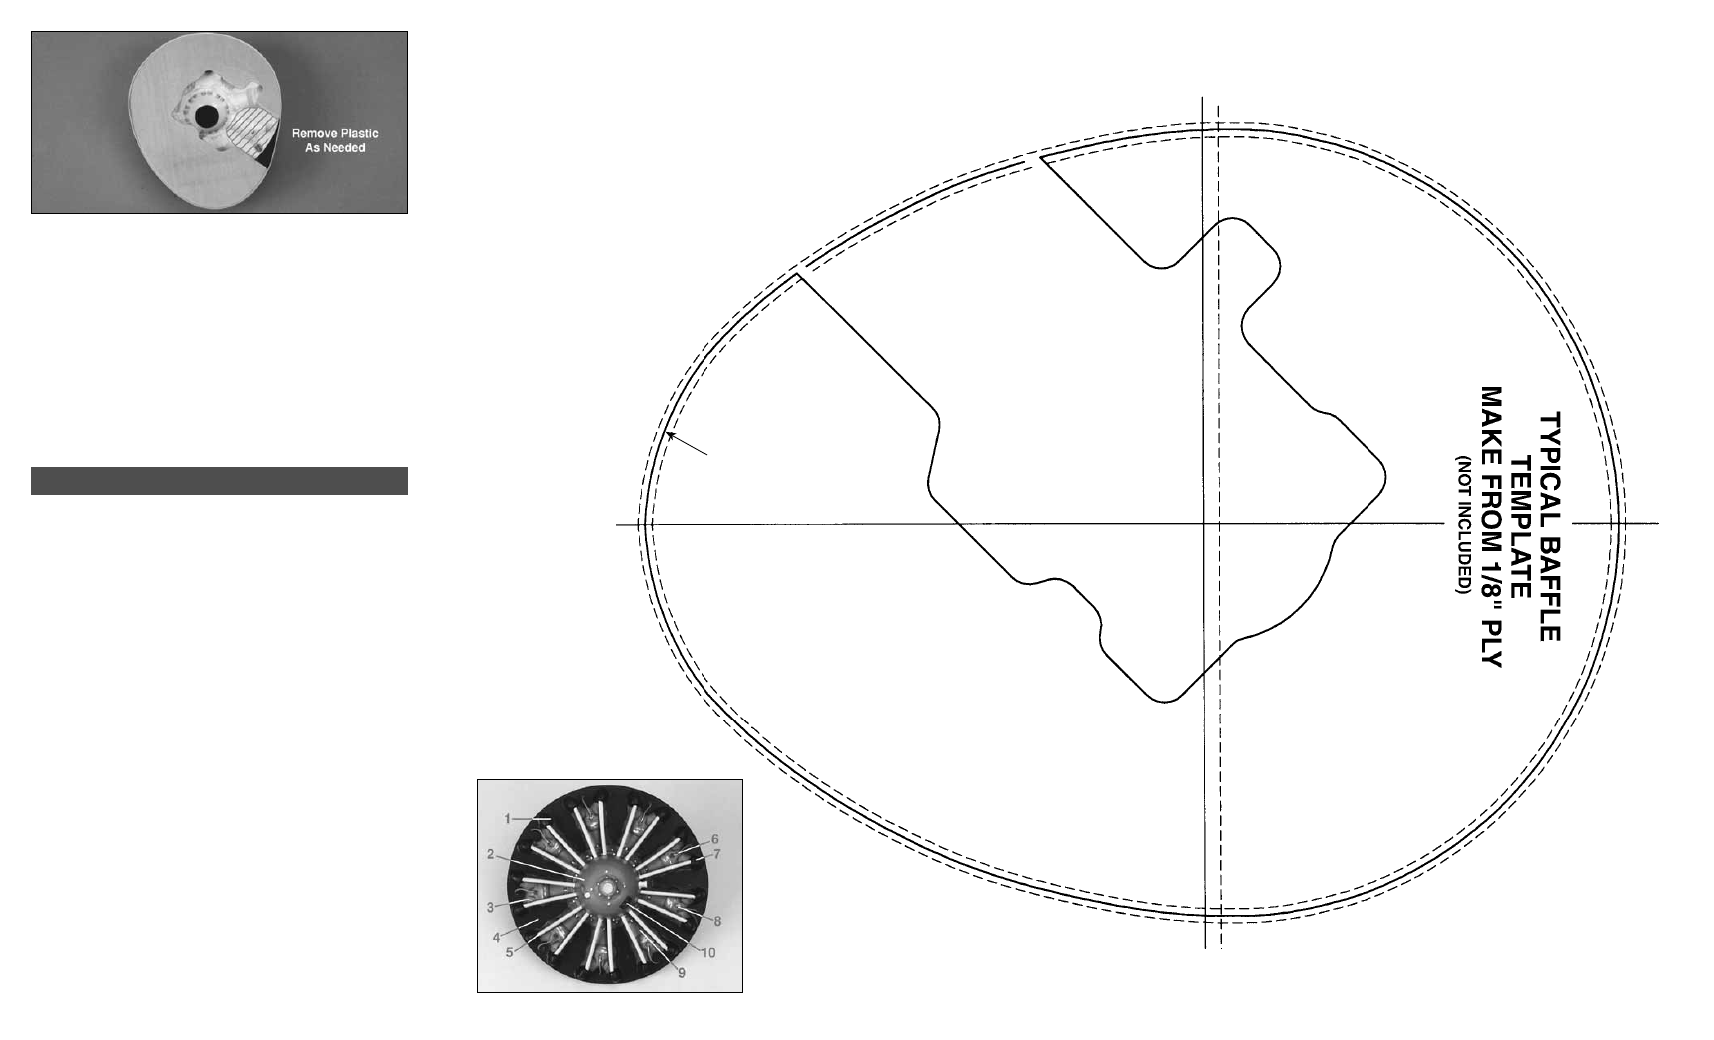
Baffle Template
The cutout in this baffle is sized to fit
a typical .60-size 2-stroke engine.
We painted our prototype Radial with Testors Model
Enamel paint, then sprayed two light top-coats of satin
finish epoxy over the finished job. This finish withstands
fuel and normal wear and tear quite well.
If you are building a scale replica of a particular aircraft,
paint the Radial in similar colors to the full scale version.
The colors we chose represent typical P&W colors with
chrome plated pushrod tubes.
PAINTING SEQUENCE AND COLORS USED
Top Flite LustreKote
™
(Aerosol)
1. Entire Exterior – Gray Primer
Testors Model Master Enamel (Brushed on)
2. Crankcase – Gunship Gray
3. Cylinders – Euro Gray
4. Background – Light Gray or Flat Black
5. Pushrod Tubes – Silver
6. Ignition Leads – Red
7. Rocker Arm Covers – Black
8. “Spark Plug” Connectors – Gold or Copper
9. Cylinder Fins and Weathering – Silver & Black
Random Fine Lines On The Fins
10. Engine I.D. Plate – Black with Silver details
11. Epoxy Satin Finish Clear Coat (Test clear coat to
make sure it is compatible with the Testors Enamel.)
PARTS LIST
Qty.
Description
Part No.
1
ABS Plastic Radial
RADIAL08
5
8" Plastic Push Rod Tubes
PLTB025
1
16"
Wire for Ignition Leads WIRES58
1
Instruction
Sheet
RADIALP08
PAINTING SUGGESTIONS
Use solid line for
Top Flite P-47D cowl.