Top Flite TOPQ7899 User Manual
Page 2
❑
5. Cut out the slot in the top half of the tank to allow the Release
Loop to exit through the top of the tank from the inside.
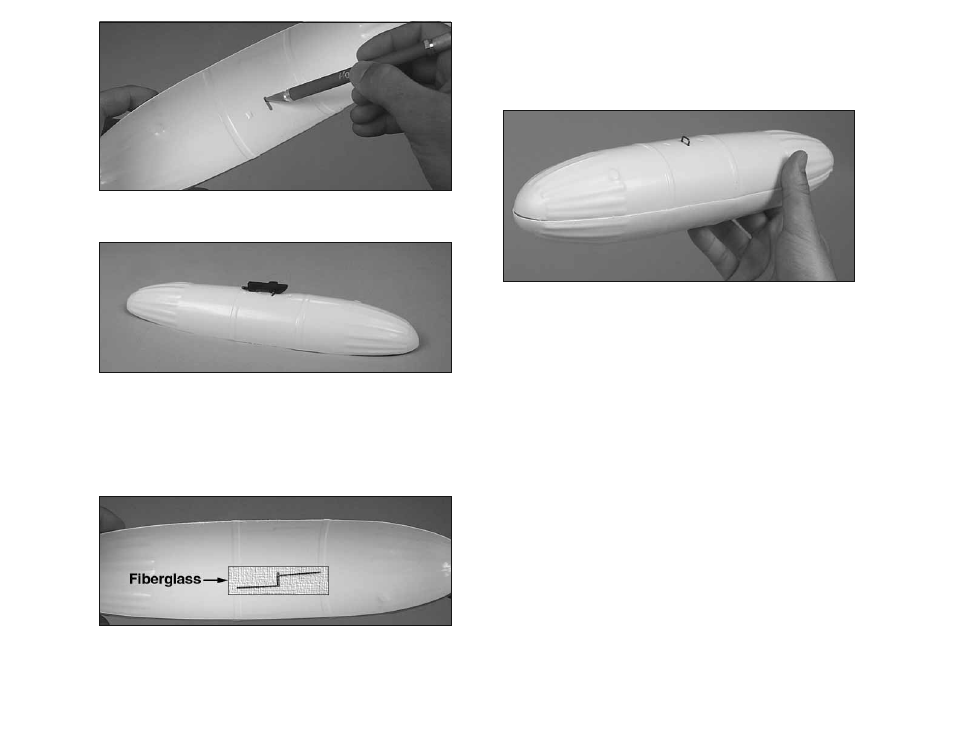
❑
6. Use 150-grit sandpaper to thoroughly roughen the inside of the
tank where the release hook is secured. With the Release Loop
inserted through the top half of the tank, test fit the Release Loop to
the Release Mechanism to make sure there is no interference.
❑
7. Roughen the portion of the Release Loop that will be glued to the
tank with 150-grit sandpaper.
❑
8. Glue the Release Loop to the inside of the top half of the tank
with 30-minute epoxy and the supplied 1" x 3" fiberglass tape. Allow
the epoxy to cure.
❑
9. Check the fit of the top and bottom halves of the tank carefully.
Sand away any obstructions so you have a good fit.
❑
10. You may wish to add about 1/4 oz of nose weight (not included)
to the inside nose of the tank. This will make the tank more neutrally
balanced when it falls. If you choose to add nose weight, roughen the
inside surface thoroughly and use epoxy to glue the weight securely
in place. A couple of old washers work well for this.
❑
11. Tape the two halves of the tank together in several places with
masking tape. Glue the two halves together by wicking thin CA into the
seam. Do not use accelerator as it will weaken the plastic.
❑
12. Prime and paint the tank as desired.
TYPICAL INSTALLATION OF THE
RELEASE MECHANISM
Note: These are the latest instructions for the installation of this
drop tank. Please disregard any earlier instructions from any of
our plans or manuals.
Note: These are generic instructions explaining how to install the
Release Mechanism on a Warbird’s wing. Depending on the air-
plane or location on the airplane that you are installing your
release mechanism on, the procedure may vary slightly.
❑
1. Reinforce the area that you are going to install the Release
Mechanism on with hardwood blocks, or stringers. You can also use
fiberglass if you wish.
❑
2. Position the Release Mechanism in the location where you
want to install it. Route a thin flexible cable (Sullivan #507) from the
release servo to the release tab. Tin the cable with silver solder at
the release tab end and put a Z-bend in it. If you wish, you could also
use a string tied to the release tab and to the servo arm.