Top Flite TOPA1005 User Manual
Page 7
❏
6. Test fit the hinges in the hinge slots in the wing
and flaps. If necessary, use a hobby knife or a small
razor saw blade to enlarge any hinge slots that are
too tight.
❏
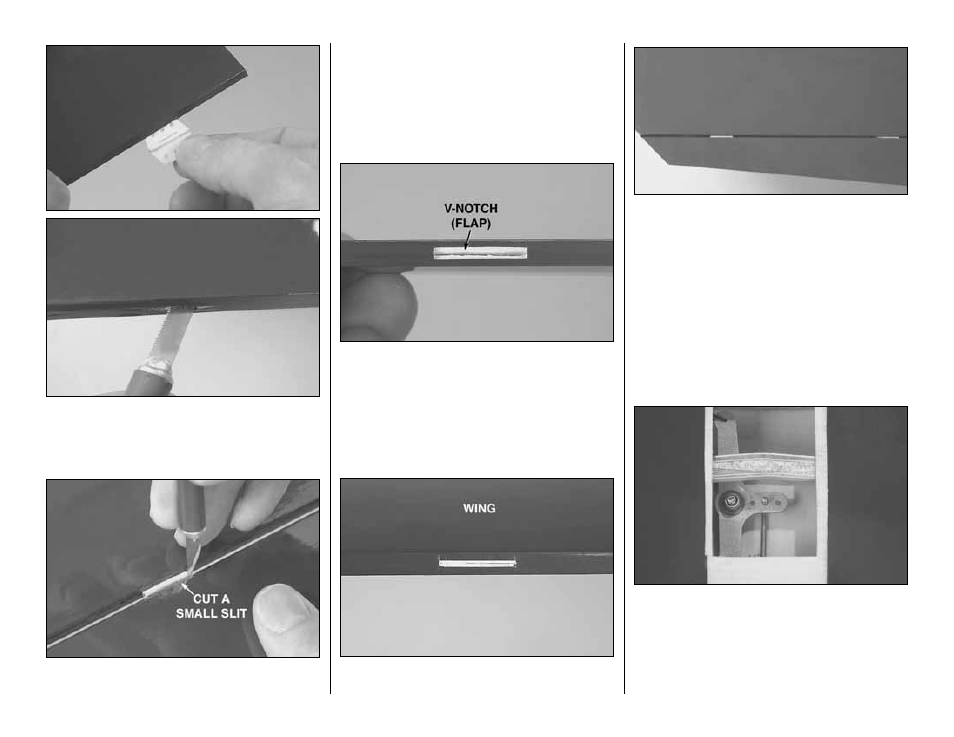
7. Without using any glue temporarily join both
flaps to the wing with eight hinges. Use a #11 hobby
blade to cut a small slit in the wing and flap on both
sides of all the hinges. These slits will mark the ends
of the hinge slots.
❏
8. Remove the flaps from the wing and take out the
hinges. Cut a small “V-notch” between the slits cut in
the flaps only to accommodate the pin portion of the
hinges. This will allow the flaps to fit close to the wing.
❏
9. Cut a small strip of covering between the slits
you cut over each hinge slot in the wing.
❏
10. Without using any glue temporarily rejoin the
flaps to the wing with the hinges. There should be
little or no hinge gap and the flaps should move up
and down freely. Make adjustments where necessary
to close the hinge gaps.
Make the Flap Pushrod
❏
1. Bend and cut the flap pushrod as shown in the
full-size drawing on the back cover page from a 4-40
x 17-1/2" [445mm] threaded one-end pushrod.
Thread a 4-40 nut followed by a clevis onto the
pushrod.
❏
2. Use a 7mm socket wrench or needle nose pliers
to loosen, but do not remove, the 4mm nut on the top
of the wing that secures the bellcrank. Guide the flap
pushrod through the exit slot in the top of the wing.
Then lift the bellcrank and fit the pushrod up through
the middle hole. Tighten the nut. Make sure the
pushrod and bellcrank operate freely.
- 7 -