Ya-706 supporting runner (option) installation – Toa CR-413-6 User Manual
Page 12
12
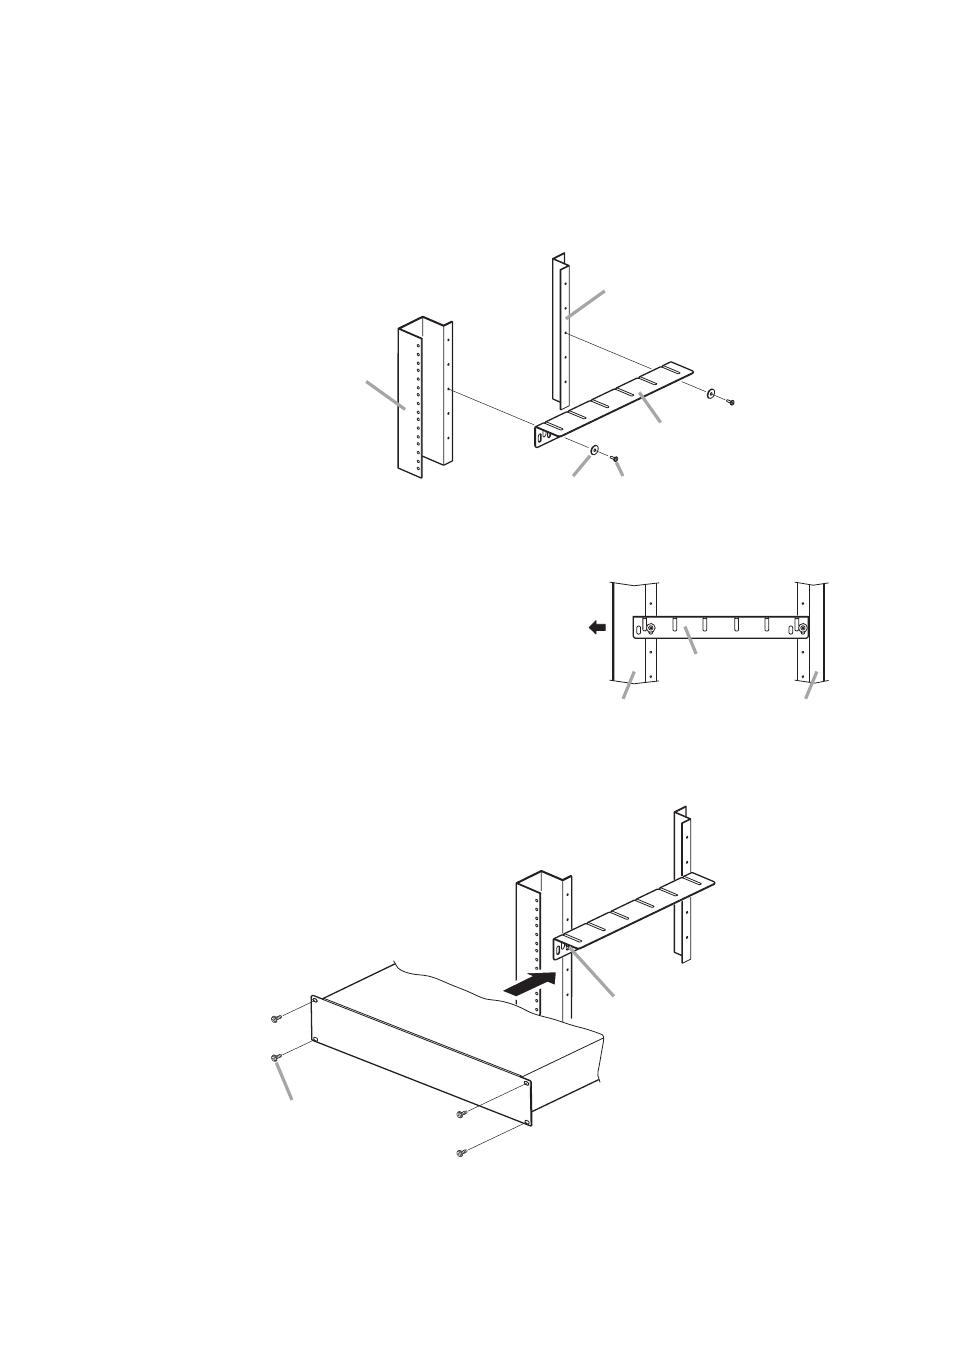
YA-706 (option)
Plain washer
(supplied with the YA-706)
Bind head taptite screw type B4 x 10
(supplied with the YA-706)
Front left frame
Sub-frame
Front
YA-706
Front frame
Sub-frame
Rack mounting screw
Component
Bind head taptite screw type B4 x 10
Note
Tighten the screws after securing
the component to the rack.
Note
To install the YA-706, use its second front hole
and rearmost hole as shown at right.
Step 2. Place the component on the loosely fitted YA-706, then
secure the component to the rack with the supplied rack
mounting screws.
Step 3. Lift up the loosely fitted YA-706 until it hold the component, then secure it.
4.2. YA-706 Supporting Runner (option) Installation
It is recommended that the optional Supporting Runner be installed to the rack so that the component can be
easily drawn from the front of the rack for maintenance purpose or if the strength is particularly needed when
installing the components in the rack.
The figures below show the way to install the YA-706 to the left side of the rack.
Follow the same procedure for installation to the right side.
Step 1. Fix the YA-706 loosely to the rack frame
and sub-frame.