Live performance (audio) setup, Midi and digital setup - all singing, all dancing – TC-Helicon Voiceprism Quickguide User Manual
Page 9
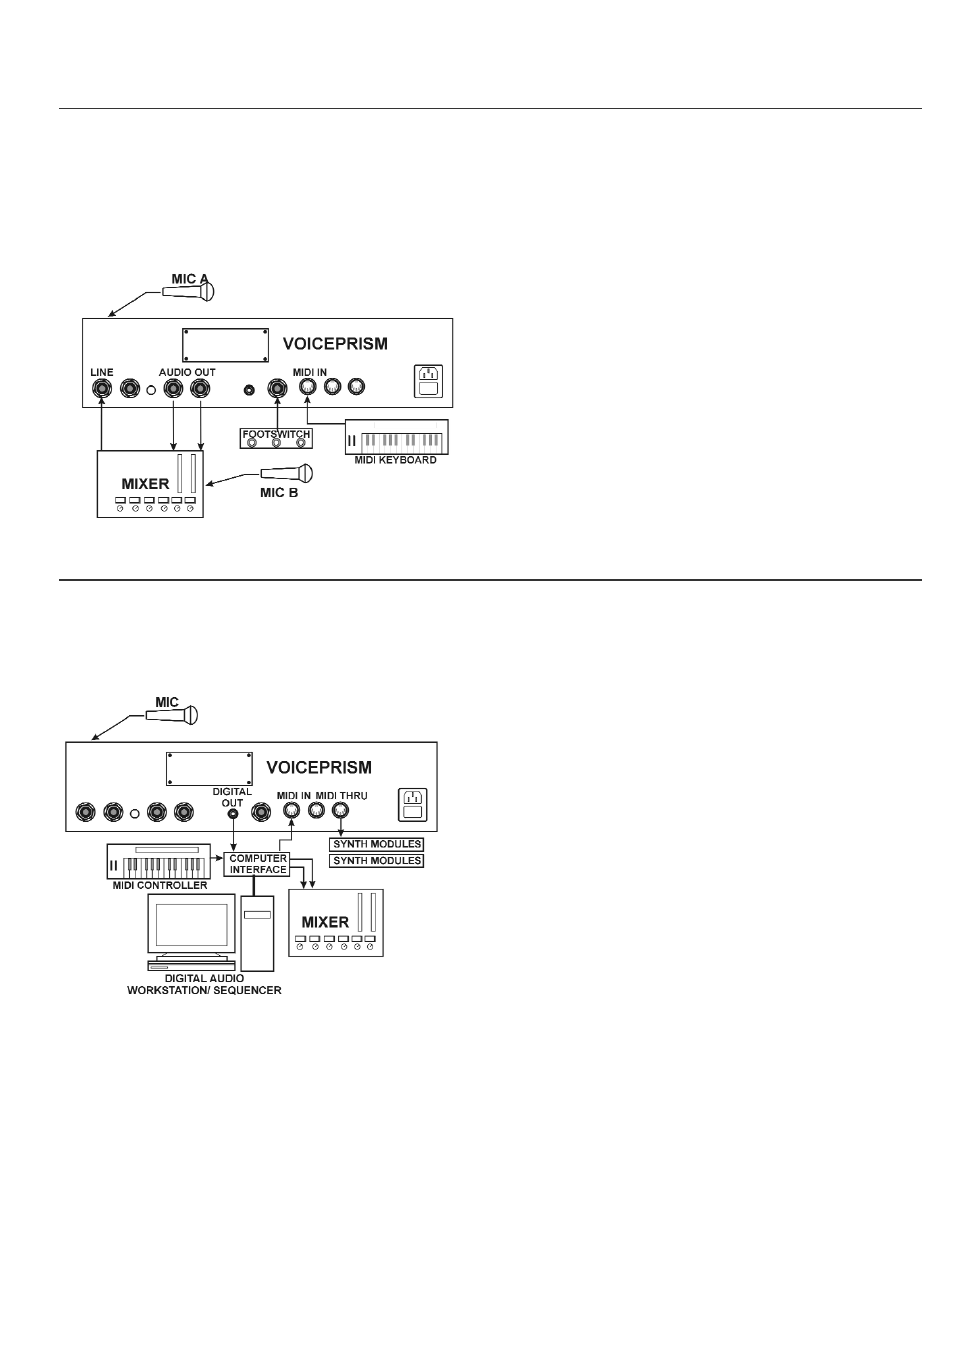
LIVE PERFORMANCE (AUDIO) SETUP
This setup is designed for a live performance situation with two options for MIC
input. VoicePrism toggles between the the two inputs using the
MIC ON
button
(when
MIC ON
is active, MIC A is the input; otherwise the input is MIC B, going
through the mixer as the line source). We have assumed that the mixer is hooked up
to to the PA system.
1. Connect Mic A to VoicePrism’s front panel microphone
input.
2. Connect your mixer setup to VoicePrism’s Audio Out.
3. Connect your Mic B through the mixer to VoicePrism’s
Line In.
4. Connect your footswitch to VoicePrism’s back panel
Footswitch.
5. Connect your MIDI keyboard to VoicePrism’s MIDI IN
6. Set the VoicePrism’s In Gain for your desired audio sen-
sitivity.
You can use Mic A or B as your lead voice input.
MIDI AND DIGITAL SETUP - ALL SINGING, ALL DANCING
This setup requires a computer capable of transmitting and receiving MIDI as well as
digital data, to make the most of VoicePrism’s digital and MIDI features. We’ve
assumed the mixer is connected to a monitor amplifier setup.
1. Connect the keyboard’s MIDI Out to the computer.
2. Connect the computer’s MIDI Out to VoicePrism’s MIDI
In.
3. Connect VoicePrism’s Digital Out to the computer.
4. Connect the computer’s Audio Out to the mixer.
5. If you wish to use other MIDI controlled modules, con-
nect them to the VoicePrism's MIDI Thru.
9
VoicePrism QuickStart Manual
Audio Setup, MIDI and Digital Setup