Front panel – TC-Helicon Voiceprism Quickguide User Manual
Page 6
VoicePrism QuickStart Manual
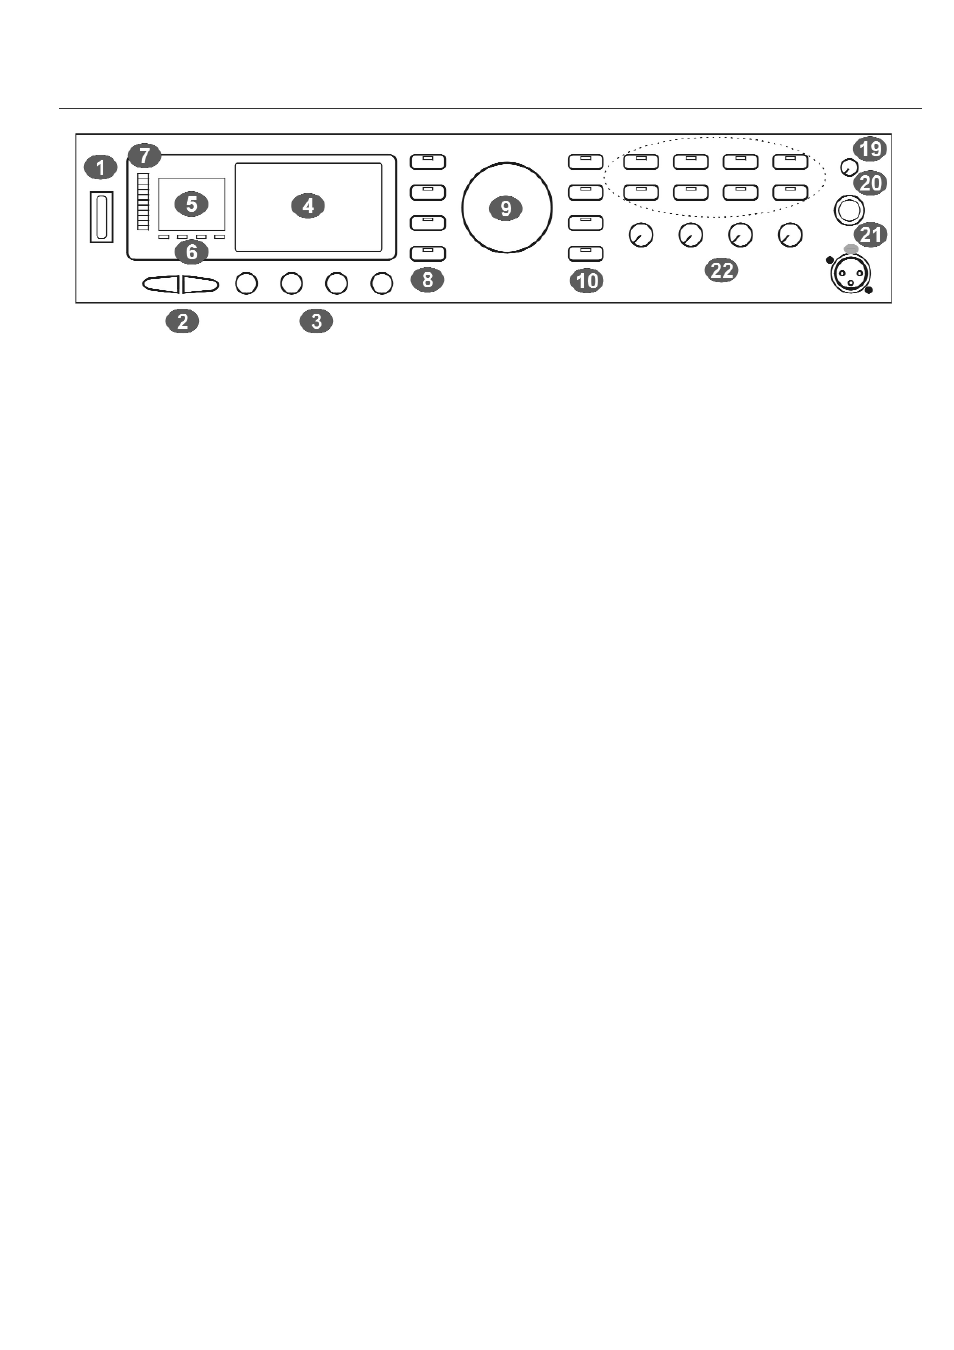
FRONT PANEL
1
1
Power Switch: This turns VoicePrism On/Off as indicated by front panel illumination. When turned
Off, the VoicePrism is not completely disconnected from the mains. VoicePrism starts up with your
last settings and preset.
2
2
Tab Arrows: these scroll forward or back one menu page or preset. You’ll find them especially
useful for navigating the multi-page menus.
3
3
Softknobs: the softknob names and current settings are displayed on the LCD; they will
change depending on your menu. Turning the softknobs will modify their settings. Pushing
the softknob until it clicks will access the softknob submenu (if available). In the softknob
submenu, twisting the associated softknob will scroll you through the list of parameters --
clicking again selects the highlighted parameter and kicks you out of the submenu. In the
top level preset window, clicking the softknobs brings up a shortcut menu of factory preset
configurations.
4
4 LCD Display: the most informative part of VoicePrism, at the highest level this shows preset
information in addition to the softknob libraries and controls. Elsewhere, the LCD provides
menus where you can view your editable features, particularly the softknob menus (by click-
ing the softknobs) and the softknob settings.
5
5 Numeric Display: displays the current preset number.
6
6 Input Indicators: these light up for the following input types.
LOCK
: illuminates to indicate pitch tracking.
MIDI
: lights up when MIDI messages are received.
44.1
: digital input received at 44.1kHz, for use with the upgrade card.
48
: digital input received at 48kHz for use with the upgrade card.
7
7 Input Level LED Bar: the LED’s illuminate to indicate the input volume level, from -30dB to
0dB. The red Ovf LED illuminates to indicate the level is too high and is being digitally clipped.
8
8
Edit Buttons: these 5 buttons jump you directly to your multi-page edit menus. Each button
has its own section in the User Manual that describes its menu screens and adjustable
parameters, thus only a very brief description is given here.
VOCALS
: accesses the editing screens for vocals.
EFFECTS
: accesses the editing screens for the two separate post effects blocks.
COMP
/
EQ
: accesses the compressor, EQ and gate editing screens.
MIX
: accesses the editing screens to set mix levels within that particular preset. The
LEVEL
knobs located on the front panel are for altering the levels globally (for all presets).
STEP
: allows you to create an ordered group of presets that you can step through either
manually or by footswitch.
6
Front Panel