English – Cooper Lighting SC1000R User Manual
Page 8
Bonus bulb included
This fixture includes a spare bulb, which insures that you can
always finish your job or project without interruption due to bulb
failure. The spare bulb and holder are located in the center han-
dle of the portable fixture (Figure I) NOTE: Always handle
halogen bulbs with gloves or with a clean soft cloth. Oil from your
skin can cause premature failure of the bulb.
Replacing the bulb
Step 1:
Make sure fixture is turned OFF and unplugged.
Step 2:
Turn wing nut on back of handle counterclockwise to remove handle.
Using a Phillips screwdriver loosen the screw on the front of the door.
Step 3:
The door frame and lens assembly will swing down
allowing access to the bulb.
Step 4:
Using gloves or soft cloth, press the old bulb to one side
of the spring loaded socket as indicated on the metal
reflector. Remove opposite end of bulb from the other
side of the socket. Remove the new bulb from its package
making sure not to touch bulb with bare hands. Reverse this proce-
dure to install a new replacement bulb (Figure J).
Step 5:
Replace the door frame and lens assembly and secure it using a
phillips screwdriver.
Aiming the fixture
Make sure the light fixture is in the OFF position and cool. Loosen
the knob located on the side of the light fixture housing. Using the
tab handle on the light fixture, tilt to desired position then retighten
knobs (Figure K). There is a stop that restricts the downward and
inward movement of the fixture for safety reasons. To prevent over-
heating and risk of burns or fire, do not aim the fixture down at an
angle of more than 10 degrees from horizontal.
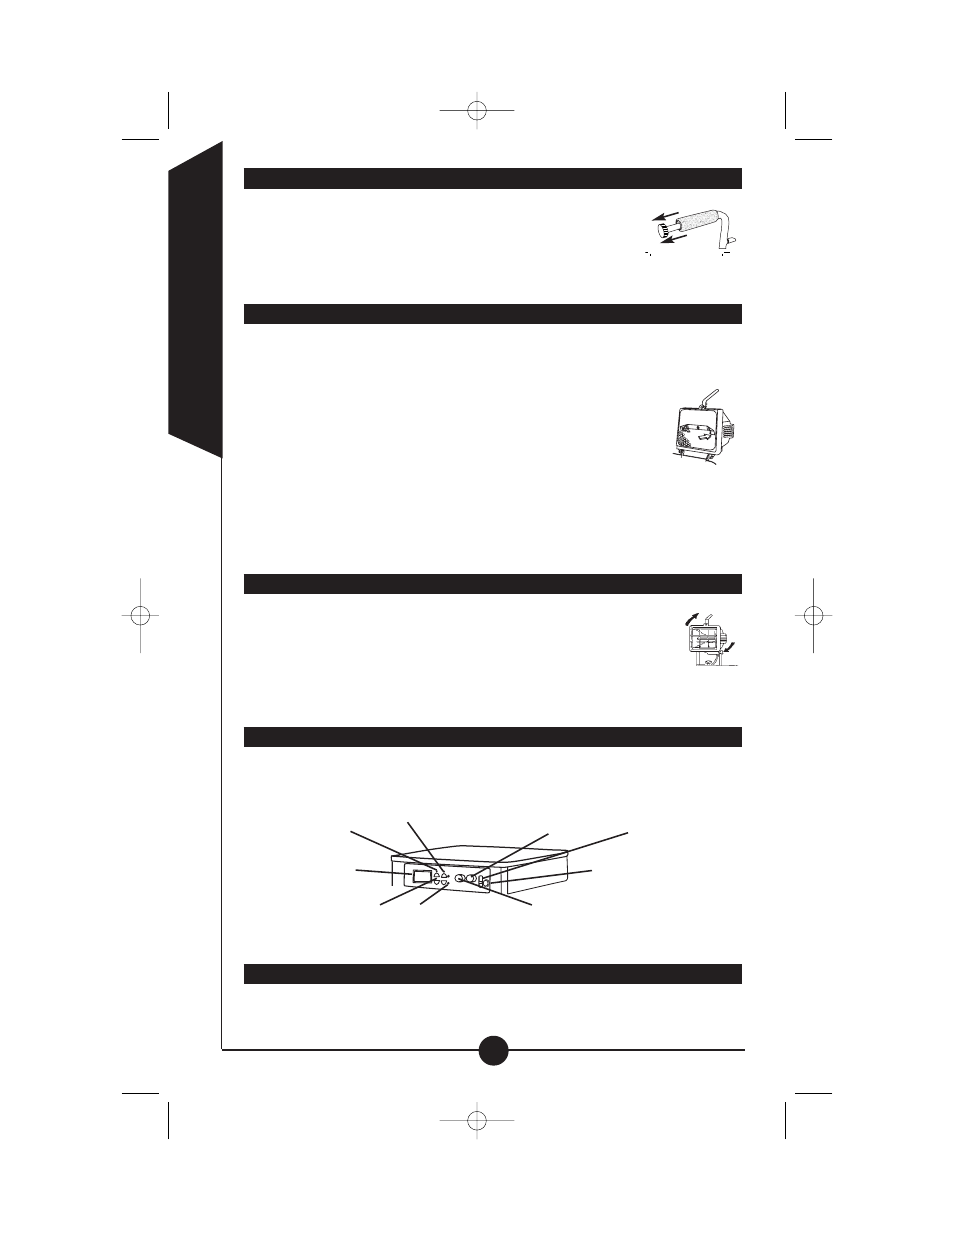
AM/FM Radio Operation
Electrical cord located on the back of the cage/stand must be plugged
into power source for radio to operate.
Two year limited warranty
Cooper Lighting (“the Company”) warrants this product (“the product”) against
defects in material or workmanship for a period of two years from date of origi-
8
ENGLISH
FIG. K
FIG. J
98.5
Displays radio
station selected
Selects AM/FM
radio stations
LED light indicates
station reception
LED light indicates
stereo reception
LED light indicates
stereo/mono
selection
Selects radio
station by turning
knob left or right
Adjusts volume to
be louder by turning
knob to the right
Allows external
CD player to be
used with radio
Turns radio on/off
with press of button
FIG. I
SC1000R I.S 325-1439 6/4/04 4:12 PM Page 8