English – Cooper Lighting SC1000R User Manual
Page 5
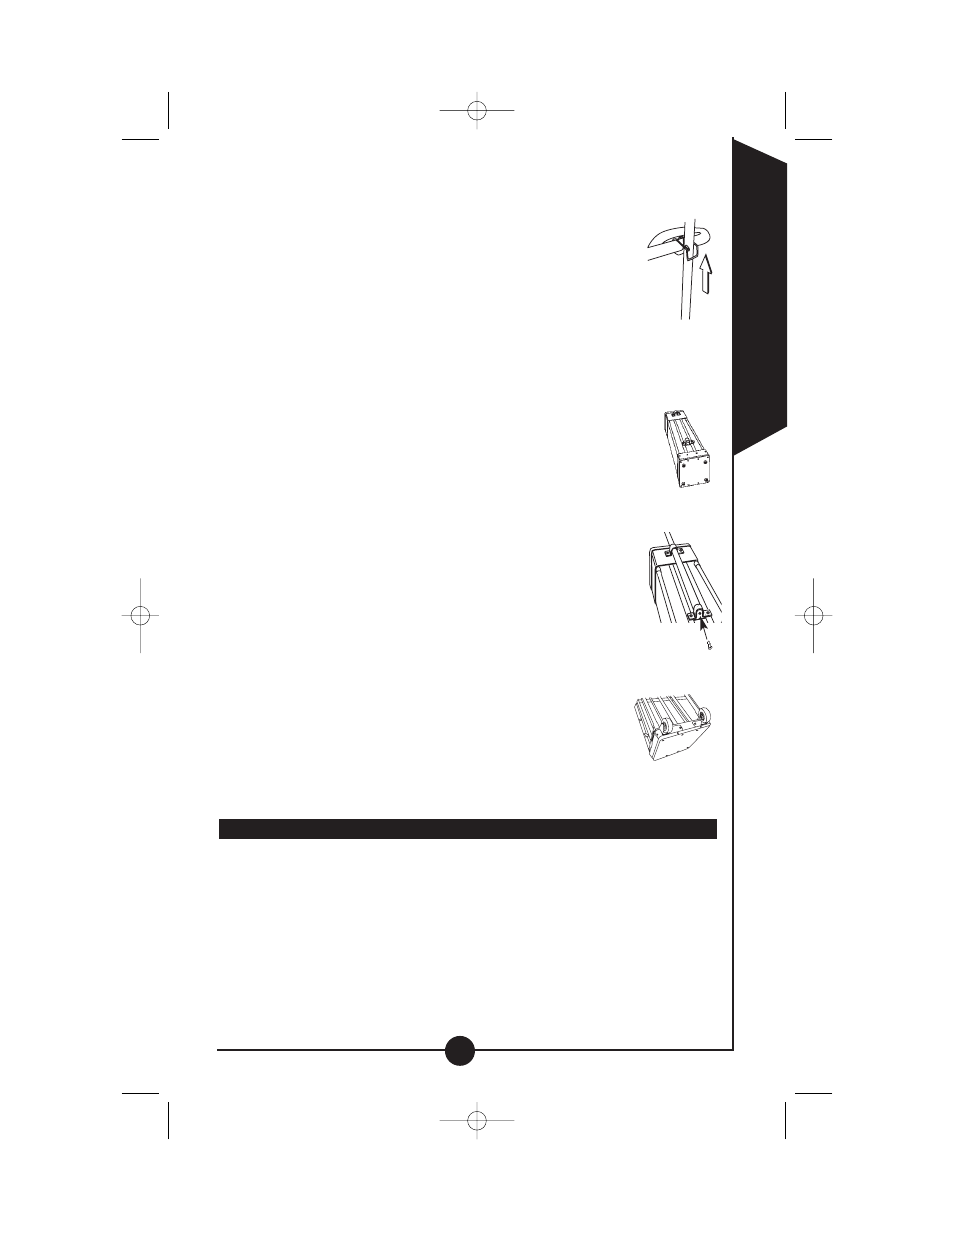
the locking clamp on the center pole of the door (Figure A). This is
done by pulling up on the lock lever and disengaging the top hook
end. The portable unit will remain supported by the lower hook.
Step 3:
Open the door opposite the locking clamp. To open the
door, first release the spring loaded door locks by pulling
the lock knob towards the center of the door until the latch
pin clears the hole. Rotate the door until it stops with
the knee action locking bars fully extended.
Step 4:
Remove the portable light fixture by first raising the unit
off of the hook. Lower the portable fixture to the floor of the cage, and
lean the top of the unit towards the open door. Pull the portable fix-
ture out of the cage and place it upright on the ground. Remove verti-
cal pole and all other loose parts from the cage including all packing
material. Open the door on the other side of the cage
using the same procedure as in Step 3.
Step 5:
Remove all of the hardware from its packaging and check
the “What’s included” list in the owners manual to be sure
that all of the components are available for assembly.
Step 6:
Carefully lay cage on the front face so that the rear of the
cage in facing up, for pole bracket and wheel attachment.
Remove screws from the bracket mounting holes on the
back of the cage and attach bottom pole bracket and top
pole bracket to cage leaving the screws slightly loose.
(Figure B)
. (NOTE: Bottom pole bracket is the bracket with
one end closed to prevent tube from falling through.)
Remove screw from bottom of adjustable pole and slide
adjustable pole down through the two pole brackets and
align notch in tube with formed metal tab inside of the bottom bracket.
Attach pole to bottom bracket using the screw that was
removed (Figure C). Securely tighten all (4) bracket
mounting screws after bottom pole screw has been
secured.
Step 7:
Remove wheel mounting screws on back/side of the
cage and secure wheels in place using the screws
that were just removed (Figure D).
Step 8:
Pick up cage and set it in an upright position.
Use as a stand light
Step 1:
Release the light fixture from the cage door by carefully unlatching
the locking clamp on the center pole of the door. (Figure A) This is
done by pulling up on the lock lever and disengaging the top hook
end. The portable unit will remain supported by the lower hook. Open
the door opposite the locking clamp. To open the door, first release
the spring loaded door locks by pulling the lock knob towards the
center of the door until the latch pin clears the hole. Rotate the door
until it stops with the knee action locking bars fully extended. Remove
the portable light fixture by first raising the unit off of the hook. Lower
the portable fixture to the floor of the cage, and lean the top of the
unit towards the open door. Pull the portable fixture out of the cage
5
ENGLISH
FIG. D
FIG. C
FIG. B
FIG. A
SC1000R I.S 325-1439 6/4/04 4:12 PM Page 5