Am33 lp-p natural gas conversion instructions – Sure Heat 2008 Amana AM33 Natural Gas Conversion Kit User Manual
Page 5
Orifice
Fig. 16
Fig. 17
Fig. 18
Fig. 19
Fig. 15
AM33 LP-P Natural Gas Conversion Instructions
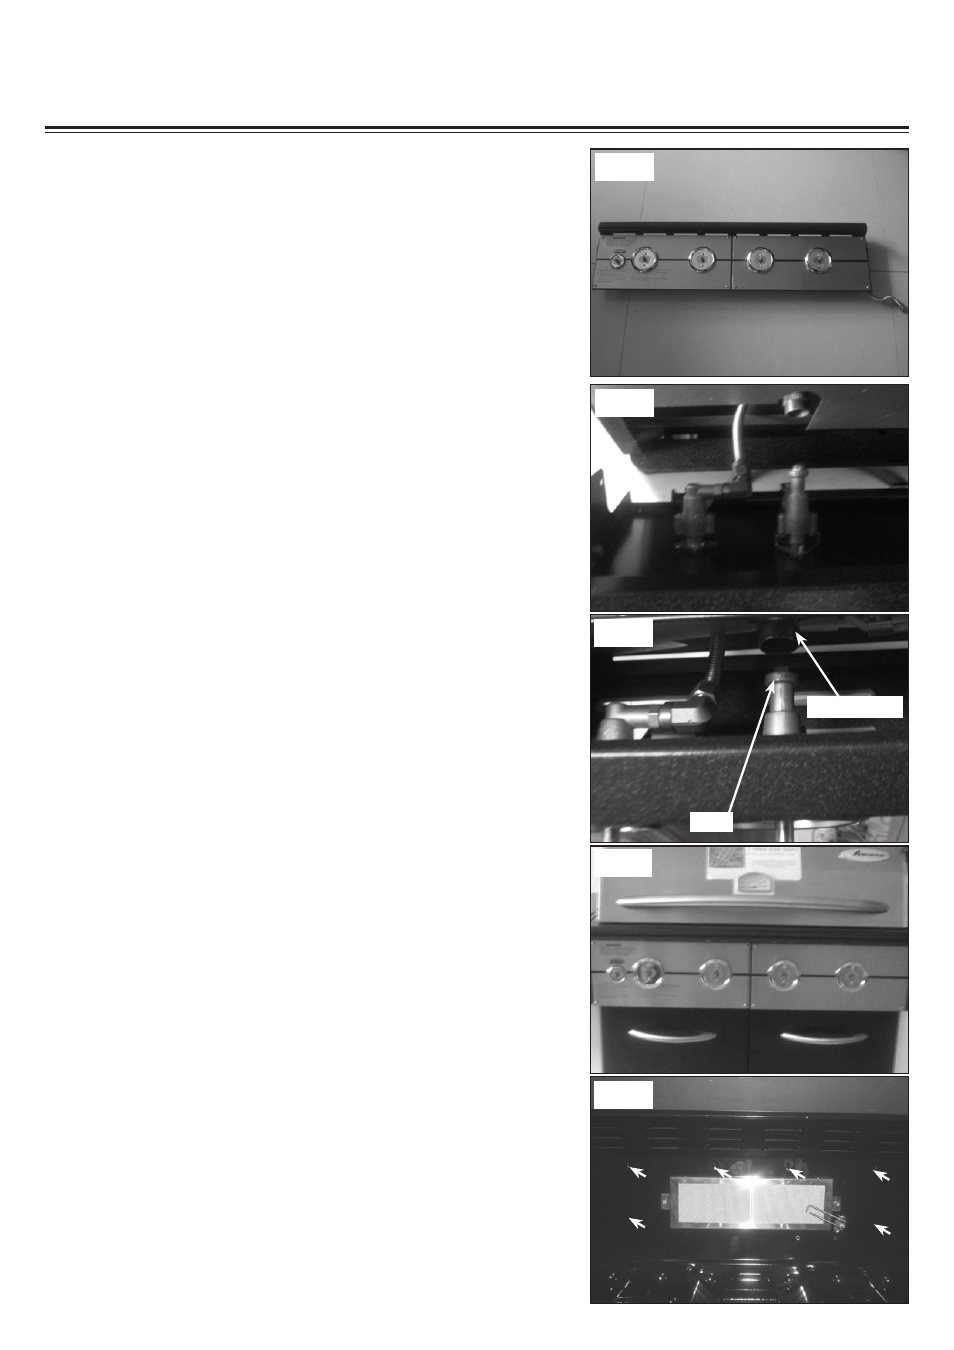
18. Use the four screws removed in step 10-11 to secure
the front control panel in position. (See Fig. 18)
19. Remove the bread warming rack, main cooking grates,
flavor grids and set them aside. Remove the six (6)
screws securing the wind shield and rear IR cover in
position. Remove the rear IR burner cover. (See Fig.
19)
15. Replace the LP manifold with the one provided in the
NG conversion kit. Reattach the flex line to the manifold
and use the eight screws removed in step 13 to attach
the bezels and manifold onto the front control panel.
(See Fig. 15)
NOTE: Make sure the “ OFF” position facing up as
it was.
16. Attach the front control panel onto the grill assembly.
Hold the elbow on the rear IR burner valve and use a
3/4 wrench to tighten the flex line . (See Fig. 16)
Note: Be careful, applying pressure to the elbow of
the valve may cause it to break.
17. Slide the front control panel back in position. Make sure
the orifices of the main burner control insert valves into
the main burner tubes. (See Fig. 17)
Main burner tube