Step 2. set your raid configuration – StarTech.com S352BMU3N Manual User Manual
Page 11
Instruction Manual
7
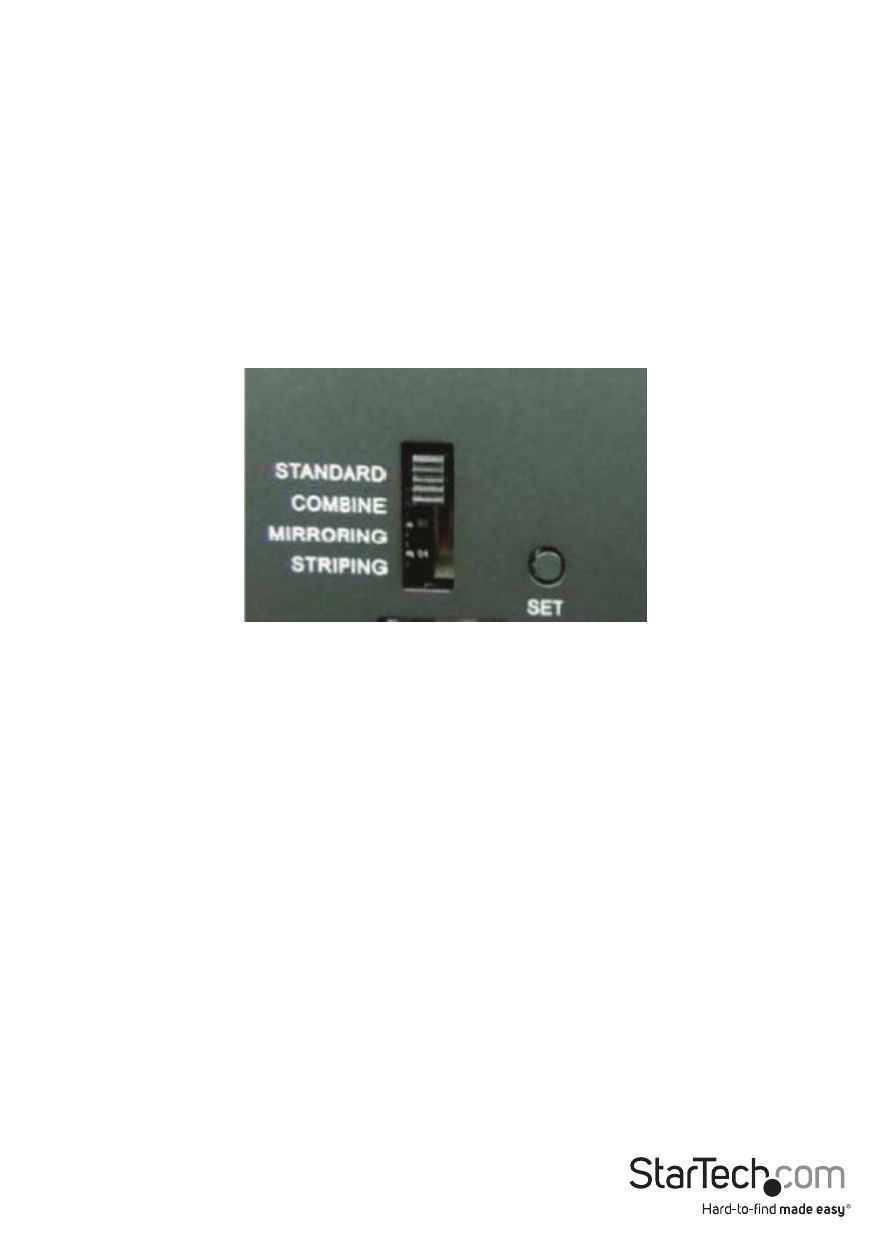
Step 2. Set your RAID Configuration
WARNING! In order to prepare your drives for RAID and Network operation, this
enclosure will configure newly installed drives into an acceptable format (exFAT).
Please be aware that any data currently on the drives may be lost during this process. It
is recommended that you back up all data prior to setting your RAID configuration.
Note: While RAID configuration can be done at any time, we recommending setting
your RAID configuration before initially connecting to your Network.
1. Ensure the unit is powerd off (main power switch at the rear of the housing is set
to off).
2. Using the RAID switch on the back of the unit, set to your desired RAID
configuration. (Available RAID Configurations)
3. Toggle the rear power switch to the on position then press and hold the “Set RAID
button” as you power on the enclosure by pressing the “Front Power Button”.
4. Once the enclosure has turned on, release the “Set RAID button”. You may hear a
buzzer sound from the enclosure as confirmation of the RAID change.
5. Your Desired RAID configuration is now set.
RAID Notes
If changing RAID configuraiton, ensure your enclosure is set back to
STANDARD (JBOD), before setting to a different configuration.
JBOD is only supported in DAS connection or if you are using only
one hard drive with the NAS.,If connecting through NAS with
two drives in JBOD, only one drive will be accessible.
If 2 hard drives are installed, JBOD mode cannot be supported in NAS mode.