Installation, Hardware installation – StarTech.com SV431DDVDUA User Manual
Page 6
Instruction Manual
2
Installation
NOTE: Prior to the installation, please power off all devices that will be connected to
this system.
Ensure that all devices you will connect are properly grounded.
Place cables away from fluorescent lights, air conditioners, and machines that are likely
to generate electrical noise.
If you experience any problems using a USB KVM switch, the following BIOS setup
changes may be necessary for PC users and not necessary for Mac users:
Set HALT ON ERROR to ALL BUT KEYBOARD.
In PNP AND PCI SETUP, set PNP OS INSTALLED to YES and set USB IRQ to ENABLED.
Different systems may use different naming, so contact your system manufacturer for
further assistance with these settings.
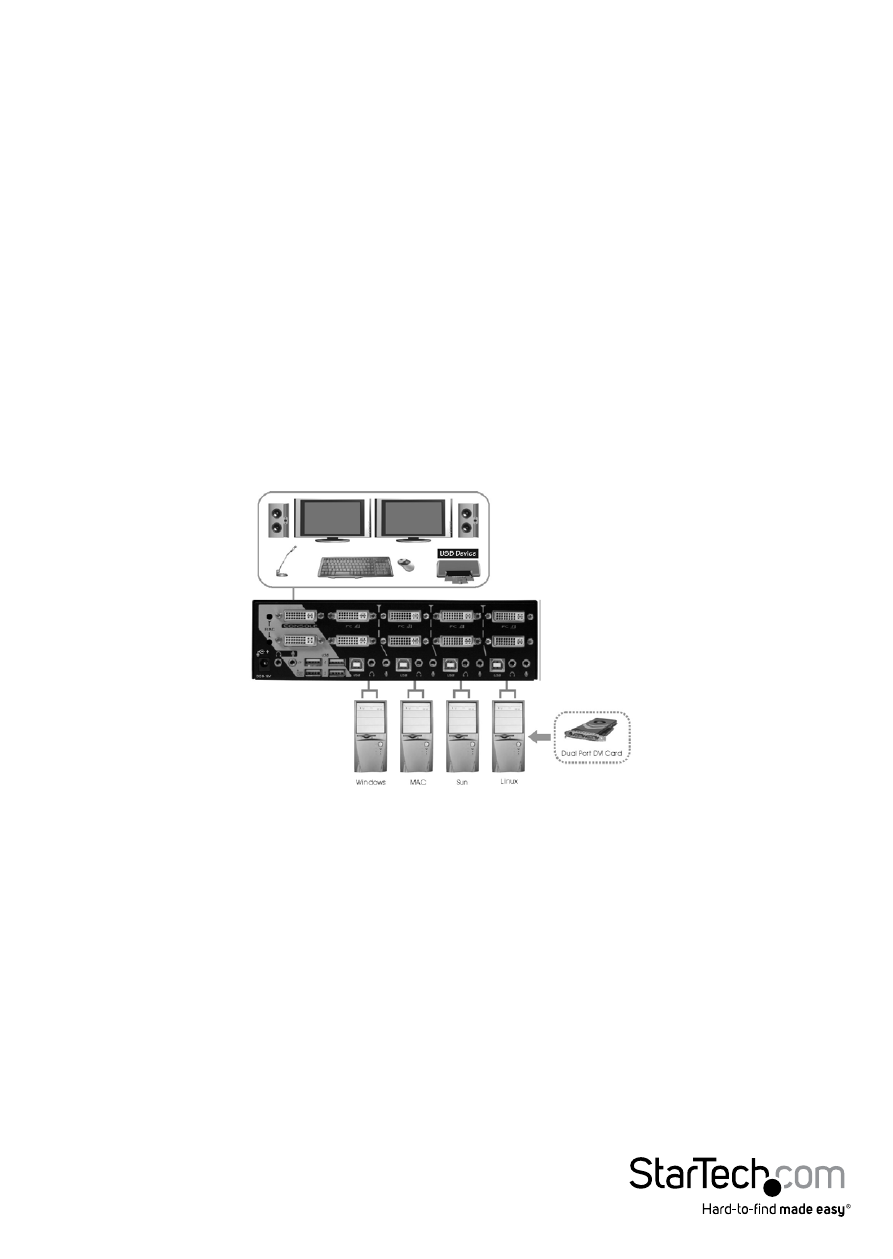
Hardware Installation
1. Plug 1 or 2 monitor(s) into the Console side DVI and/or VGA connectors; plug a USB
keyboard and a USB mouse into the dedicated USB keyboard and mouse ports on
the KVM switch.
2. Use a male-to-male DVI and/or VGA video cable to connect the DVI/VGA
connector(s) on the computer’s video card, to one of the KVM’s PC ports (ie. PC1). A
dedicated video, USB and audio 4-in-1 KVM cable can be used (ie. StarTech.com ID:
USBDVI4N1A6 (DVI) or USBVGA4N1A6 (VGA)).
3. Use a USB type A-B Cable to connect the KVM’s USB port (type B, square connector) for
the PC port used in Step 2, and the USB port on the computer (type A, flat connector).
4. Repeat for Steps 2 and 3 for each PC port on the KVM switch, or each computer you
wish to use on the KVM.