Cascade configuration, Driver installation – StarTech.com CAB1631HDU User Manual
Page 6
Instruction Manual
3
NOTE: After the initial power up, you can hot-plug additional computers or slave KVM
switches without having to power down your KVM.
NOTE: For any “CABxxxx” series KVM Module, the connectors (keyboard and mouse) for
the Local Console port on the rear of the KVM module are not active while the module
is connected to the LCD Console by the C-36 connector. When the C-36 connector is no
longer connected to the LCD Console, the keyboard/mouse ports become active and
the KVM module can act as a rear mounted standalone KVM switch. The Local VGA port
can be connected to an external VGA monitor at any time.
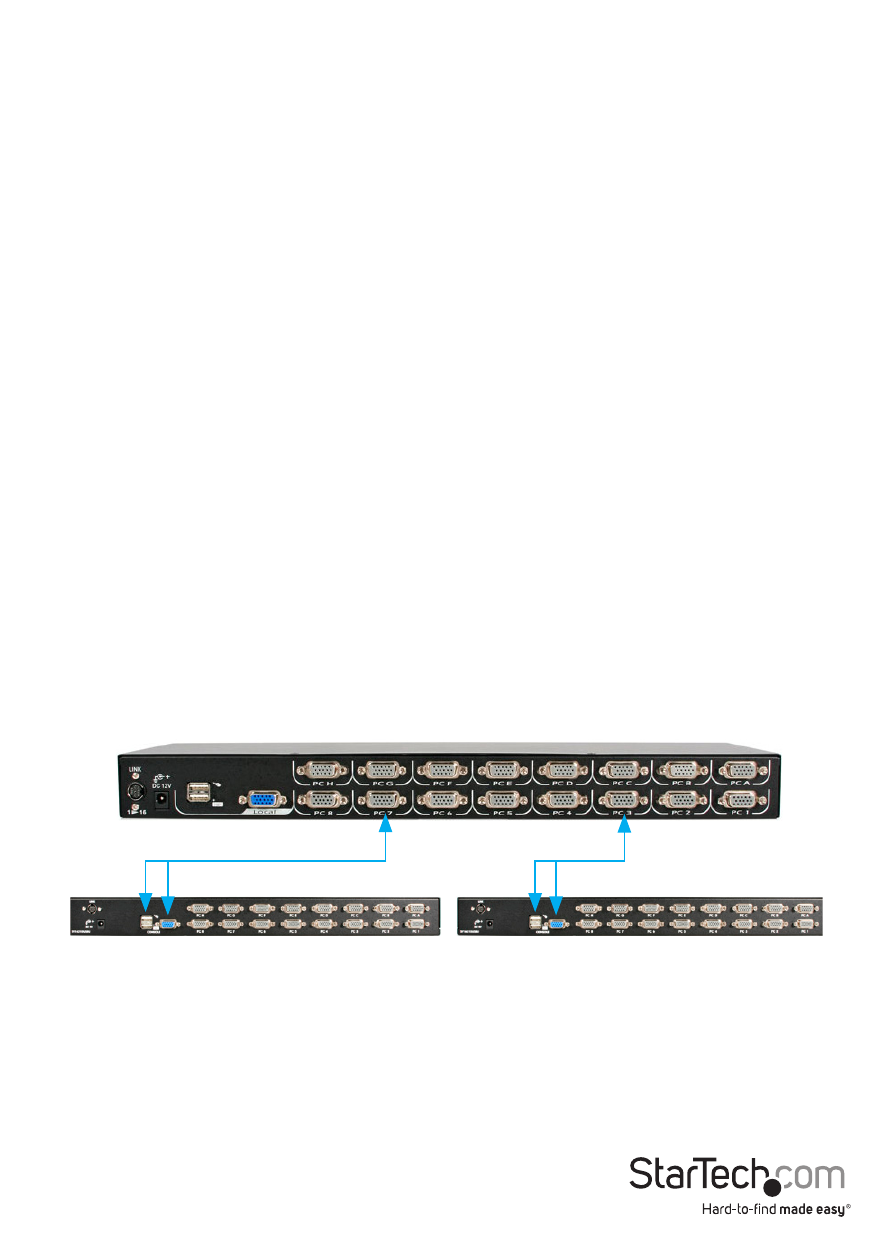
Cascade Configuration
You can connect a second level of KVM switches to one or more of your Master KVM
switch’s PC ports. The KVM switches connected to the Master switch are know as
Slaves. Once connected, the KVM switches will automatically configure themselves as
either Master or Slaves. You can only connect an equal or “smaller” KVM to the Master
KVM. For example, a 16-port Master KVM switch can have both 16-port and 8-port
slaves. An 8-port Master KVM switch can only have 8-port KVM slaves or lower.
The 8-port KVM can support 64 PCs, with 8 8-port Slave KVMs, each connected to 8
PCs. The 16-port KVMs can support 136 computers, with 8 16-port Slave KVMs, each
connected to 16 computers. The Slave KVMs must be connected to the 1~8 ports,
not the A~H ports on the Master KVM.
To cascade your KVMs, use a StarTech.com KVM cable to connect one of your Master
switch’s PC ports to the Slave switch’s Console ports.
A slave KVM module may be mounted to the rear vertical poles inside a rack cabinet by
the rear brackets with the connectors facing out.
KVM cables
* 16-port model shown
Driver Installation
The KVM Module uses generic keyboard/mouse/monitor drivers that are built into the
operating system, so no additional drivers are required.