Mark, Template, For flush mounting) – Specialty Concepts MARK/22 User Manual
Page 9
MARK
/
(
15,20,22
)
TEMPLATE
(for flush mounting)
TOOLS AND MATERIALS NEEDED:
Slotted screw
driver, Wire cutter/strippers, Key
hole saw
or saber saw
, Pencil, scrat
ch aw
l or other marker
Wire of proper gauge to run from the panels, to the MARK/(15,20), and to the battery
(See
INSTALLATION INSTRUCTIONS #6: WIRE TYPE / SIZE
)
Mounting fasteners of appropriate ty
pe for w
all material
Included are four 3/4 - #6 screw
s and a spare fuse (20 amp
AGC for the MARK/15). (25 amp AGC for the MARK/20,22).
A
lso for Flush Mounting:
A
lso for w
all mounting: (MA
RK/(15,20,22) w
ith 4X7 BOX):
Drill w
ith 3/32" and 3/8" bits
1/2 inch Romex
strain relief clamps
Installation steps:
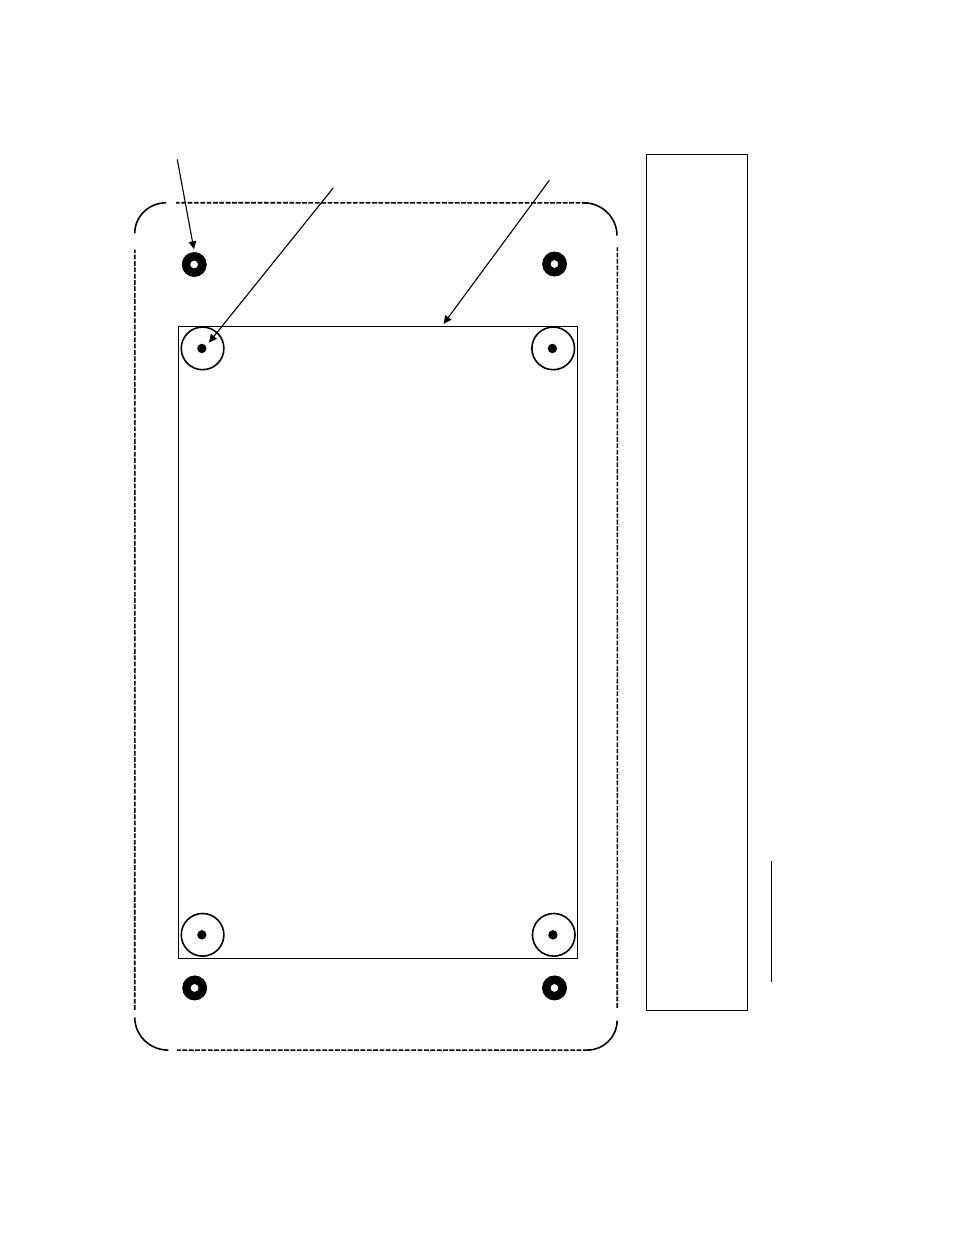
1. Tape template to surface where t
he MARK/(15,20,22) is to be installed.
2. Punch “Mounting Holes” and “Cutout Corner Holes” with nail or awl.
3. Remove template. Drill “Cutout Co
rner Holes” with 3/8” drill. Dr
ill “Mounting Holes” with 3/32” drill.
4. Connect outside edge of “Cutout Corner Holes” with a pencil line.
5. Use suitable saw to cut along pencil line.
6. Make electrical connections
. (Refer to instruction manual)
7. Mount the MARK/(15,20,22) to wall using supp
lied wood screws or other appropriate hardware.
Mounting Holes
(1 of 4 )
Cutout Corner Holes
(1 of 4 )
Cutout Outline