Mounting the sd505-6rb – SilentKnight SD505-6RB 6 Relay Base User Manual
Page 2
Model SD505-6RB Installation Instructions
2
P/N 151192
7550 Meridian Circle
Maple Grove, MN 55369-4927
612-493-6455
800-328-0103
Fax: 612-493-6475
© 1999 Silent Knight
P/N 151192, 6/99
http://www.silentknight.com
Class B (Style 4)
Figure 3 illustrates how to wire the SD505-6RB
to the SLC loop connectors for Class B (Style 4)
supervision.
Figure 3: Class B (Style 4) SLC Wiring
Mounting the SD505-6RB
The SD505-6RB mounts on a standard single or
double gang electrical switch box.
Follow these steps to mount the SD505-6RB:
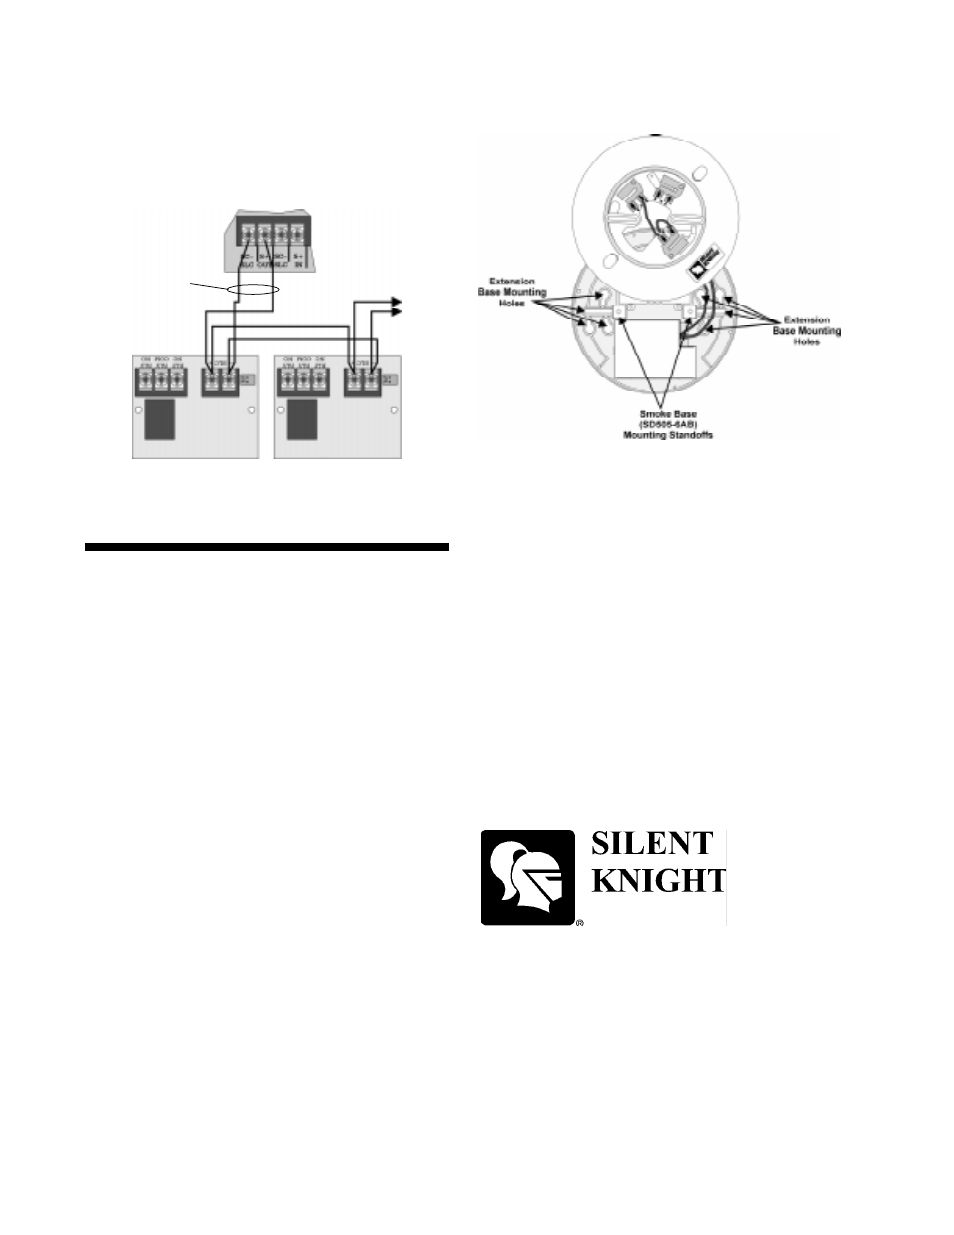
1. Mount the extension base using the #8 1-1/2
screws through the extension base mounting
holes. (See Figure 4.)
2. Wire the SLC loop as shown in Figure 2 or
Figure 3.
3. Snap the SD505-6RB cover plate over the
SD505-6RB circuit board. See Figure 1.
4. Connect wiring harness (P/N 140675) to the
smoke base as shown in Figure 1.
5. Plug wiring harness (P/N 140675) into
harness connector. Refer to Figure 1.
6. Attach the smoke base (P/N SD505-6AB) to
extension base (P/N 120505) using the
#8 1/2” screws. (See Figure 4.)
Do Not over tighten screws.
Figure 4: Mounting the SD505-6RB
Supervised
Power Limited