Maintenance (continued) – Shellab SMO5CR-2 User Manual
Page 27
27 |
P a g e
MAINTENANCE (CONTINUED)
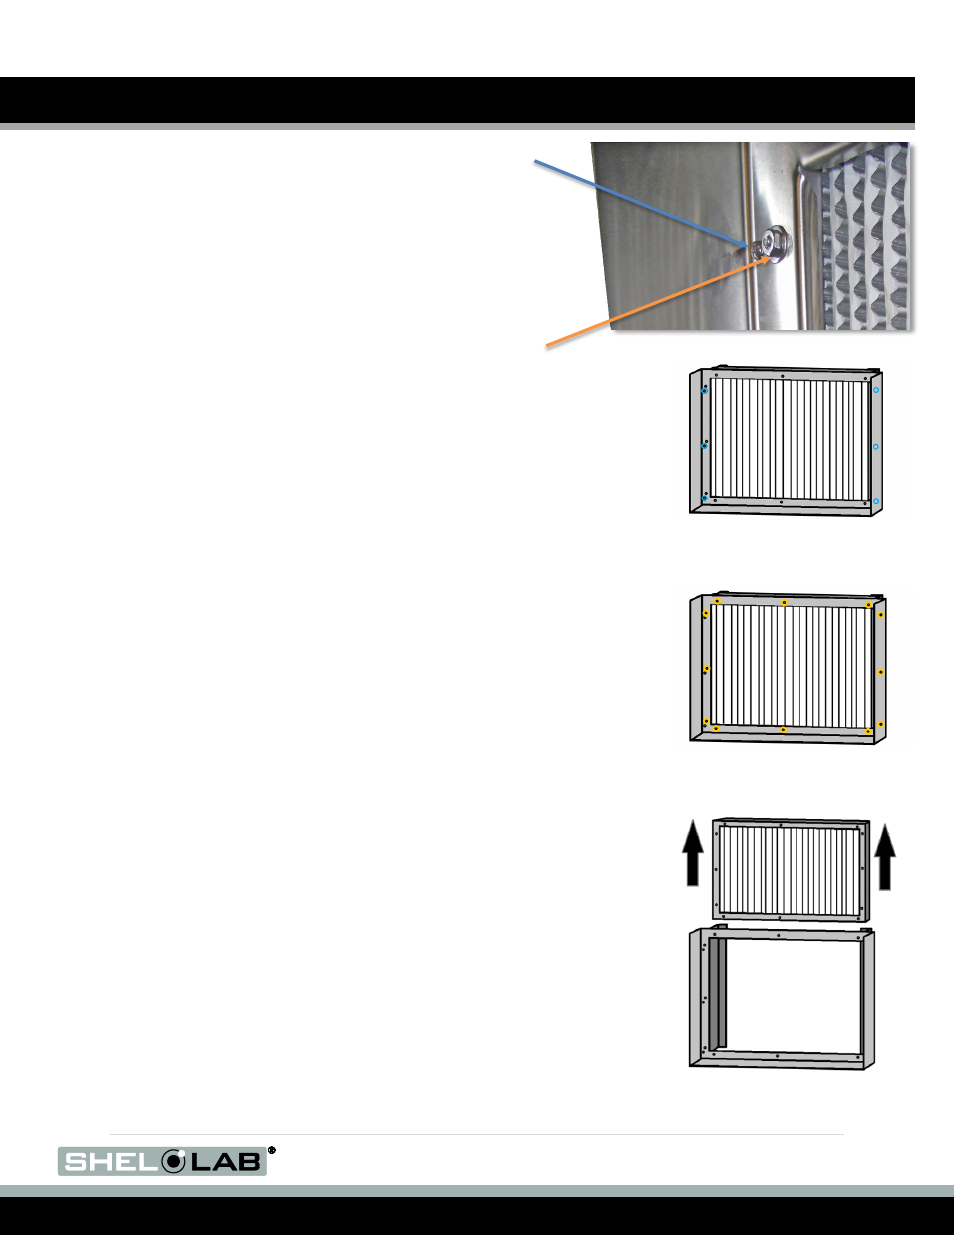
6. Loosen but do not remove the six (6) mounting bracket screws on the
right air duct.
a. This creates play (looseness) in the mounting bracket that
will make it easier to slide out the HEPA filter.
7. Unscrew and remove the 12 HEPA filter pin nuts and washers.
8.
Slide the old HEPA filter assembly out of the air duct’s mounting
bracket.
9. Slide the new HEPA filter assembly into the air duct assembly.
a. Screw in the 12HEPA filter pin screws and washers.
b. Retighten the six (6) mounting bracket screws.
10. Reinstall the air duct assembly on the right wall.
11. Reinstall the oven chamber ceiling liner.
12. Screw in the back wall nuts and washers to secure the ceiling liner.
13. Reinstall the chamber gasket.
6) Loosen the Mounting
Bracket Screws
Mounting Bracket
Screw
HEPA Filter Pin Nut
and Washer
7) Remove the HEPA Filter
Pin Nuts and Washers
8) Slide the HEPA Filter
Out of the Air Duct