Attaching lenses, Installation, Removal – RED CANON EOS MOUNT User Manual
Page 11
DECEMBER 18, 2011
© 2011 RED.COM INC.
9
ATTACHING LENSES
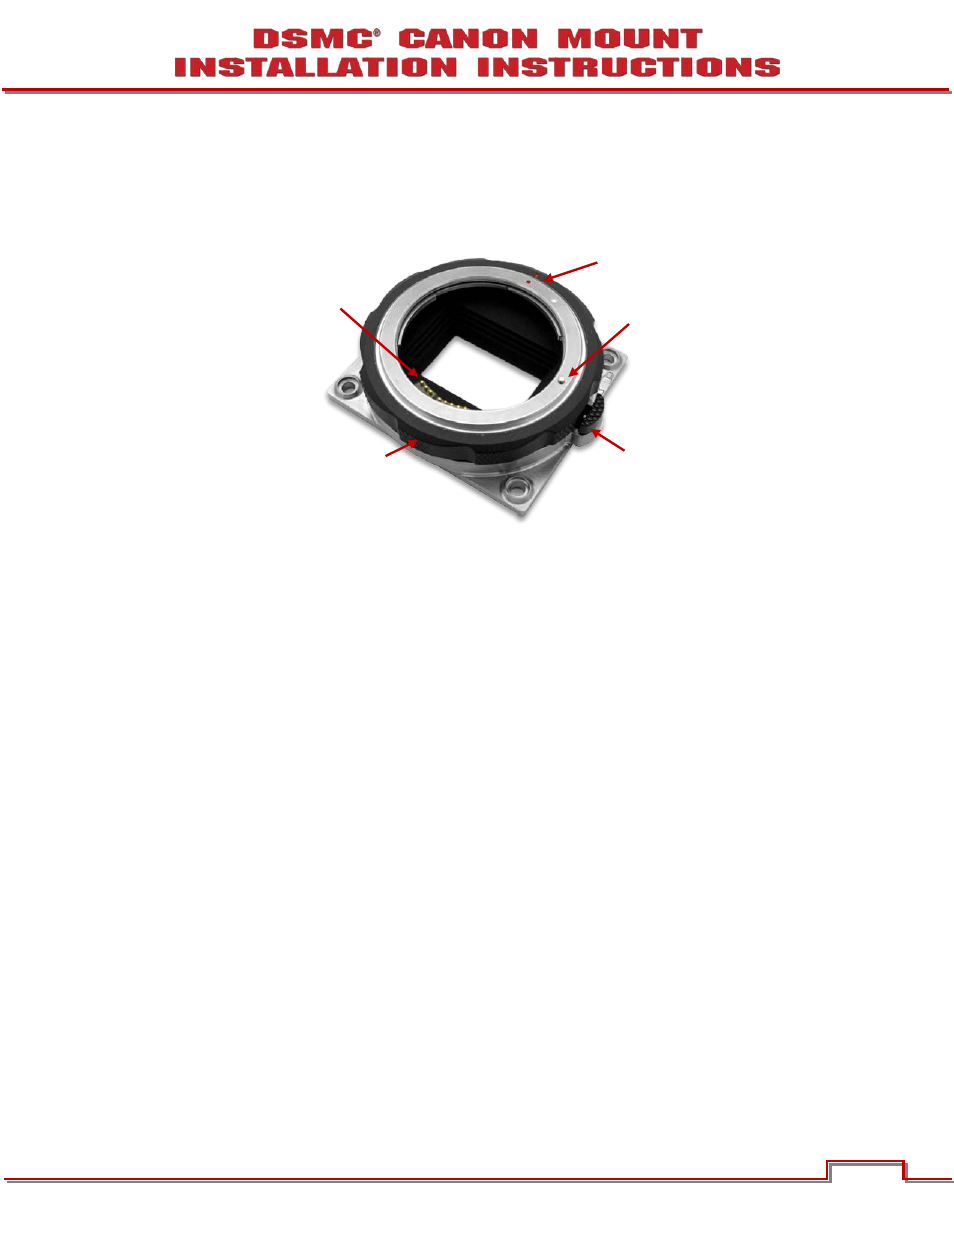
The DSMC Canon Mount allows you to install Canon lenses. The Lens interface allows the camera and
Canon EF or EF-S lenses to communicate, providing live aperture, focus and zoom data.
INSTALLATION
1. Rotate the lock ring in the extreme counter-clockwise (unlocked) direction until the Red line on the
lock ring lines up with the Red dot on the mount face.
2. Line the Red dot on the mount with the Red mark on the lens (if equipped).
3. Rotate the lens in a clockwise direction until it stops and the lock pin secures the lens in place.
4. Rotate the lock ring clockwise to secure the lens.
REMOVAL
1. Rotate the lock ring in the extreme counter-clockwise (unlocked) direction until the Red line on the
lock ring is in the 12 o’clock position.
2. Press the release button.
3. While pressing the release button, rotate the lens counter-clockwise until the Red mark on the lens (if
equipped) lines up with the Red line on the lock ring.
4. Remove the lens from the mount.
Release
Button
Lock Ring
Lens
Interface
Lock Pin
Alignment Marks