RED ONE QSG User Manual
Page 5
RIGHT HANDLE INSTALLED
13. Install top handle (pointing toward rear of camera) using two (2) Allen bolts.
14. Assemble right handle, wing nuts and washers - do not tighten.
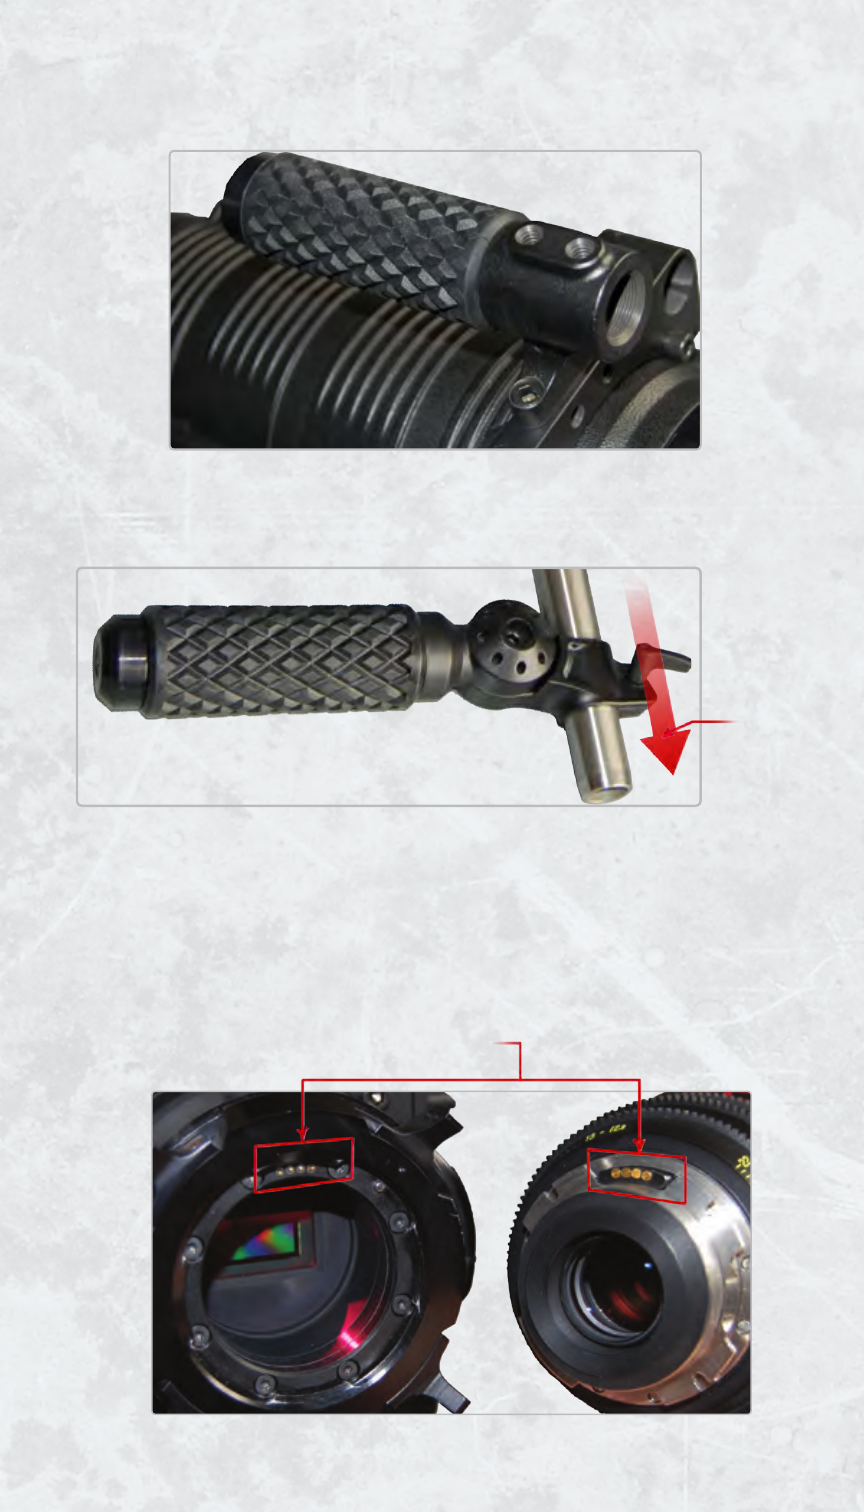
15. Slide right handle over front of either rod. Lock in place using wing nut.
16. Working from front of camera, remove body cap from PL Mount by rotating retaining
ring counter-clockwise.
17. Mount and secure lens to PL Mount by inserting the tabs, (note notches and index pin)
and rotate retaining ring clockwise.
IMPORTANT: IF USING S4/I COMPATIBLE LENSES DATA PINS SHOULD BE
ORIENTED TO 12 O’CLOCK WHEN MOUNTING LENS TO ENSURE COMMU-
NICATION BETWEEN LENS AND CAMERA.
TOP HANDLE
INSTALLED
FRONT
OF
CAMERA
NOTE:
POSITION HANDLE HORIZONTALLY
TO EASE IN ASSEMBLY