Camera assembly procedure – RED ONE QSG User Manual
Page 3
BASE PRODUCTION PACK
ASSEMBLY SHOWN
WITH TOP MOUNT AND TOP HANDLE
The following instructions will outline basic assembly of the RED ONE™ camera body,
BASE PRODUCTION PACK, RED
™
LCD, REDFLASH
™
, RED DRIVE®, and RED
BRICK®.
When connecting cables between camera and components, align Red dots
on cable and connector and press in firmly to establish a secure connection.
Wingnuts can be indexed by pulling out and rotating to desired position. This
may be necessary during assembly to clear components.
1. Remove your RED ONE
™
camera body and all accessories from packaging and
place on a suitable work surface preferably in a dust-free environment.
2. Thoroughly inspect your camera and accessories.
• If there is any physical damage to your camera or accessories, please contact us
.
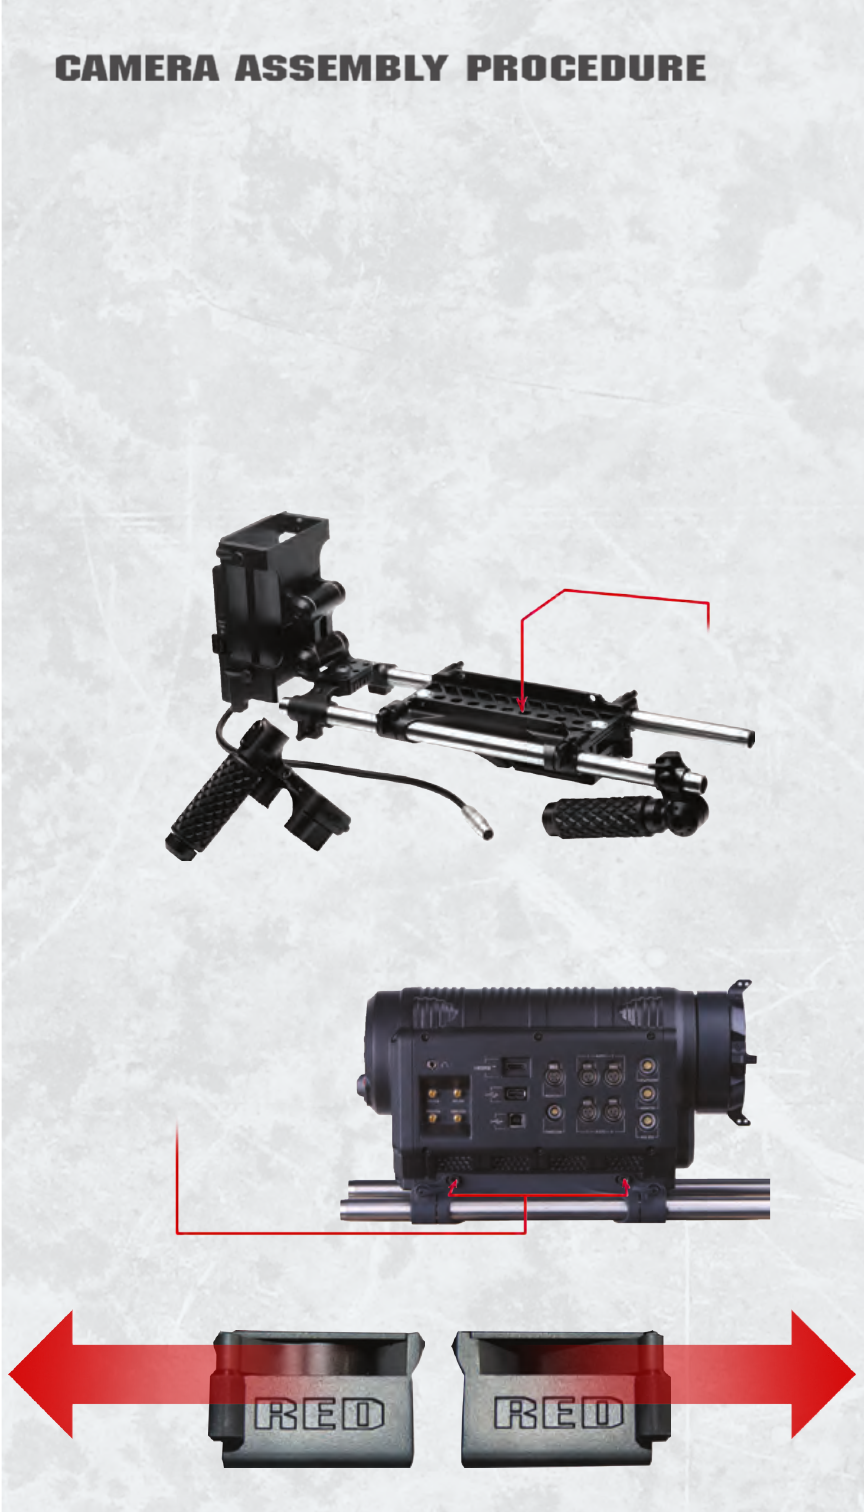
3. Assemble bottom plate, wing nuts and washers - do not tighten.
4. Set camera body onto bottom plate and align four (4) mounting holes - two (2) on each
side - install Allen bolts and tighten.
5. Slide rods through mounting holes in bottom plate until centered. Lock in place using
wing nuts.
6. Ensure shoulder dovetail lock is on “R” side of RED
™
logo and slide into bottom plate.
Install end with RED
™
logo facing rear of camera. Secure in place by sliding lock to “D”
side of RED
™
logo.
CAMERA ASSEMBLY PROCEDURE
CAMERA ASSEMBLY PROCEDURE
MOUNTING HOLES
ATTACH CAMERA TO
BOTTOM PLATE
BOTTOM PLATE
UN-LOCKED
LOCKED
*** TIP***
HAND TIGHTEN THE 4
SCREWS, THEN
SINCH TIGHT WITH
3/16 ALLEN WRENCH