Dmx control: application example, For ohm 'standard' dmx control, For ohm 'advanced' dmx control – PRG OHM User Manual 1.12 User Manual
Page 21
OHM™ LIGHT USER MANUAL
19
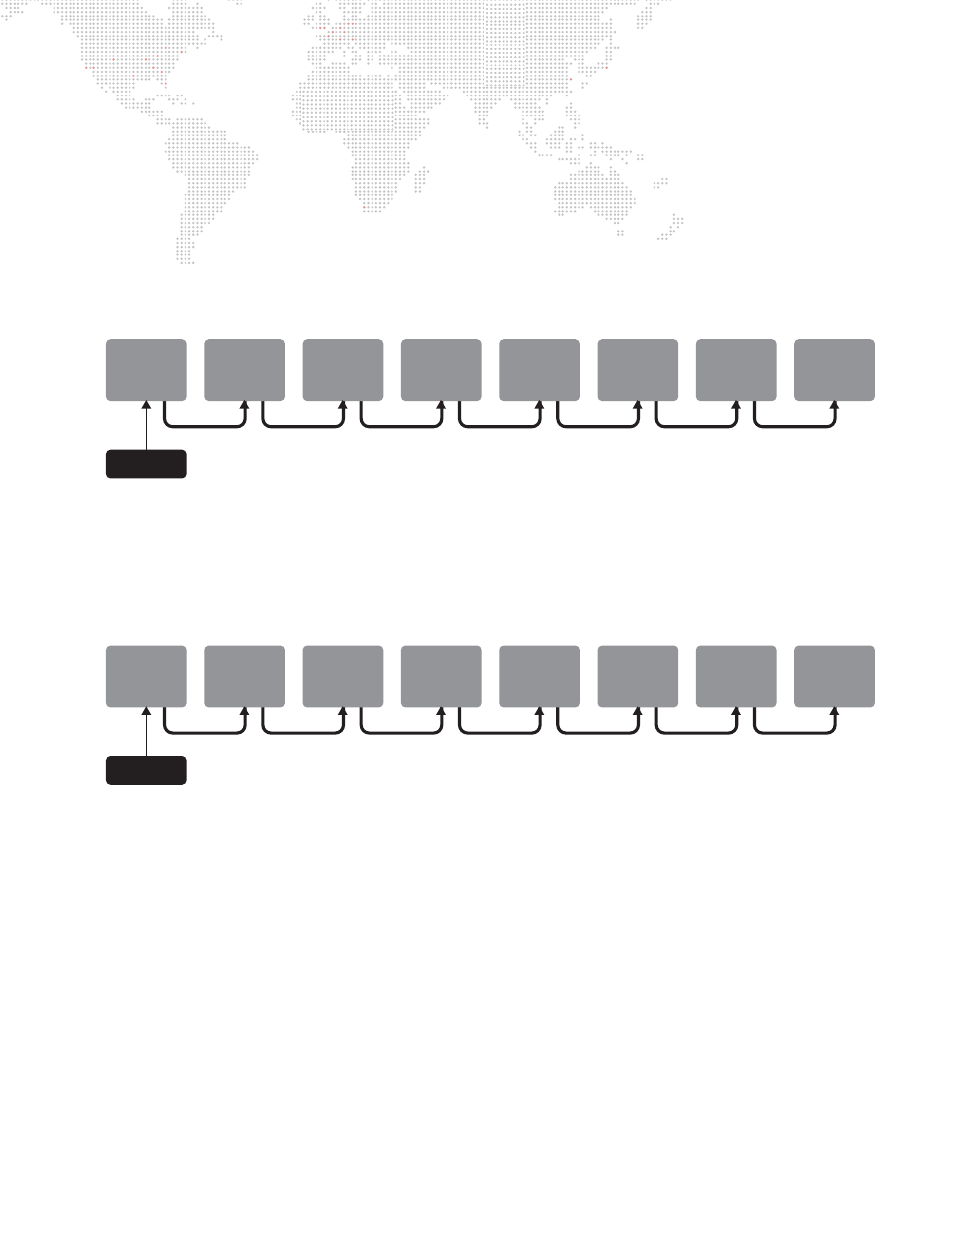
DMX Control: Application Example
OHM is fully controllable from the 5-pin DMX IN port on the MMI on the side of the fixture. The 'DMX Thru' jack also
allows you to daisy-chain fixtures. Keep in mind the following points regarding DMX control:
For OHM
'Standard'
DMX Control:
+
Each OHM to be controlled via DMX must have the address set accordingly.
+
For example, the first fixture to be controlled could be set to DMX address 001.
+
OHM (under 'Standard') DMX Control protocol uses 2 channels per fixture; so the subsequent fixtures should be
offset by 2 as shown in the example figure below:
For OHM
'Advanced'
DMX Control:
+
Each OHM to be controlled via DMX must have the address set accordingly.
+
For example, the first fixture to be controlled could be set to DMX address 001.
+
OHM (under 'Advanced) DMX Control protocol uses 10 channels per fixture; so the subsequent fixtures should be
offset by 10 as shown in the example figure below:
OHM
#1
DMX: 001
DMX
OHM
#2
DMX: 003
OHM
#3
DMX: 005
OHM
#4
DMX: 007
OHM
#5
DMX: 009
OHM
#6
DMX: 011
OHM
#7
DMX: 013
OHM
#8
DMX: 015
OHM
#1
DMX: 001
DMX
OHM
#2
DMX: 011
OHM
#3
DMX: 021
OHM
#4
DMX: 031
OHM
#5
DMX: 041
OHM
#6
DMX: 051
OHM
#7
DMX: 061
OHM
#8
DMX: 071