Installation instructions (continued), Caution – Perfect Aire PATCH10000 User Manual
Page 12
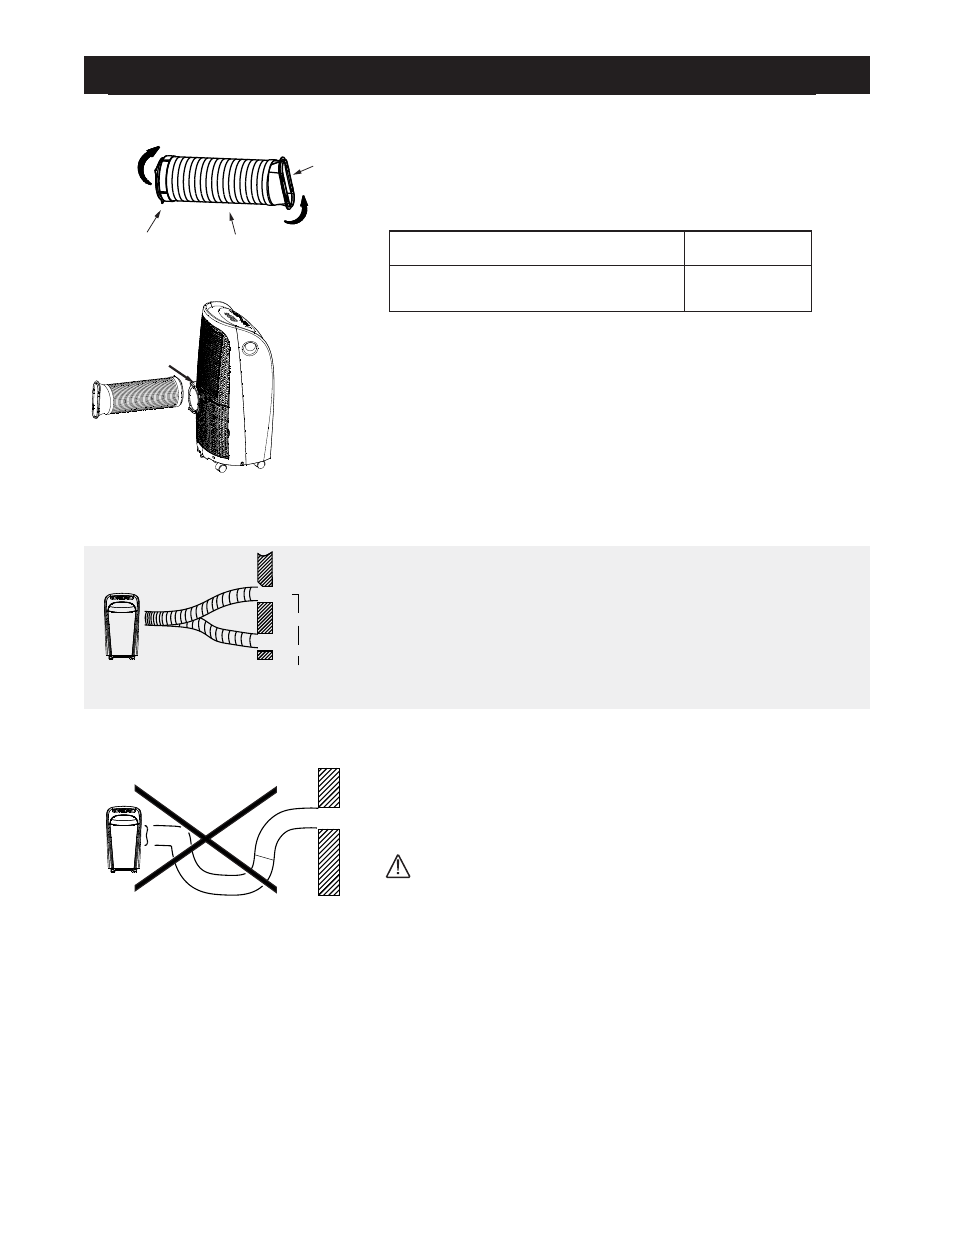
INSTALLATION INSTRUCTIONS (CONTINUED)
Exhaust hose installation:
The exhaust hose and adaptor must be installed or removed
in accordance with the usage mode as indicated below.
1. Install the vent joint and flat mouth adaptor onto the exhaust
hose as shown in Fig. 16. Refer to the previous pages for
window kit installation.
2. Slide the exhaust hose into the air outlet opening in the direction
depicted by the arrow in Fig. 17.
Fig. 17
Fig. 19
Fig. 18
max 47.25 in (120 cm)
min 11.8 in (30 cm)
Fig. 16
COOL or AUTO mode
Install Hose
Remove Hose
FAN, DRY, HEAT*
(*for units with electric heating function)
Vent
Joint
Flat Mouth
Adaptor
Exhaust
Hose
11
The duct can be compressed or extended moderately
according to the installation requirements, but it is
desirable to keep the duct length to a minimum.
IMPORTANT:
DO NOT OVER BEND THE DUCT. See Fig. 19.
NOTE: Wall ventilation accessories are not available for
this product.
Make sure that there is no obstacle around the air outlet of
the exhaust hose (in the range of 20 in (500 mm)) in order for
the exhaust system to work properly.
CAUTION:
Note: Flat mouth adaptor and vent joint must be threaded
counter clockwise onto the exhaust hose. Extend both ends of
the exhaust hose 1-2 inches before installing these pieces onto
the exhaust hose.