Work piece and work area set up, General operating instructions – Chicago Electric 67616 User Manual
Page 10
Page 10
For technical questions, please call 1-800-444-3353.
Item 67616
Work piece and Work area Set up
1. Designate a work area that is clean and well-
lit. The work area must not allow access by
children or pets to prevent distraction and injury.
2. Route the power cord along a safe route to reach
the work area without creating a tripping hazard or
exposing the power cord to possible damage. The
power cord must reach the work area with enough
extra length to allow free movement while working.
3. Secure loose work pieces using a vise or clamps
(not included) to prevent movement while working.
4. There must not be objects, such as utility lines,
nearby that will present a hazard while working.
General Operating instructions
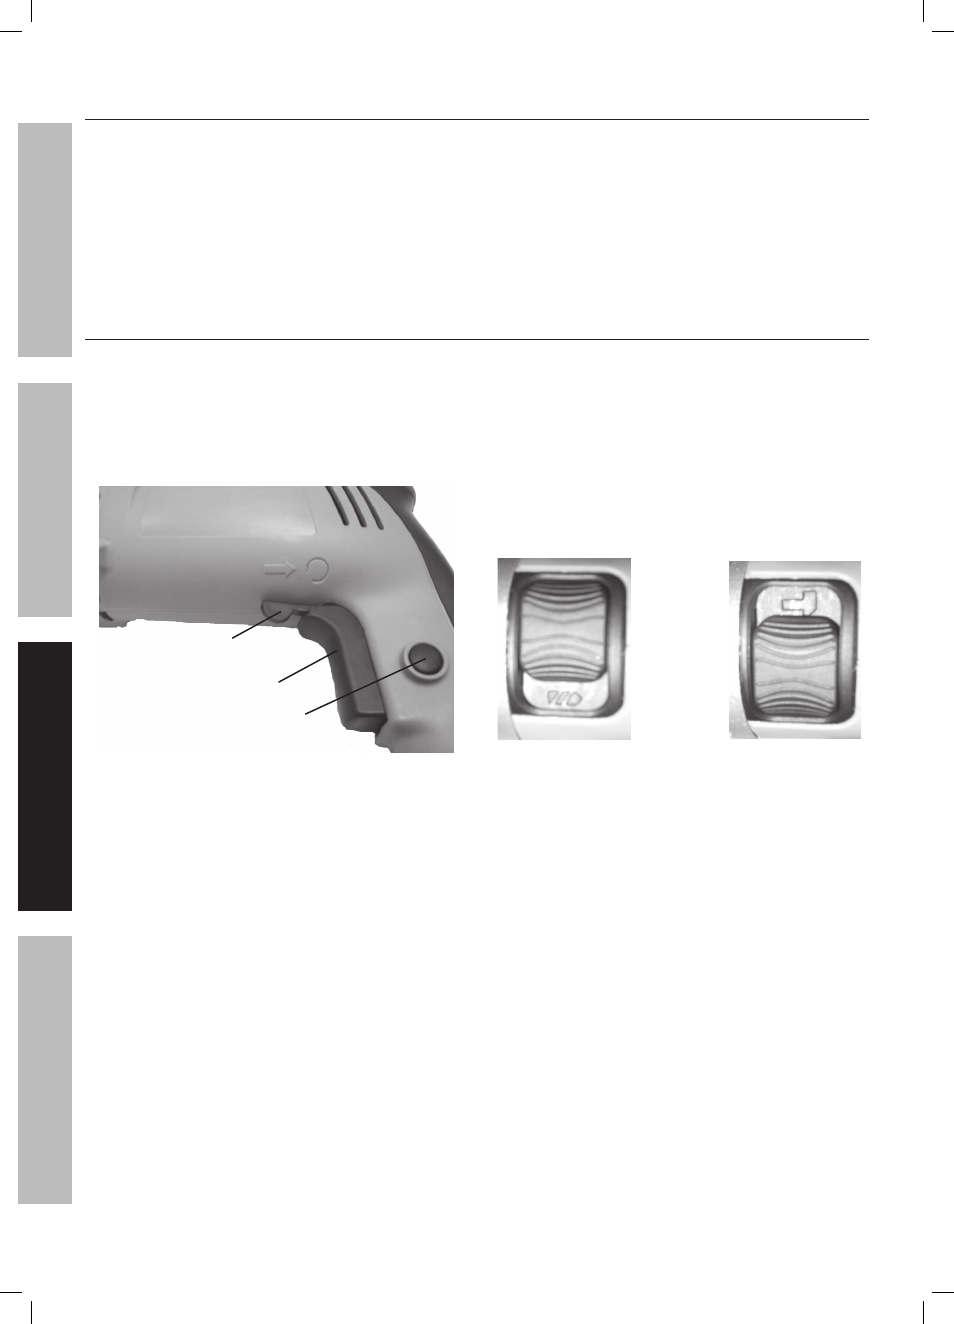
1. Plug Power Cord (53) into working outlet.
2. Slide the Forward/Reverse Switch (54) to the correct
position for the current job. For
drilling (clockwise
rotation), slide the Switch to the
right. To rotate
Chuck in a counterclockwise direction, slide the
Forward/Reverse Switch to the
left. See Figure 2.
3.
Figure 2
Forward/Reverse
Switch (54)
Trigger (55)
Lock Button (56)
Forward/Reverse
Switch positioned to
this side indicates
“reverse” bit rotation
Verify bit is securely locked in Chuck.
4. Press Trigger (55) to activate. To increase
variable drilling speed, continue pressing
down on Trigger (55). Decreasing pressure
on Trigger will slow the drilling speed.
5.
WaRninG! Use both hands during use.
6. For controlled depth drilling, loosen Auxiliary
Handle and slide Depth Gauge into gauge slot
and re-tighten Handle. The Depth Gauge has
two sets of markings on opposite faces of the
gauge. One is in half inch increments and the
other in 10 mm increments (increments are
not precise values, only general guides).
7.
nOtE: Depth Gauge length may not
be adequate for all drill bits used.
8. Insert bit and tighten the chuck. Loosen Auxiliary
Handle, place tip of bit against a solid, hard
surface and extend Gauge until against same
surface. Determine required hole-depth and retract
Gauge accordingly. Tighten Auxiliary Handle.
9. To switch between plain drilling and hammering
mode (drilling with an oscillating hammer motion),
slide the Mode Switch (21) to left or right. The “drill”
symbol indicates plain drilling while the “hammer”
symbol indicates hammer drilling. See Figure 3.
10.
Figure 3
Mode Switch
(21)
(Top View)
Drill symbol
Hammer symbol
After pressing Trigger, press Lock Button (56)
to keep drill running without keeping finger on
Trigger. Press Trigger again to unlock.
11.
WaRninG! use this function OnlY when
drilling soft materials. Do not drill or hammer
drill hard, brittle materials such as steel or
concrete with lock Button pressed (On). If drill
bit catches on material, the high torque will cause
the tool to twist around without stopping. This
violent action could cause injury to your hands and
arms. It could also damage the Hammer Drill.
12. To prevent accidents, turn off the tool and
disconnect its power supply after use. Clean, then
store the tool indoors out of children’s reach.
Sa
FE
tY
Op
ER
ati
O
n
m
aint
Enan
CE
SE
tup