Installing the projector, Fitting the lamp – OmniSistem PR Pilot 250 Wash User Manual
Page 4
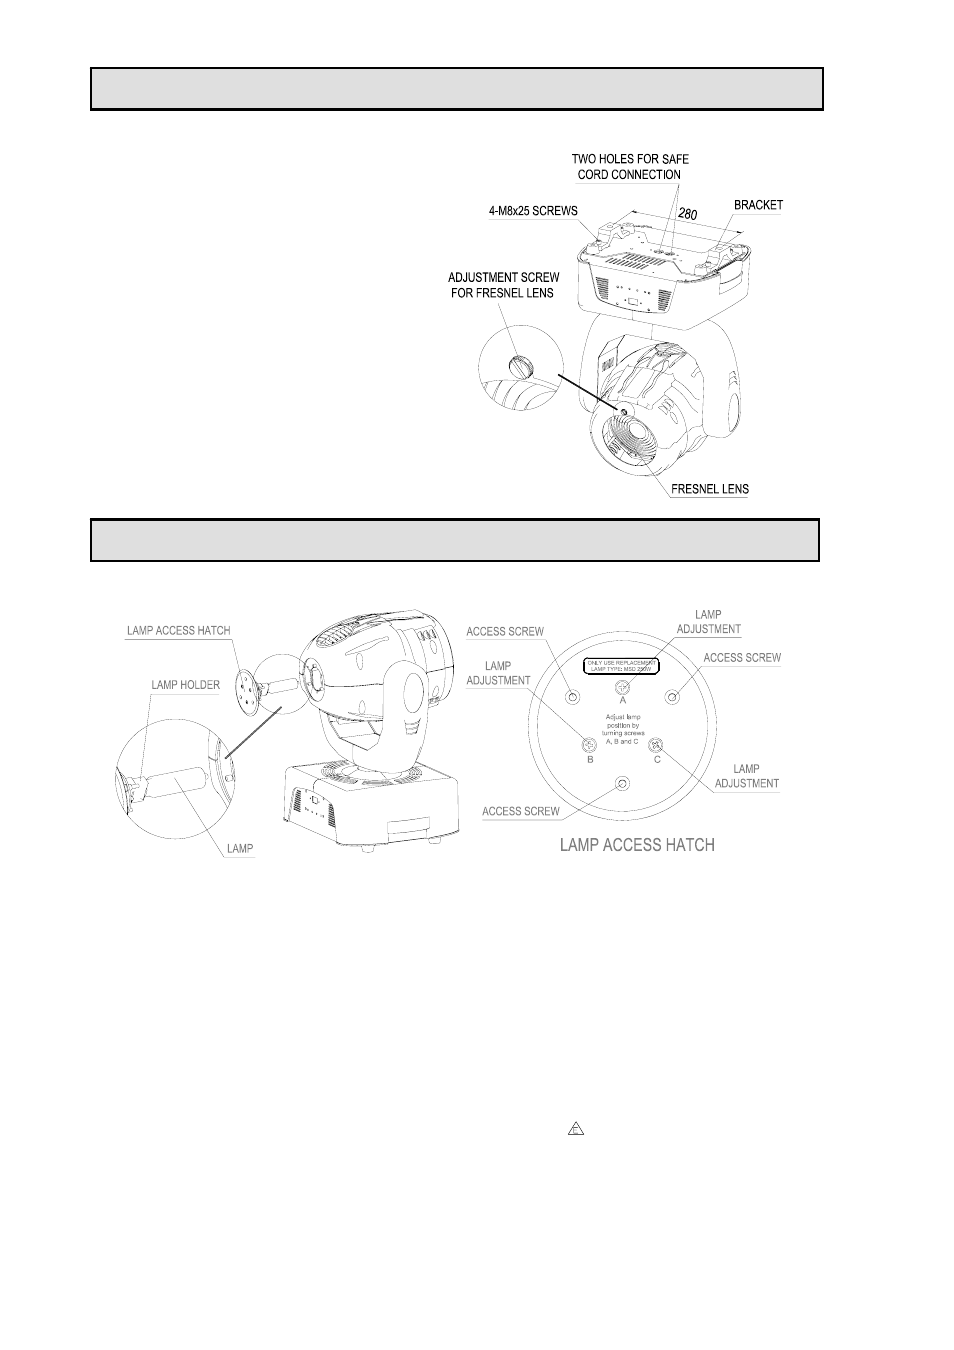
INSTALLING THE PROJECTOR
The projector should be mounted via its
bracket using 2 M12 bolts. The bracket itself
attaches to the underside of the projector
with 4 M8X25 bolts provided. Always ensure
that the projector is firmly anchored to avoid
vibration and slipping whilst functioning.
Always ensure that the structure to which
you are attaching the projector is secure and
is able to support a weight of 20.1Kg for each
PILOT WASH. For safety the projector
should have a secondary fixing with a safety
chain through the holes on the underside of
the unit. You can adjust the screw illustrated
to let the Fresenel lens in or out for
magnifying/lessening the images or
soft/focusing the beams.
Pilot Wash manual.doc
4/12
WARNING
: The projector should NEVER be
lifted or carried by the yoke.
Loosen the 3 access screws at the rear of the projector and pull the lamp access hatch straight out
from the real of the projector. (When changing a lamp, you must let the old lamp cool sufficiently.)
Insert an MSD 250W lamp in the lamp holder.
FITTING THE LAMP
Reinstall the lamp access hatch, then tighten the 3 access screws.
NOTE:
Close the access hatch carefully and re-tighten the 3 screws. To optimize light output it will be
necessary to adjust the lamp alignment to obtain an even distribution of light within the beam. The
three screws (marked A, B, and C) may be gently turned to center the lamp within the reflector. The
projector should be switched on with the shutter open and the beam focused to do this, it is also
advisable to allow the lamp 5 minutes to come up to full brightness before starting to align it. Note: the
three screws will only need a small adjustment to centre the lamp, do not try to unscrew them
completely. Read the rest of this manual and then come back to this section to align the lamp.
The MSD series are high pressure lamps with external igniters (
). Care should always be taken
when handling these lamps. Always read the manufacturers "Instructions for use" enclosed with the
lamp.