O.S. Engines FT-300 Gemini User Manual
Page 9
Installation procedure is as follows:
1) Ream the propeller centre hole to the size indicated in
the separate instructions sheet. Make sure that the
propeller is properly balanced.
2) Fit the propeller sleeve-nut and washer to propeller,
screw onto shaft and tighten firmly with 17 mm wrench
supplied.
If the Safety Propeller Lockout Assembly of your engine
is supplied with the Locknut Spacer, add the Spacer if
the dimension "T" indicates you should do so, in the
separate instructions sheet.
3) Finally, insert the Safety Propeller Locknut. Tighten
Locknut firmly (but not with excessive force) using
14 mm wrench.
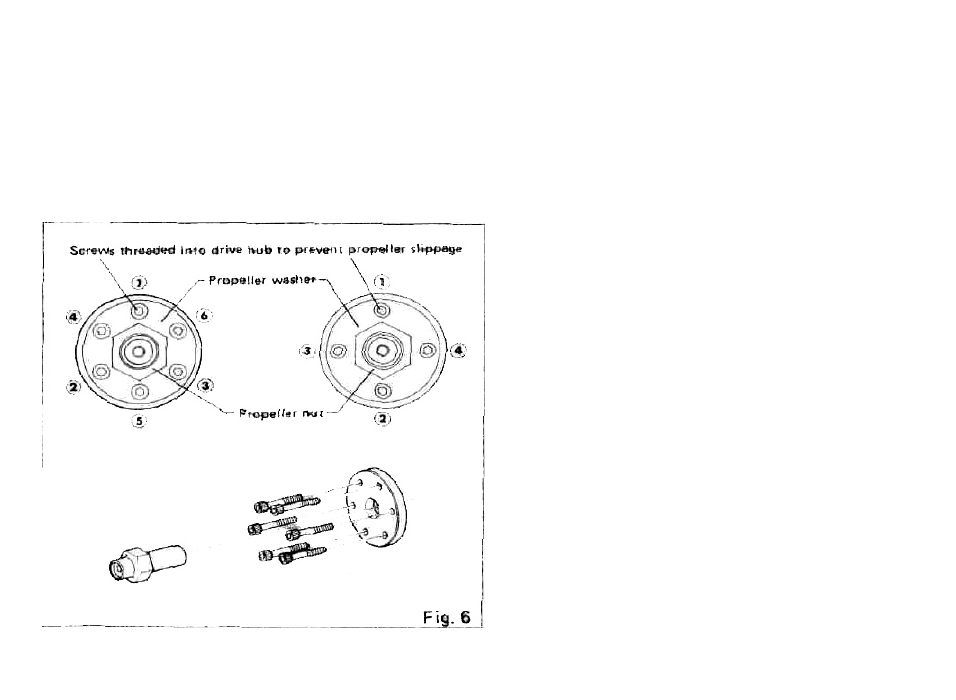
PROPELLER WASHER SET FOR SCALE MODEL
If you prefer to use the standard prop-nut and retaining
screws (see Fig. 6) to obtain more scale-like appearance
choose a propeller that has a boss at least as large as the
diameter of the drive hub so that it is not weakened when
drilied for the retaining screws. If the screws are not used,
the propeller may loosen (due to detonation when running
or preignition when starting) and, if the engine is running,
the propeller will fly off, complete with the retaining nut
and washer. This can be very dangerous.
Therefore, secure the prop nut and screws as follows:
1) Drill 3 mm diameter holes accurately through propeller
boss to exactly align with those in prop washer and drive
hub. Do not drill holes oversize.
2) Install prop, prop washer, screws and prop nut.
3) Tighten prop nut.
4) Tighten screws progressively and evenly in the order
shown in the sketch.
5) Repeat steps 3) and 4) above to make sure that the prop
is really secure.
-8-