MF Digital OptiEC Inkjet Manual User Manual
Page 11
OptiPrinter CD/DVD Inkjet Printer
ZZ 004 805 - 11 -
SECTION 6: INSERTING/CHANGING THE PRINT CARTRIDGES
1.
Press the Power Button to turn on the printer
2.
Before installing or changing a print cartridge, you MUST insert a CD into the OptiPrinter. Press
the CD Tray Button, place a CD onto the tray and press the CD Tray Button again. The tray will
slide back into the printer. The Print Cartridge Status Light will flash
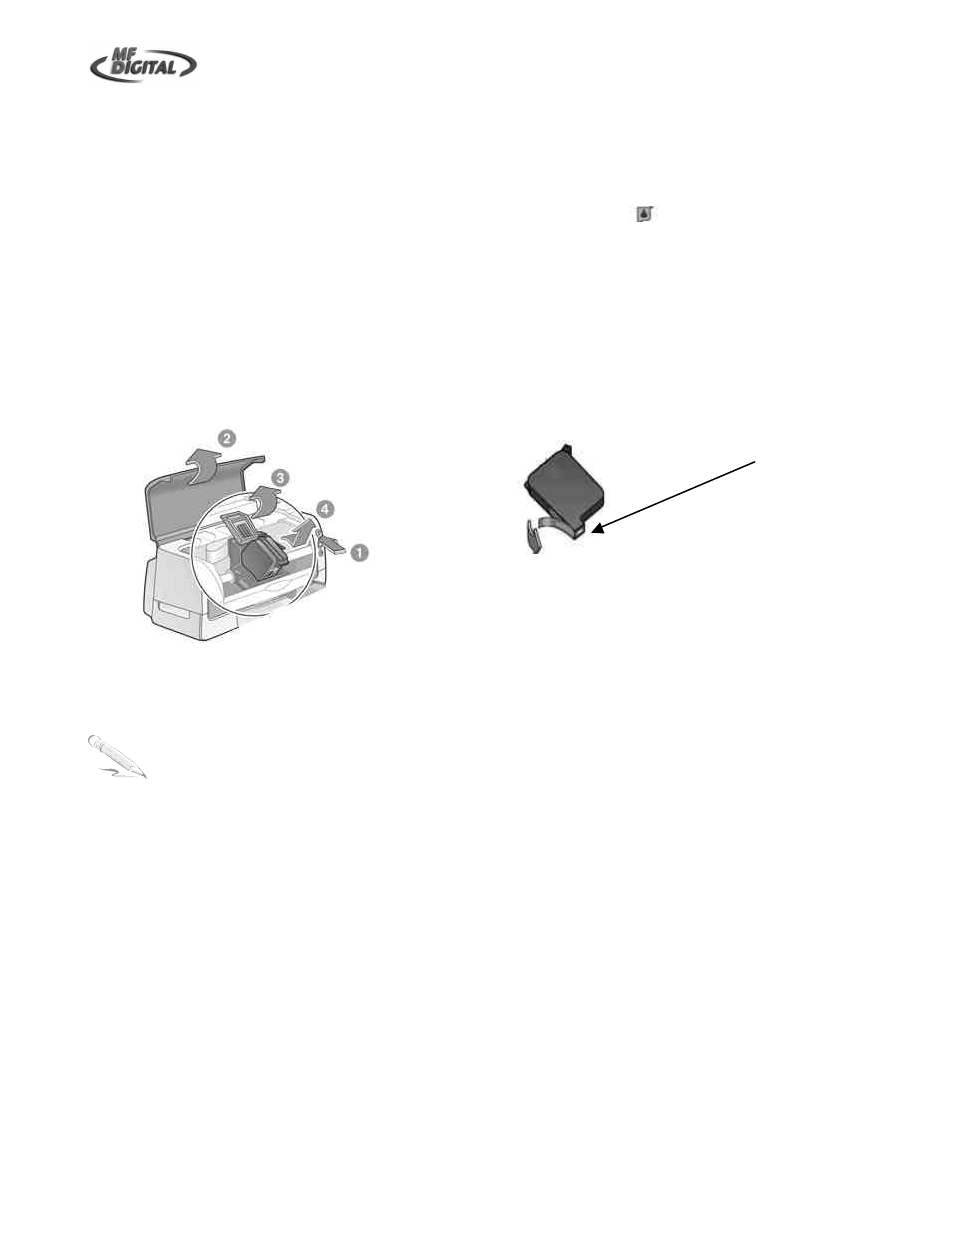
3.
Open the top cover
4.
The print cartridge cradle moves to the center of the printer (Fig. 3 on the next page)
5.
Raise the cradle latch
6.
Remove existing cartridge (if any) from the cradle
7.
Remove the plastic tape from the print cartridge (Fig. 4 on the next page)
8.
Hold the cartridge so that the copper strip is on the bottom and rear
9.
Push the cartridge firmly into the cradle (color on the left, black on the right)
10.
Secure the cradle latch, then, close the top cover.
SECTION 7: INSTALLING THE PRINTER SOFTWARE
Note:
The screen images that follow are from Windows 2000. Windows XP screens appear slightly
different.
1.
Connect the OptiPrinter to your PC (see Section 3)
2.
Switch on your PC and the OptiPrinter. Your PC should automatically recognize that new
hardware has been added in the form of the OptiPrinter and the “Digital Signature Not Found ”
message box (see Fig. 5 on the next page) will appear. You will be asked if you wish to continue
installation, select Yes. In Windows XP, select Continue Anyway.
Fig. 4
Fig. 3
Remove plastic tape