Installation steps – K-Edge K13-220 User Manual
Page 2
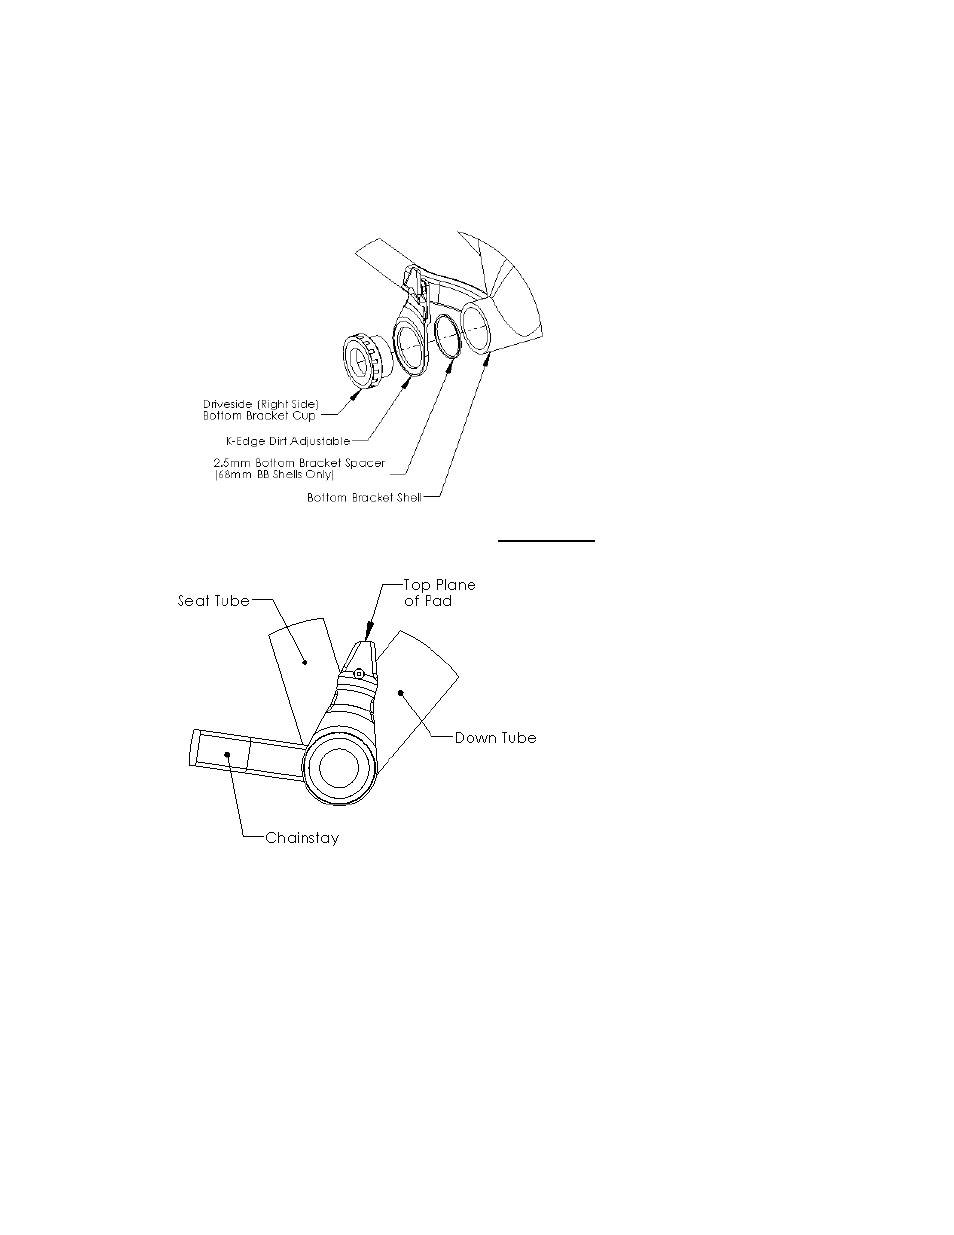
Installation Steps:
1.
Remove crankset per manufacturer's recommendations.
2.
Remove driveside (right side) bottom bracket cup.
3.
Replace 2.5mm spacer (normally reserved for an 'E-Type' front derailleur) with the Dirt Adjustable. Install
components in accordance to the image below:
4.
Reinstall driveside (right side) bottom bracket cup and hand-tighten only.
5.
Position Dirt Adjustable angle either halfway between down-tube and seat-tube of frame OR to where the top
plane of the pad is parallel to the ground when the bike is on its wheels.
6.
Check to ensure clearance between front derailleur cage and Dirt Adjustable pad and adjust accordingly.
7.
Torque the driveside (right side) bottom bracket cup per manufacturer's recommendations while maintaining
the angle of the Dirt Adjustable.
8.
Ensure proper pad is installed for your given setup.
9.
Adjust pad position as close as possible (without touching/rubbing) to the chain while on the smallest chainring
and largest cog, the default position for the Dirt Adjustable is with 2x 0.5mm Nylon Spacers. Max torque on pad
bolt is 2N-m.
10. Check that all components are secure and ride.