Casio 3206 User Manual
Page 11
Operation Guide 3135 3206
11
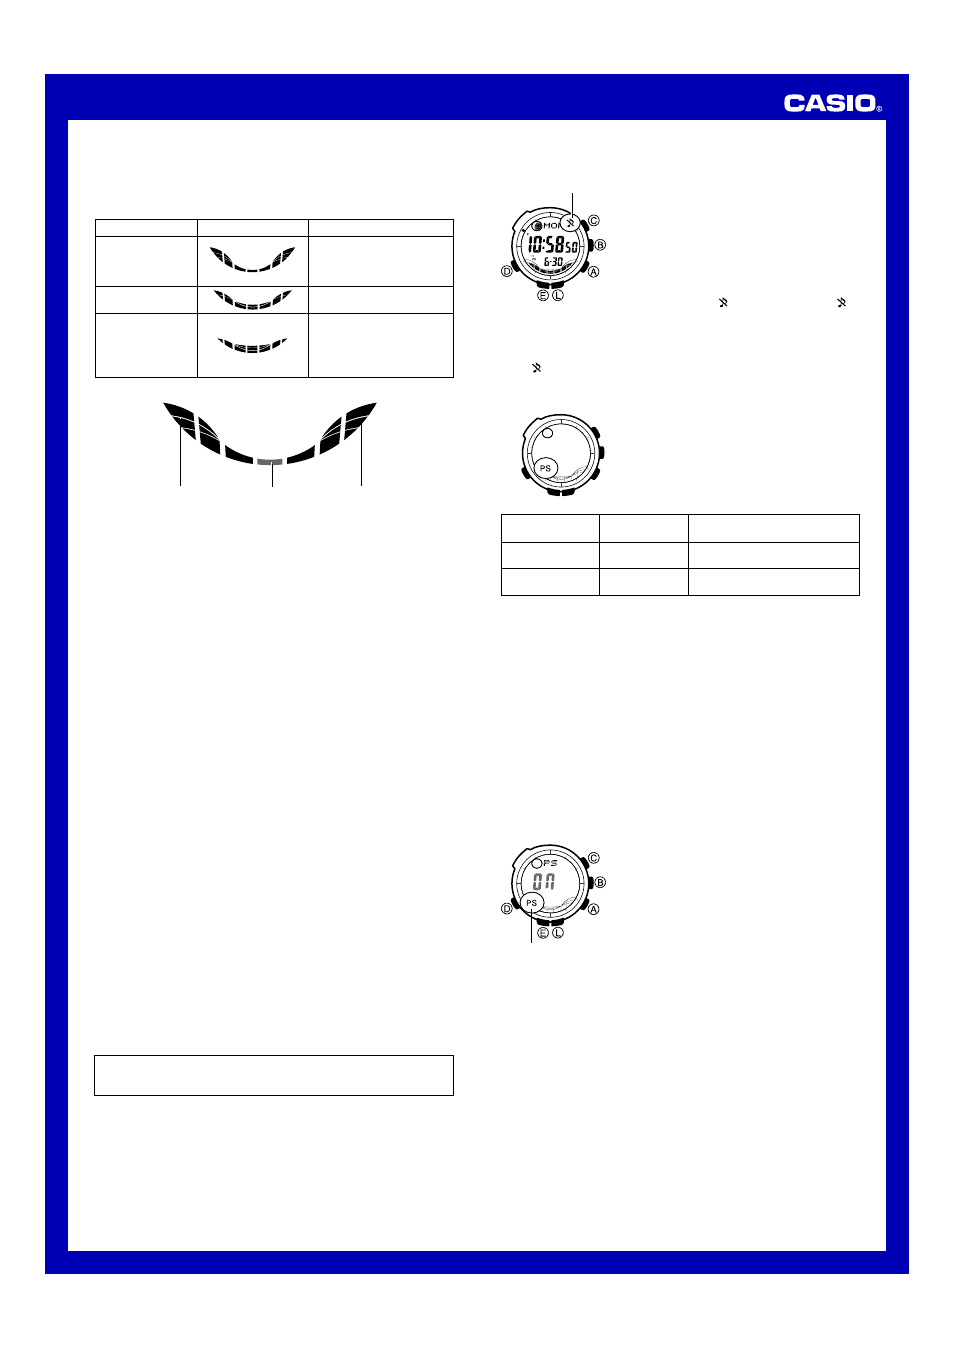
Tide Graph
The Tide Graph graphically represents the current tide condition using one of
three patterns that represent spring tide, intermediate tide, and neap tide, as
shown below.
Large difference between
high tide and low tide. Occurs
a few days before and after a
New Moon and Full Moon.
Medium difference between
high tide and low tide.
Small difference between
high tide and low tide. Occurs
a few days before and after
the first quarter and last
quarter of a half moon.
Tide Name
Graph
Description
Spring Tide
Intermediate Tide
Neap Tide
• The Tide Graph flashes as shown below to indicate the tide range.
• The segments on either end of the Tide Graph flash during high tide.
Lunitidal Interval
Theoretically, high tide is at the Moon’s transit over the meridian and low tide
is about six hours later. Actual high tide occurs somewhat later, due to factors
such as viscosity, friction, and underwater topography. Both the time
differential between the Moon’s transit over the meridian until high tide and
the time differential between the Moon’s transit over the meridian until low tide
are known as the “lunitidal interval”.
llll
lll
lll
ll
lll
High tide
High tide
Low tide
Auto Return Features
• The watch returns to the Timekeeping Mode automatically if you do not
perform any button operation for two or three minutes in the Tide/Moon
Data, Alarm, Data Recall, Digital Compass, or Barometer/Thermometer
Mode.
• If you do not perform any button operation while in the Altimeter Mode, the
watch returns to the Timekeeping Mode automatically after nine or 10
hours.
• If you leave a screen with flashing digits on the display for two or three
minutes without performing any operation, the watch exits the setting
screen automatically.
Initial Screens
When you enter the World Time or Alarm Mode, the data you were viewing
when you last exited the mode appears first.
Scrolling
The A and C buttons are used on the setting screen to scroll through data
on the display. In most cases, holding down these buttons during a scroll
operation scrolls through the data at high speed.
Sensor Malfunction Indicator
Subjecting the watch to strong impact can cause sensor malfunction or
improper contact of internal circuitry. When this happens,
ERR
(error) will
appear on the display and sensor operations will be disabled.
• If
ERR
appears while a measurement operation is being performed in a
sensor mode, restart the measurement. If
ERR
appears on the display
again, it can mean there is something wrong with the sensor.
• Even if battery power is at Level 1 or Level 2, the Digital Compass Mode,
Barometer/Thermometer Mode, or Altimeter Mode sensor may be disabled
if there is not enough voltage available to power it sufficiently. In this case,
ERR
will appear on the display. This does not indicate malfunction, and
sensor operation should resume once battery voltage returns to its normal
level.
• If
ERR
keeps appearing during measurement, it could mean there is a
problem with the applicable sensor.
Whenever you have a sensor malfunction, be sure to take the watch to
your original dealer or nearest authorized CASIO distributor as soon as
possible.
Mute indicator
Button Operation Tone
The button operation tone sounds any time you
press one of the watch’s buttons. You can turn the
button operation tone on or off as desired.
• Even if you turn off the button operation tone,
the alarm, Hourly Time Signal, and Countdown
Timer Mode alarm all operate normally.
To turn the button operation tone on and off
In any mode (except when a setting screen is on
the display), hold down D to toggle the button
operation tone on ( not displayed) and off (
displayed).
• Since the D button also is the mode change button, holding it down to turn
the button operation on or off also causes the watch’s current mode to
change.
• The indicator is displayed in all modes when the button operation tone is
turned off.
Power Saving
When turned on, Power Saving enters a sleep
state automatically whenever the watch is left for
a certain period in an area where it is dark. The
table below shows how watch functions are
affected by Power Saving.
• There actually are two sleep state levels:
“display sleep” and “function sleep”.
Elapsed Time in
Dark
60 to 70 minutes
(Display Sleep)
6 or 7 days
(Function Sleep)
Display
Blank, with
PS flashing
Blank, with
PS not flashing
Operation
Display is off, but all functions are
enabled.
All functions are disabled, but
timekeeping is maintained.
• Wearing the watch inside the sleeve of clothing can cause it to enter the
sleep state.
• The watch will not enter the sleep state while the digital time is between
6:00 AM and 9:59 PM. If the watch is already in the sleep state when the
digital time reaches 6:00 AM, however, it will remain in the sleep state.
• The watch will not enter the sleep state while it is in the Digital Compass,
Barometer/Thermometer, Altimeter, Countdown Timer, or Stopwatch Mode.
When the watch is left in any mode besides the Countdown Timer and
Stopwatch Mode, it will return to the Timekeeping Mode automatically after
a specific amount of time. Then if left in the dark for the elapsed time
indicated in the table above, the watch will enter the sleep state.
To recover from the sleep state
Perform any one of the following operations.
• Move the watch to a well-lit area. It can take up to two seconds for the
display to turn on.
• Press any button.
• Angle the watch towards your face for reading.
To turn Power Saving on and off
1. In the Timekeeping Mode, hold down E until
the city code starts to flash, which indicates
the setting screen.
2. Press D nine times until the Power Saving
on/off screen appears.
3. Press A to toggle Power Saving on (
ON
) and
off (
OFF
).
4. Press E to exit the setting screen.
• The Power Saving on indicator (PS) is on the
display in all modes while Power Saving is
turned on.
l l l lll
l
l
ll
lll
ll
ll
l
l
ll
l
Power Saving on
indicator
Timekeeping
• Resetting the seconds to
00
while the current count is in the range of 30 to
59 causes the minutes to be increased by 1. In the range of 00 to 29, the
seconds are reset to
00
without changing the minutes.
• With the 12-hour format, the P (PM) indicator appears on the display for
times in the range of noon to 11:59 p.m. and no indicator appears for times
in the range of midnight to 11:59 a.m.
• With the 24-hour format, times are displayed in the range of 0:00 to 23:59,
without any indicator.
• The 12-hour/24-hour timekeeping format you select in the Timekeeping
Mode is applied in all modes.
• The watch’s built-in full automatic calendar makes allowances for different
month lengths and leap years. Once you set the date, there should be no
reason to change it except when battery power drops to Level 5.
• The times for the Timekeeping Mode and all the city codes of the World
Time Mode are calculated in accordance with each city’s UTC offset.
• The UTC offset is a value that indicates the time difference between a
reference point in Greenwich, England and the time zone where a city is
located.