Haltech HT055045 User Manual
Page 9
ECU Manager Software
ECU Manager software is used for setup, calibration and diagnostics and can
be found on the CD supplied with this unit or downloaded from the Haltech website
www.haltech.com
Minimum System Requirements
Operating System:
Windows 2000 SP4 / XP / Vista / Windows 7
Processor Speed:
1GHz
RAM:
256 MB
Video Card:
128MB graphics card with 3D acceleration
USB:
1.1
Hard Drive Space:
250Mb
Minimum Screen Resolution:
1024 x 768 pixels
Installing ECU Manager
Installing ECU Manager onto your PC is performed similar to any other Windows
software package. Installation is outlined below to ensure correct installation:
1.Insert the CD-ROM into your PC’s CD-ROM drive. The CD should automatically
launch into the Haltech Browser. If the CD does not run automatically double
click on the “My Computer” icon on the desktop, double click on the Haltech icon
(CD- ROM drive) to start the browser software.
2.The Browser will display the disclaimer and you will need to agree to the
terms stated before allowing to progress. Read the Disclaimer and click on
AGREE if you agree.
3.Now you will be able to access all the information contained on the CD
4.To download the Platinum Software, click on the Platinum Series ECU Manager
Link. You will be prompted to install the software. Click “Install” to install
ECU Manager and the Data Log viewer.
5. Follow the software prompts and install the software.
With your programming cable (USB) attached to your ECU and the other end
connected to your laptop, power up the ECU by turning your key to IGN. Start the
programming software on your PC and go online with the ECU.
Calibration Steps
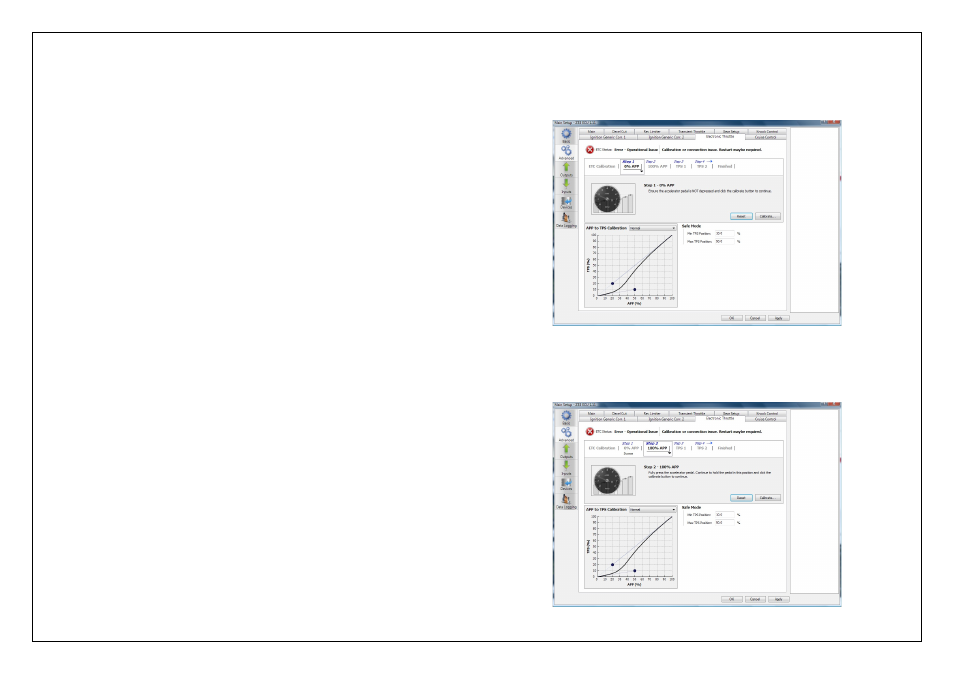
Step 1: 0% Accelerator Pedal Position ( APP )
Ensure that the accelerator pedal is NOT depressed and click
the calibrate button
Figure 10 – 0% APP Successful calibration display
Step 2: 100% Accelerator Pedal Position ( APP )
Fully press the accelerator pedal. Continue to hold the pedal in this position
and click the calibrate button
Figure 11 – 100% APP Successful Calibration display