Cleaning & replacing filter, Exhaust filter cleaning & replacement, Cleaning dirt cup – Guardian Technologies GGU350 User Manual
Page 6
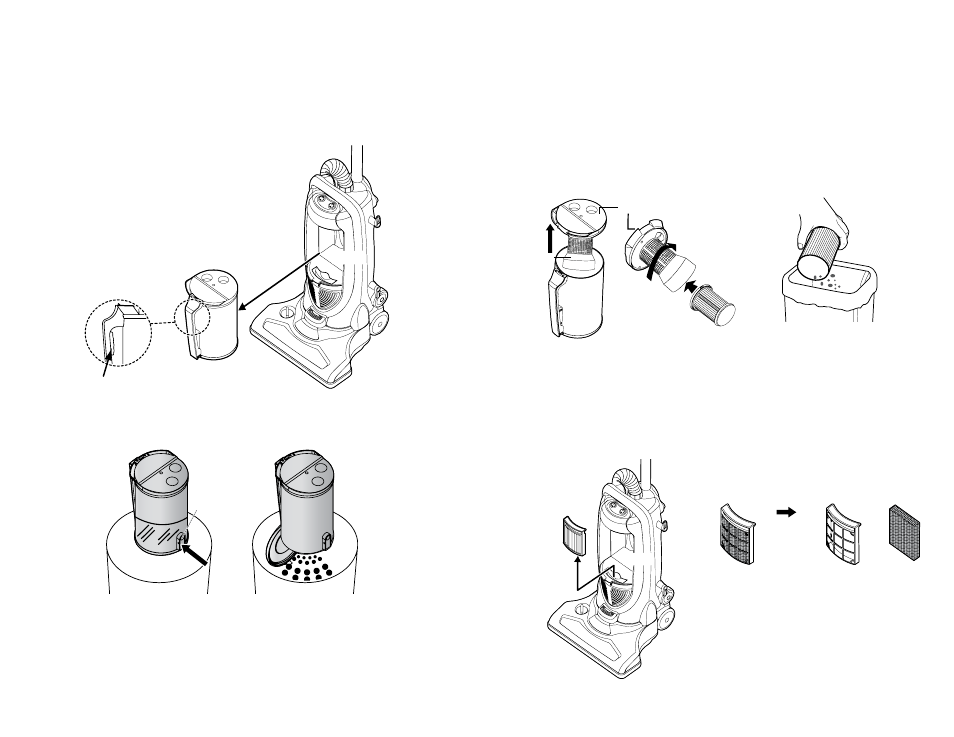
CLEANING & REPLACING FILTER
To oPTIMIzE THE VACUUM PERFoRMANCE yoU SHoULD CLEAN THE
FILTER EACH TIME yoU EMPTy THE DIRT CUP.
1. lift up the dirt cup cover, rotate and remove the filter protector.
2. rotate and remove the inner filter. (Fig. 21)
Tap the inner filter on a trash bin to remove the dust from the pleats. (Fig. 22)
NoTE: This inner filter is washable and can be rinsed if you notice a reduction in
vacuum performance (suction). To wash, first tap filter to remove excess dirt and
dust from pleats. rinse filter clean with warm water then allow to completely dry
(a minimum of 24 hours) before returning to dirt cup. use filter: FLTB for inner dirt cup.
r
Tap Gently
Fig. 21
Fig. 22
ExHAUST FILTER CLEANING & REPLACEMENT
•
pull out the exhaust filter. (Fig. 23)
•
replace the exhaust filter when it becomes dirty. (Fig. 24)
use filter: FLTA for exhaust filter.
CAUTIoN: This filter is noT washable.
Filter
Filter Frame
Body
Exhaust
Filter
Fig. 23
Fig. 24
NoTE: Replacement parts can be purchased by calling
1.866.603.5900 or by visiting www.guardiantechnologies.com.
Dirt Cup Cover
HEPA
Inner Filter
(Located inside
Filter Protector)
Filter Protector
*HEPA Filter is located
INSIDE the green filter
protector. Remove filter
protector to access
HEPA Filter.
*
E-10
E-11
-
Fig. 19
Dirt Cup
Release Button
Fig. 20
Dirt Cup
Release Button
Dirt Cup
Body
CLEANING DIRT CUP
•
you will need to empty dirt cup when dust reaches the Full line.
•
Turn oFF the vacuum and unplug from electrical outlet.
•
grasp the dirt cup handle and depress button, pull out the dirt cup from
the body. (Fig. 19)
•
To empty, remove the dirt cup and hold over trash bin. push the dirt release
button and dispose of the dirt. (Fig. 20)