Build the wing – Great Planes Tutor Park Flyer Kit- GPMA0002 User Manual
Page 8
the elevator joiner to match the leading edge of the
elevators.
❏
10. Use a #11 blade to cut the slot for the control horn,
then glue the control horn into position on the bottom of the
elevator.
Start by building the left wing panel first so your progress
matches the photos.
❏
1. Cover the left wing panel plan with Great Planes Plan
Protector.
❏ ❏
2. Match the 1/8" x 1/4" x 24" [3.2 x 6.4 x 610mm] balsa
main spars so any warps will counteract each other.
❏ ❏
3. Pin one of the main spars in position over the plan,
aligning one end of the main spar with the outside edge of
the root rib W-1.
❏ ❏
4. Pin one of the 1/32" x 3/4" x 24" [.8 x 19 x 610mm]
balsa trailing edge sheets in position over the plan,
aligning one end of the trailing edge sheet with the outside
edge of the root rib W-1.
❏ ❏
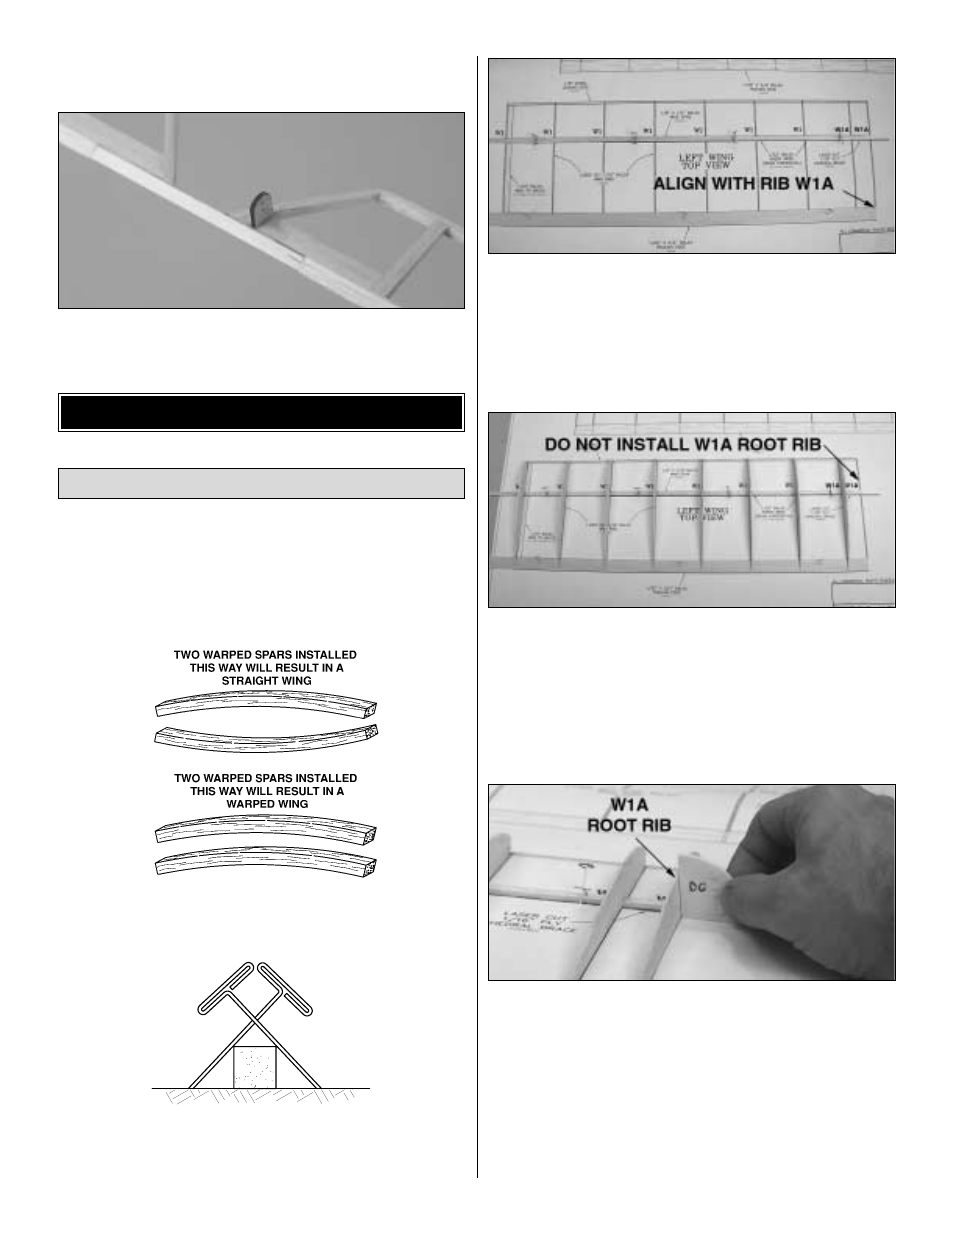
5. Starting at the wing tip, glue the seven laser-cut
1/16" [1.6mm] balsa W-1 and one W-1A ribs over the main
spar and trailing edge sheet, perpendicular to the building
board. IMPORTANT: Do not install the W-1A root rib until
the next step.
❏ ❏
6. Position the W-1A root rib in place over the main
spar. Use the laser-cut 1/8" [3.2mm] ply dihedral gauge to
set the rib at the proper angle before gluing it to the main
spar and the trailing edge sheet.
❏ ❏
7. Position the top 1/8" x 1/4" x 24" [3.2 x 6.4 x 610mm]
balsa main spar in the rib notches with one end flush with
the outside edge of the root rib and glue to all the ribs.
Build the Wing Panels
BUILD THE WING
8