Build the fuselage – Great Planes Tutor Park Flyer Kit- GPMA0002 User Manual
Page 12
❏
6. Cut the bottom sheeting for the aileron servo, so that
the servo can be mounted to the side of the center rib.
❏
7. Clean the aileron servo case with a tissue dampened
with alcohol or other suitable solvent. Mount the aileron
servo to the side of the center rib with double-sided foam
mounting tape (GPMQ4440, not included).
❏
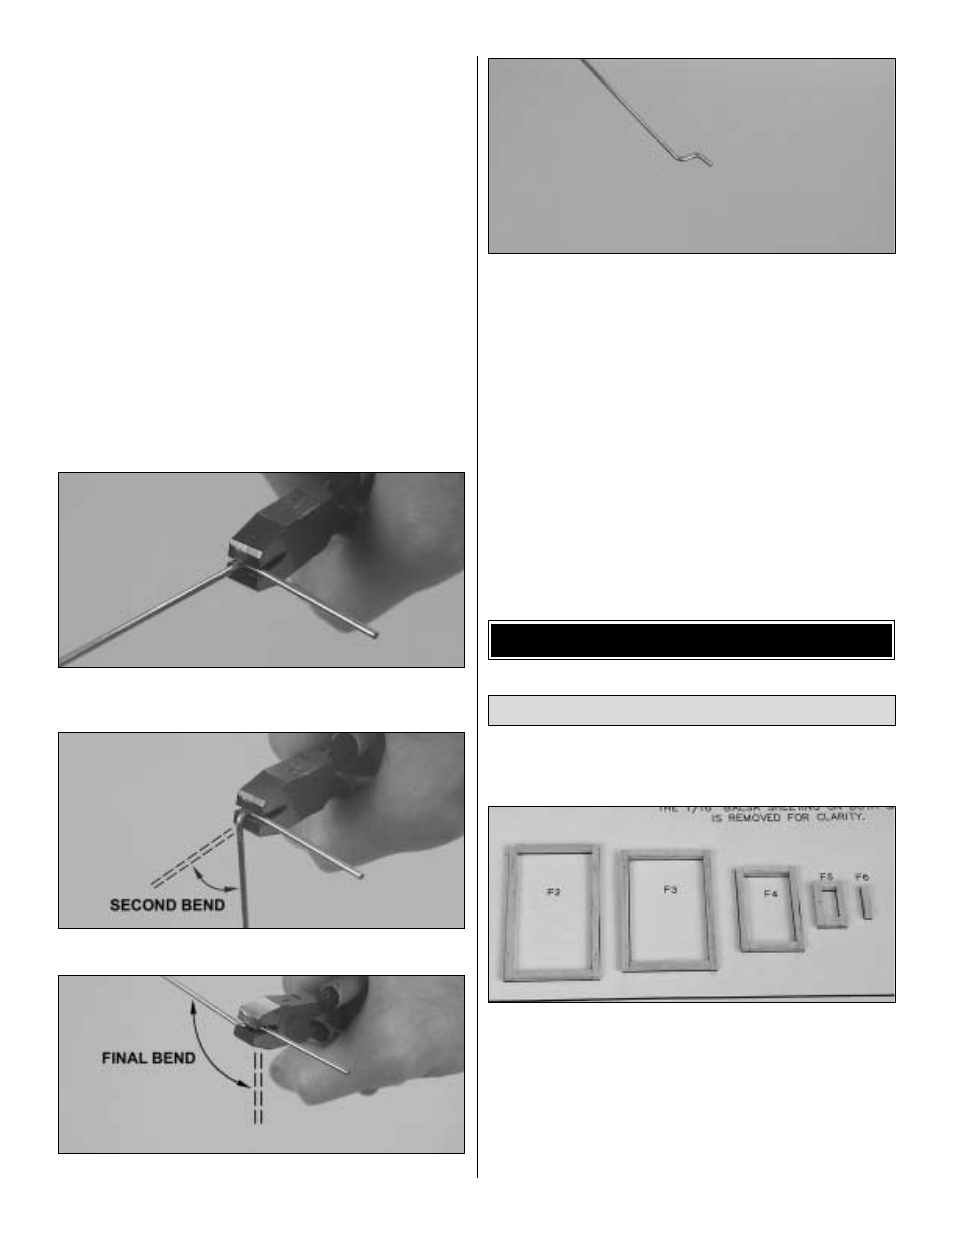
8. Use the remainder of the .030" [.76mm] wire you used
for the torque rods to make the aileron pushrods. Note that
the pushrods are connected to the torque rods with a “Z-bend”
on both ends. If you do not have Z-bend pliers, or do not
know how to make a Z-bend with regular pliers, follow the
procedure below. (For clarity, larger wire than is supplied
with this kit was used in the photos.)
❏
A. Make the first 90° bend near one end of the wire.
❏
B. Hold the wire in the pliers as shown.
❏
C. Make the second 90° bend downward.
❏
D. Make the final 90° bend upward to form the “Z.”
❏
E. Cut the excess wire near the end.
Note: This procedure does not work for all types of wire, but
will work on the thin music wire supplied with this kit.
❏
9. Connect the aileron servo to the aileron torque rods
with the pushrods you just made.
❏
1. Cover the fuselage former drawings on the plan with
Great Planes Plan Protector.
❏
2. Use the remaining 1/8" x 1/8" x 24" [3.2 x 3.2 x 610mm]
balsa sticks to build formers F2 through F6 over the plan.
Hint: First cut the vertical sticks a little long, then pin them to
the plan. Next, cut and glue the horizontal sticks into position.
Lastly, trim the ends of the vertical sticks even with the
horizontal sticks.
❏
3. Remove the formers from the plan and use a bar
sander with 150-grit sandpaper to sand them flat and even.
Build the Formers
BUILD THE FUSELAGE
12