Prepare the model for flying – Great Planes Tutor Park Flyer Kit- GPMA0002 User Manual
Page 19
❏
1. Use denatured alcohol or other solvent to clean the
motor shaft. Roughen the shaft with 320-grit sandpaper so
glue will adhere.
❏
2. Apply a small drop of medium CA to the hole in the
pinion gear, then press the gear onto the motor shaft using
the base of a large screwdriver or something similar. While
doing this, do not rest the base of the motor on your
workbench, but support the motor shaft with a piece of
hardwood. This way, the pressure applied to the gear will
not displace the armature in the motor.
❏
3. Press the motor by hand as far as it will go into the
gear drive unit.
❏
4. Connect the motor to the speed control. Guide the
speed control and wiring through the hole in F1, then mount
the motor to F1 with two #2 x 3/8" [13mm] screws.
❏
5. Follow the instructions that came with your speed
control to connect the servos and the receiver to the speed
control. Temporarily position the receiver inside the fuse and
lay the antenna along the outside of the fuse over the stab.
❏
6. Mount the propeller to the motor using the prop
adapter. If necessary, enlarge the spacer in the prop with a
3/16" drill bit or a hobby knife with a #11 blade.
Note: This section is VERY important and must NOT be
omitted! A model that is not properly balanced will be
unstable and possibly unflyable.
❏
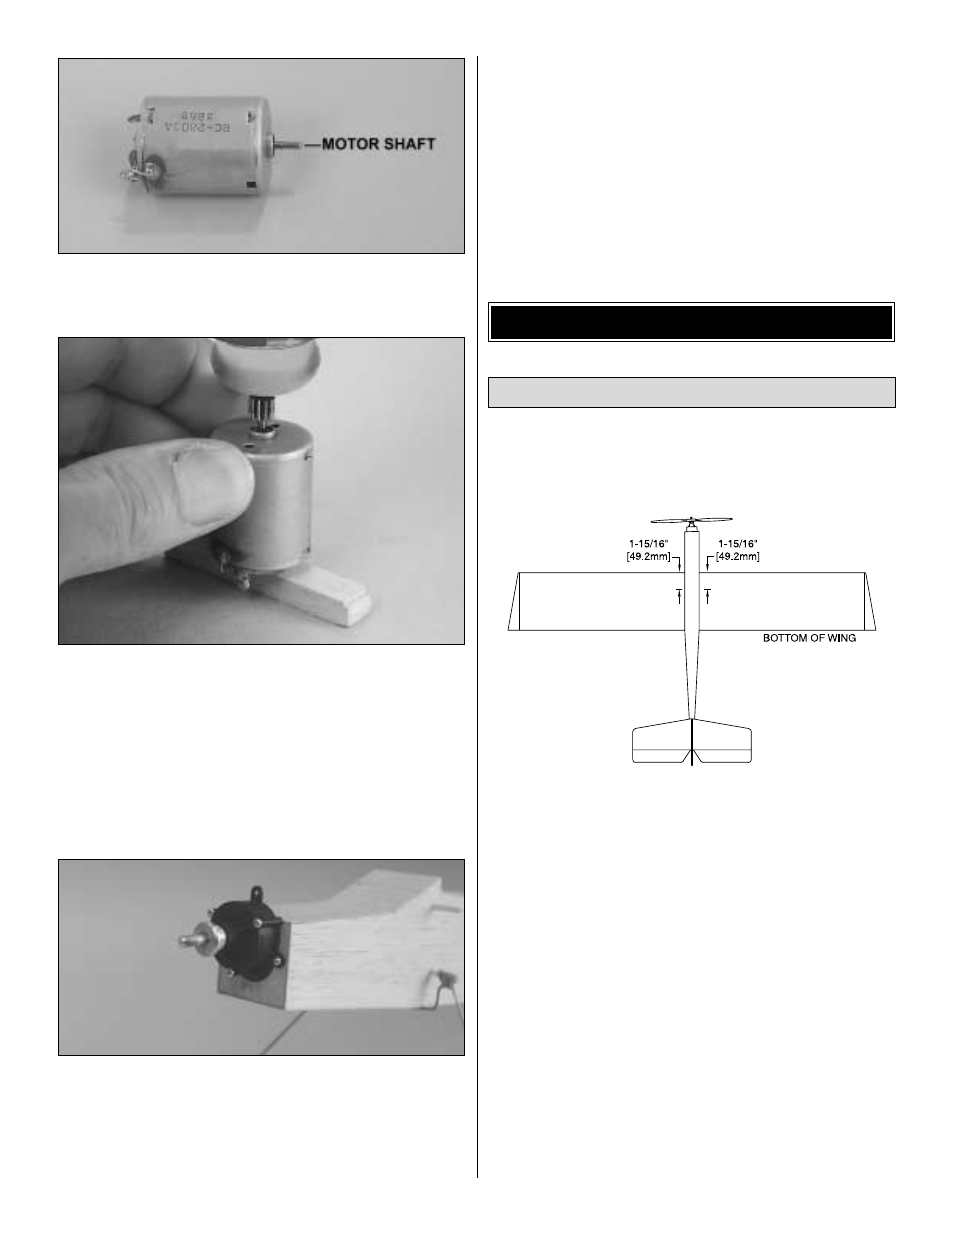
1. Use a fine-point felt-tip pen or 1/8" [3mm] wide striping
tape to accurately mark the balance point on the bottom of
the wing on both sides of the fuselage. The balance point
(C.G.) is shown on the fuse plan and is located 1-15/16"
[49.2mm] back from the leading edge of the wing. This is the
balance point at which your model should balance for your
first flights. After the initial trim flights and when you become
more acquainted with the Tutor, you may wish to experiment
by shifting the balance up to 1/4" [6mm] forward or
backward to change its flying characteristics. Moving the
balance point forward may improve the smoothness and
stability, but the model may then require more speed for
takeoff and may become more difficult to slow down for
landing. Moving the balance aft makes the model more agile
with a lighter “feel.” In any case, start at the location we
recommend. Do not at any time balance your model outside
the recommended range.
❏
2. Mount the wing to the fuse with two #32 rubber bands
(when it’s time to fly the Tutor, the wing will be mounted to the
fuse with four #32 rubber bands, cris-crossing the last two.
Balance the Model
PREPARE THE MODEL FOR FLYING
19