Great Planes Tutor Park Flyer Kit- GPMA0002 User Manual
Page 17
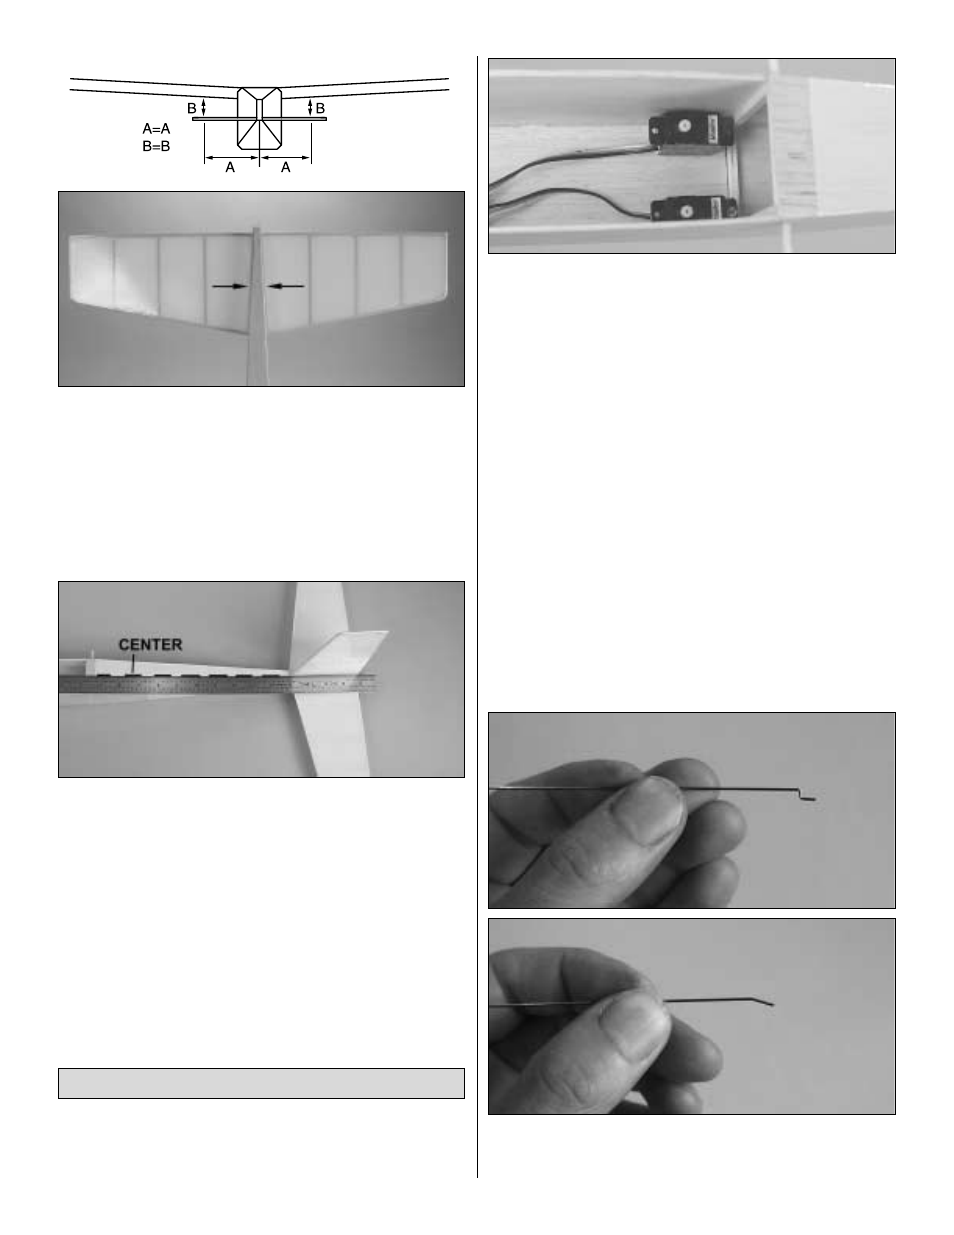
❏
4. Place the stab on the fuse, making sure it is centered
as shown in “A” = “A” in the sketch above. Hint: If the
covering on the stab is transparent, align the sticks on both
sides of the center stick with the fuse.
❏
5. View the model from the rear and see if the stab is
level with the wing as shown in “B” = “B”. If the stab is not
level with the wing, carefully sand the “high side” of the fuse
until you can get the stab to align.
❏
6. With the stab on the fuse, use a straightedge to align
the fin with the center of the top of the fuse. Glue the stab to
the fuse with thin CA.
❏
1. Before proceeding, charge the motor battery (and your
transmitter if needed). When it’s time to set up the radio, you
won’t have to stand by while the batteries are charging.
❏
2. Use a tissue dampened with denatured alcohol or
other suitable solvent to clean the servo cases so the
mounting tape will adhere. Use double-sided foam mounting
tape (GPMQ4440, not included) to mount the elevator and
rudder servos to the fuse sides where shown on the plan.
❏
3. Cut the covering from the elevator and rudder pushrod
exit slots near the aft end of the fuse.
❏
4. Thoroughly clean the remaining .030" x 20" [.76 x
508mm] wire with alcohol or similar solvent, then scuff it with
320-grit sandpaper so glue will adhere.
❏
5. Cut 3-1/2" [90mm] from the wire. Make a Z-bend on
one end and a slight bend on the other of the 3-1/2" [90mm]
piece. This is a pushrod end.
Hook Up the Controls
17