Great Planes Tutor Park Flyer Kit- GPMA0002 User Manual
Page 11
❏
7. Glue one wing tip to each end of the wing. Round the
corners slightly as shown on the plan.
If you plan to fly your Tutor with rudder only, proceed to
“Build the Fuselage.” If you plan to fly your Tutor with
ailerons, follow the proceeding instructions to build the
ailerons.
❏ ❏
1. Using the drawings on the wing plan, follow the
procedure below to make a left aileron torque rod from
one of the .030" x 20" [.76 x 508mm] wires.
❏ ❏
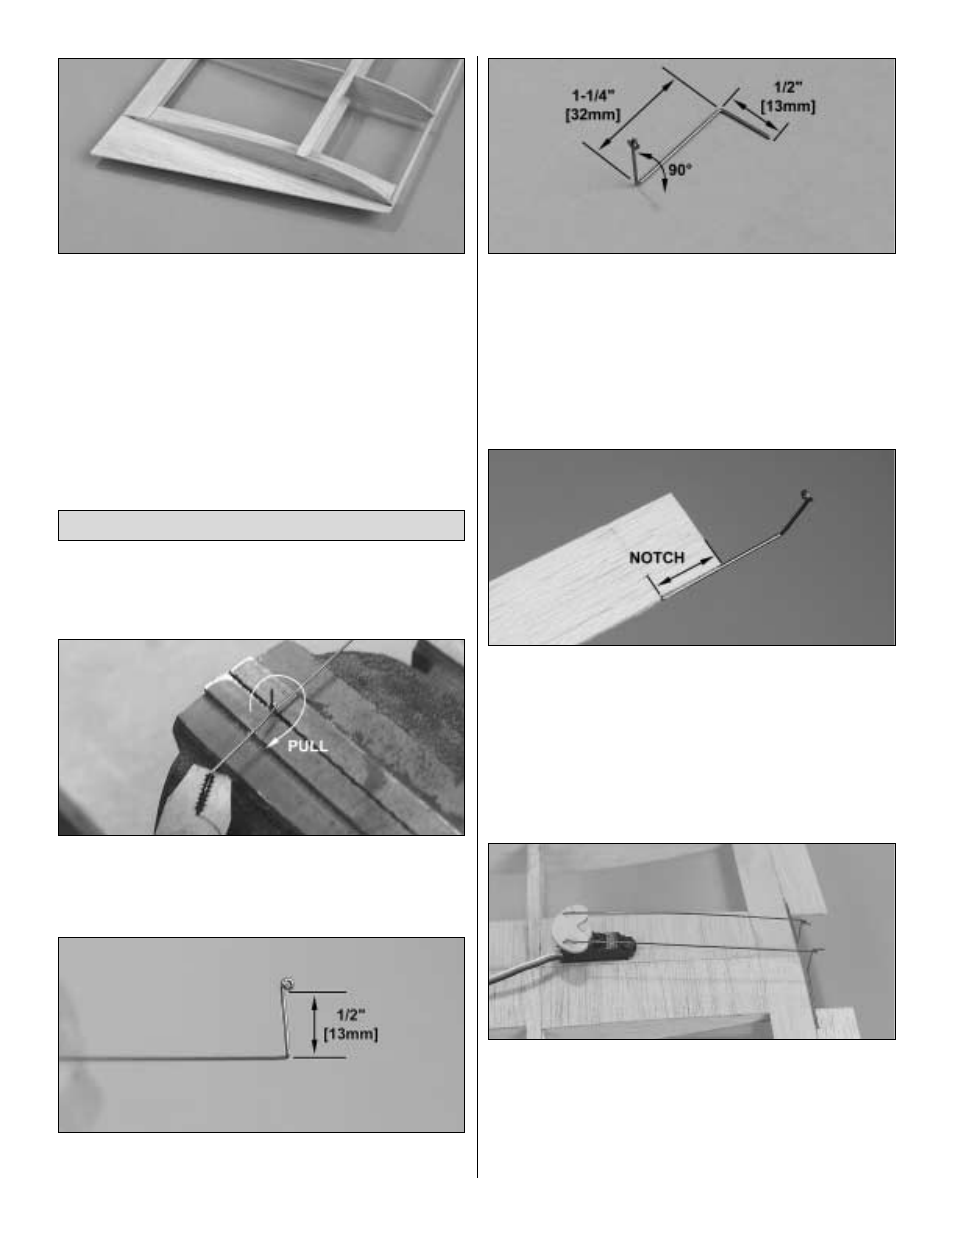
A. Cut 1" [25mm] from one end of the .030" x 20" [.76
x 508mm] wire and clamp it in a vice. Make a loop near one
end of the remaining wire by pulling it around the wire
clamped in the vice.
❏ ❏
B. Cut the excess wire from the loop, then use the drawing
on the plan to make the next bend as shown in the photo.
❏ ❏
C. Make the final bend, then cut the wire to the length
shown on the plan. Be certain the horizontal portion of the
torque rod is perpendicular to the vertical portion of the rod
that goes into the aileron.
❏ ❏
2. Cut one of the 1/16" x 3/4" x 24" [1.6 x 19 x 610mm]
balsa ailerons to the length shown on the wing plan. Drill a
#68 (or 1/32") [.8mm] hole into the leading edge of the
aileron where shown on the plan for the aileron torque rod.
❏ ❏
3. Cut a notch in the leading edge of the aileron
between the hole you drilled and the end to accommodate
the torque rod. Glue the torque rod to the aileron with
medium CA.
❏
4. Return to step 1 and make the right aileron torque rod
and aileron the same way.
Refer to this photo for the following four steps.
❏
5. Temporarily tape both ailerons to the wing. Glue the
laser cut ply servo horn to the plastic servo horn included
with your servo, then connect the pushrods as shown on the
plan. With this servo horn, the ailerons will travel up more
than down, reducing adverse yaw, which is the tendency for
the nose of the model to turn away from the direction of
banked turns.
Build the Ailerons
11