Great Planes Reactor Biplane .61 GP/EP ARF - GPMA1023 User Manual
Page 25
25
❏
7. Cut the covering from the bottom of the wing 1/16"
[1.6mm] inside the line you marked and 1/16" [1.6mm]
ahead of the wing trailing edge. Wipe away excess ink from
the lines you drew with a few of your paper towel squares
and denatured alcohol.
❏
8. Apply a thin coat of epoxy to the bottom of the wing
bolt plate and the bottom wing. Bolt the wing to the fuselage.
Wipe away excess epoxy and allow to harden.
❏
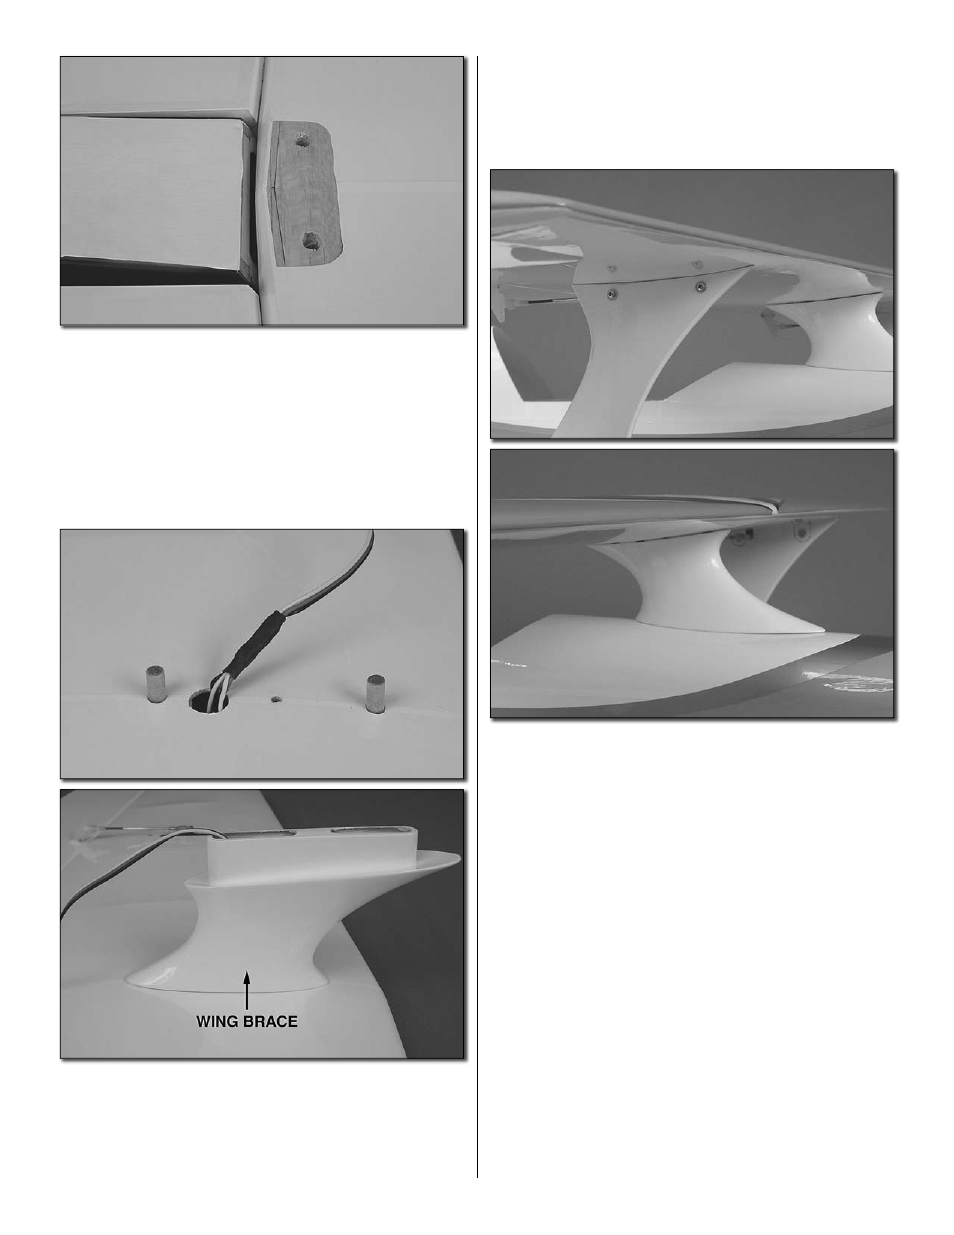
9. Test fi t both 6mm x 30mm hardwood top wing dowels
into the holes in the bottom of the top wing, then test fi t the
fi berglass wing brace to the wing over the dowels. Make any
adjustments necessary for a good fi t. Note: If you fi nd that
the dowels fi t too tightly into the brace, the holes in the brace
may be “cleaned out” with a 15/64" [6mm] drill.
❏
10. Use 30-minute epoxy to glue the top wing dowels into
the top wing. Wipe away any excess epoxy, then fi t the wing
brace over the dowels while the epoxy is hardening. Use
care not to inadvertently glue the wing brace to the dowels
or the wing.
❏
11. Temporarily fasten the remaining four wing strut tabs
to the top of both wing struts. Without using any glue, fi t the
wing brace into the fuselage, then key the top wing down
into the wing brace and the strut tabs. Make any adjustments
necessary for a good fi t.
❏
12. Once satisfi ed with the fi t, remove the top wing from
the assembly and take the strut tabs off the struts. Use coarse
sandpaper to thoroughly roughen the fi berglass wing brace
where it goes into the fuselage and use 30-minute epoxy to
glue it into position. Immediately proceed to the next step.
❏
13. Fit the wing strut tabs into the top wing with 30-minute
epoxy. Wipe off any excess epoxy that squeezes out, then
fi t the top wing to the wing brace and fasten the tops of the
wing struts to the strut tabs with four 4-40 x 3/8" [9.5mm]
screws. Bolt the top wing to the wing brace with a 6-32 x
1-1/2" [38mm] SHCS and a #6 lock washer and fl at washer.
Make sure all of the parts fi t together well and do not disturb
the model until the epoxy has hardened.