Great Planes Reactor Biplane .61 GP/EP ARF - GPMA1023 User Manual
Page 20
20
❏
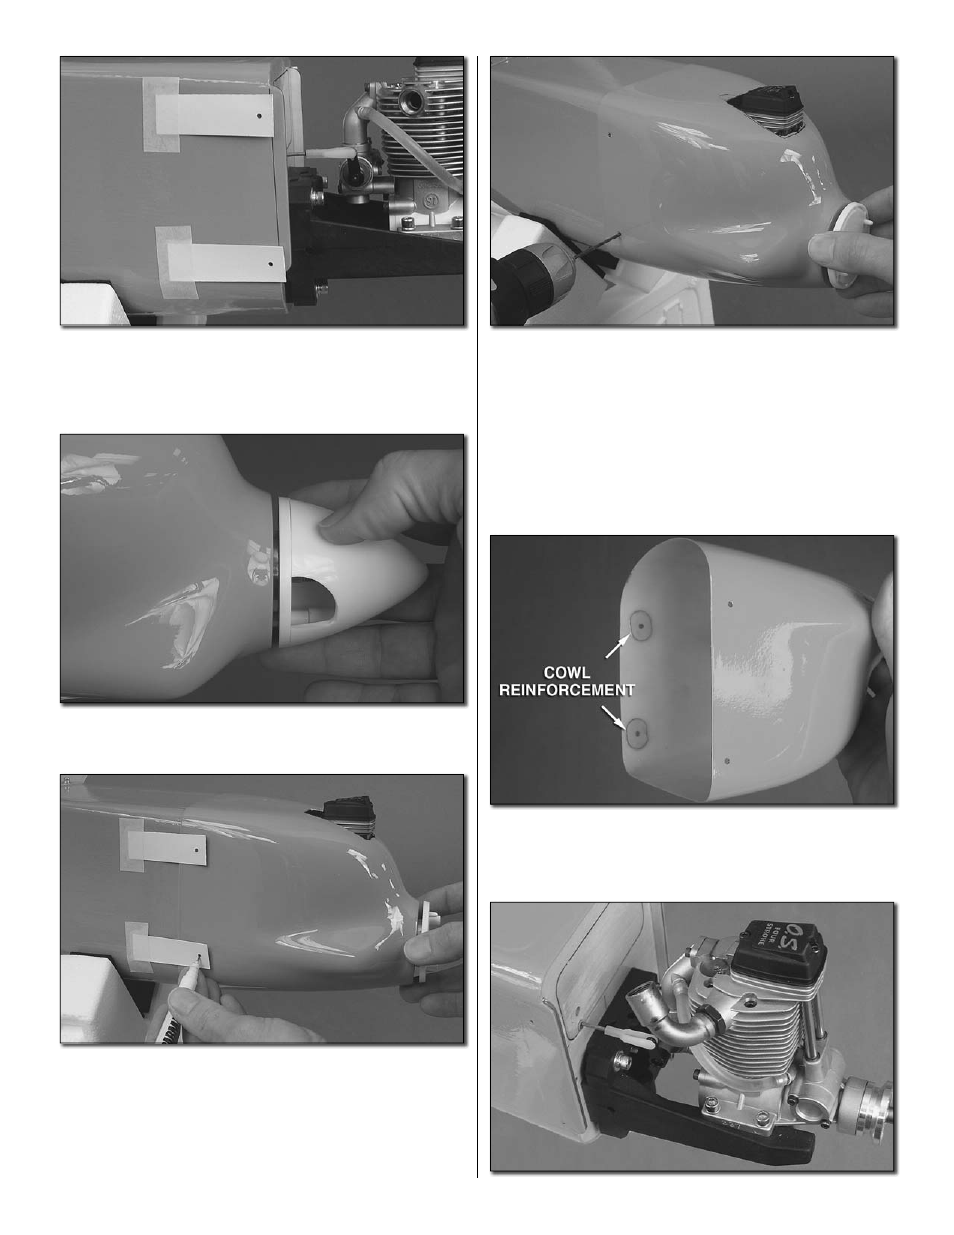
6. Make four templates with holes from thin cardstock to be
used for marking the screw holes once the cowl is in position.
Tape the templates to the fuselage with the holes in the
templates aligned over the marks made in the previous step.
❏
7. Fit the cowl into position. Temporarily fi t the spinner onto
the engine so the cowl can be accurately aligned with it.
❏
8. Centering the cowl on the spinner with a 1/8" [3.2mm]
space in between, use a fi ne point felt-tip pen to mark each
screw hole in the template onto the cowl.
❏
9. Remove the cowl. Drill 3/32" [2.4mm] holes through the
cowl at each mark.
❏
10. Remove the cardstock templates. Reposition the cowl
and spinner. Holding the cowl in position, use the holes in the
cowl as a guide for drilling four 3/32" [2.4mm] holes into the
fuselage for the mounting screws.
❏
11. Enlarge the holes in the cowl only with a 1/8" [3.2mm]
drill. Test mount the cowl with four #4 x 1/2" [12.7mm] screws
and #4 washers. Make any adjustments necessary for a
good fi t. If necessary, the holes may be slightly elongated or
enlarged to realign the cowl for perfecting the fi t.
❏
12. Once satisfi ed with the fi t of the cowl, glue the four
thin plywood cowl reinforcements to the inside of the cowl
centered over each hole. Don’t forget to harden the screw
holes in the fuselage with thin CA.