Great Planes Reactor Biplane .61 GP/EP ARF - GPMA1023 User Manual
Page 10
10
❏
5. Once the trailing edge is centered, stick pins into the
trailing edge tightly against both sides of the fuselage. This
will keep the trailing edge centered while centering the
leading edge in the next step.
❏
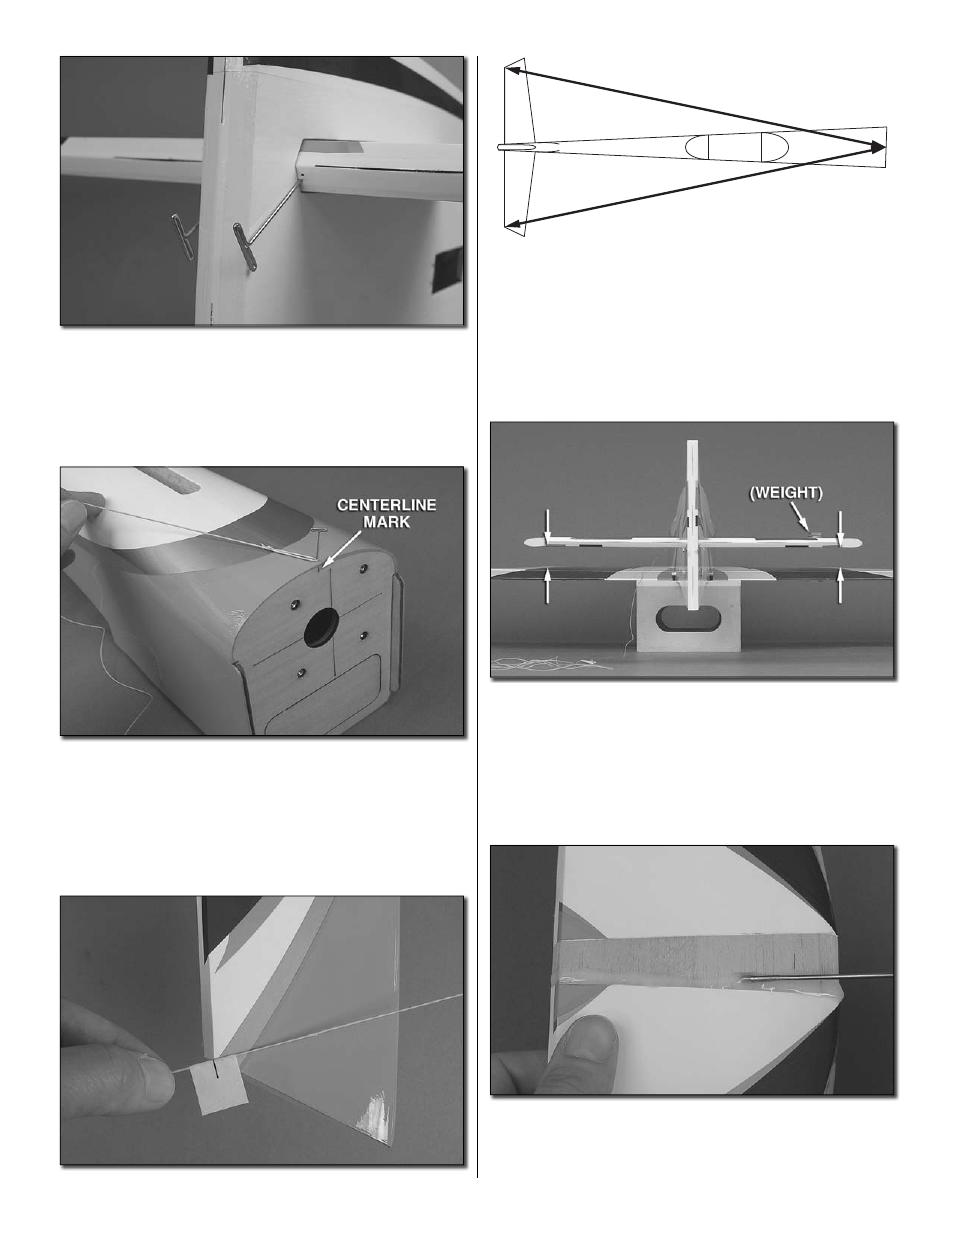
6. Push another pin through the top of the fuselage at the
small mark indicating centerline on the fi rewall. Tie a small
loop in one end of an approximately 50" [1.25m] piece of
non-elastic string such as K&S Kevlar line or Kevlar fi shing
line. Loop the string over the pin.
B
B'
B = B'
❏
7. Fold a piece of masking tape over the other end of the
string end and mark a line on it. Pull the string to the tip of
one side of the stab. Slide the tape along the string until the
line on the tape aligns with the tip. Swing the string over to
the same spot on the other side of the stab. If the mark on
the tape doesn’t align, rotate the stab and slide the tape until
both sides are the same and the stab is aligned.
One more alignment procedure to go before gluing…
❏
8. Standing about 6’ [2m] behind the model, view the
alignment of the stab and wing. If the stab is not parallel with
the wing, place incrementally increasing amounts of weight
on the stab until you can get it parallel with the wing.
The next few steps may get messy, so make sure you
have your denatured alcohol and plenty of paper towel
squares ready.
❏
9. Now that you’ve practiced the stab alignment procedure,
remove the stab from the fuselage. Liberally apply 30-minute
epoxy all the way around the exposed balsa on the right side
of the stab up to the covering.