Assemble the wings – Great Planes Fokker Dr-1 60 ARF - GPMA1380 User Manual
Page 8
❏
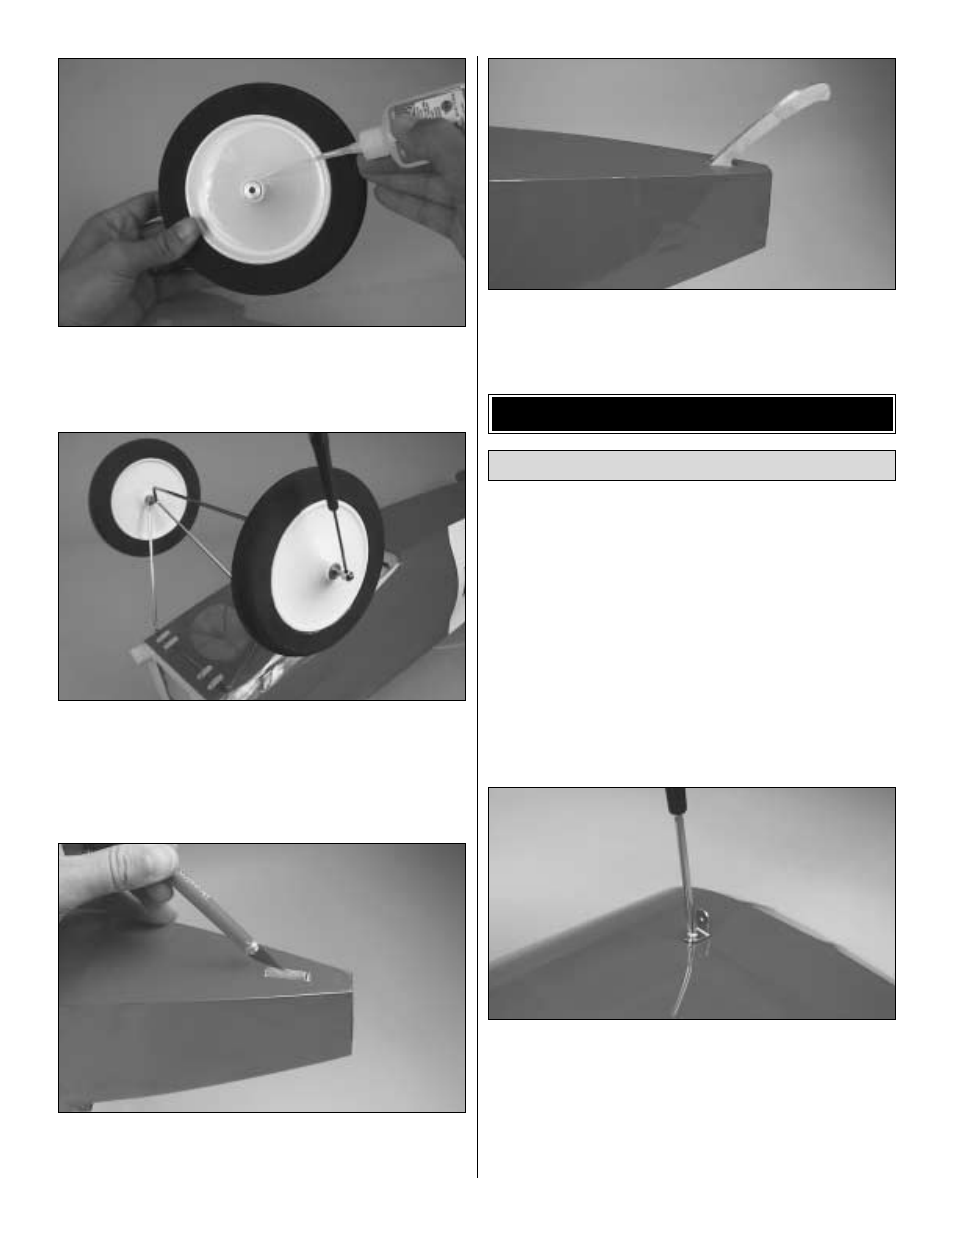
5. The scale wheels in this model have been updated and
preassembled, so it won't be necessary to glue the metal
hub to the wheel cover.
❏
6. Temporarily mount the main wheels on the landing
gear, using two 5/32" [4mm] wheel collars with 6-32 socket
head set screws (one wheel collar is used for each wheel).
File a flat spot for the wheel collar's set screws.
❏
7. Feel through the MonoKote to find the tailskid slot on
the aft part of the fuselage and cut it away. Use an iron to
seal the edges.
❏
8. Sand the base of the tailskid to fit the fuselage's
tailskid slot. Once you get a good fit, mix a small amount of
epoxy and glue the tailskid in place as shown above.
Note: During the assemby and installation of the wings on the
fuselage, we will be referring to 90 degree and 60 degree
metal brackets. These brackets are permanently attached to
the wings or fuselage with screws and temporarily attached
(when the airplane is ready to fly) to the wood struts and to the
metal cabanes with socket head cap screws. One of the pre-
drilled holes on each of the brackets has 4-40 threads. This
threaded hole is to be used for the socket head cap screws
that hold the wood struts and metal cabanes. The unthreaded
hole is to be used for the permanent sheet metal screws.
❏
1. Find the bottom wing (the one that has two Maltese
crosses on the bottom surface), two 90 degree brackets and
two #4 x 3/8" [9.5mm] screws.
❏
2. There is one 1/16" [1.6mm] hole drilled out on the top
surface of the bottom wing between the tip rib and the
second rib at each end. This is where the 90 degree bracket
is installed. Harden the hole with thin CA. Check the image
shown for bracket orientation. Leave the bracket slightly
loose, as it may need to be adjusted when the wing struts
are installed. You should install a bracket on the left side and
another one on the right side of the wing.
Assemble the Bottom Wing
ASSEMBLE THE WINGS
8